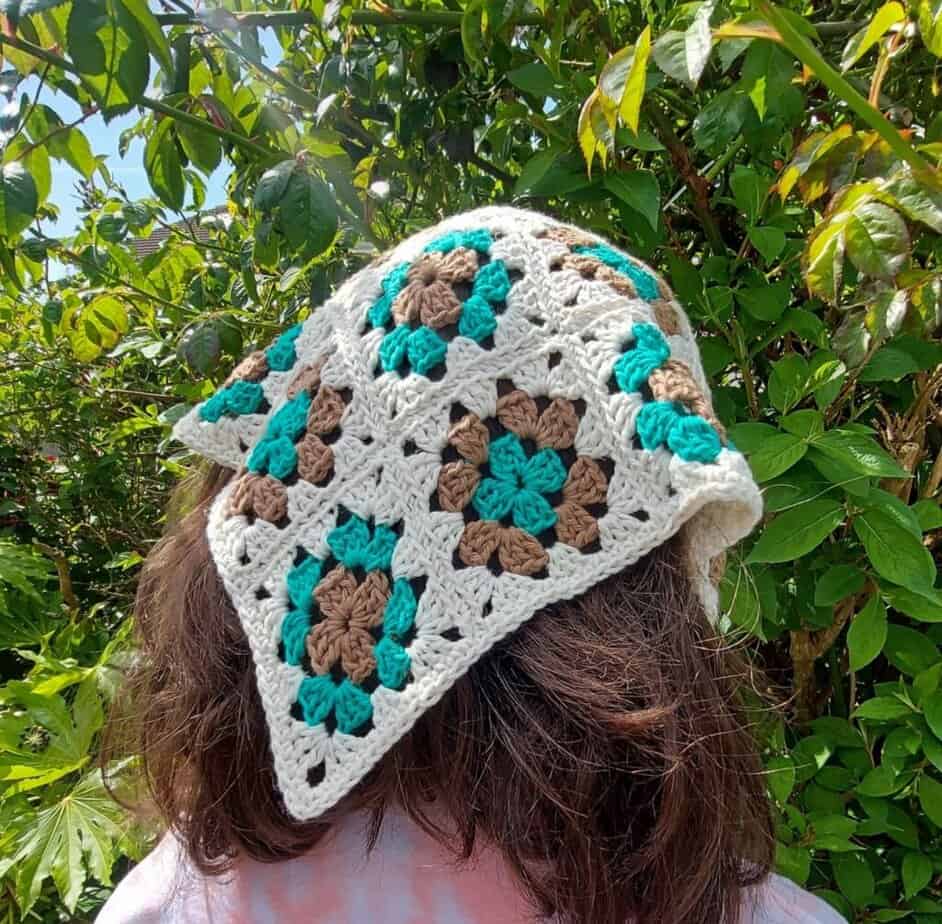
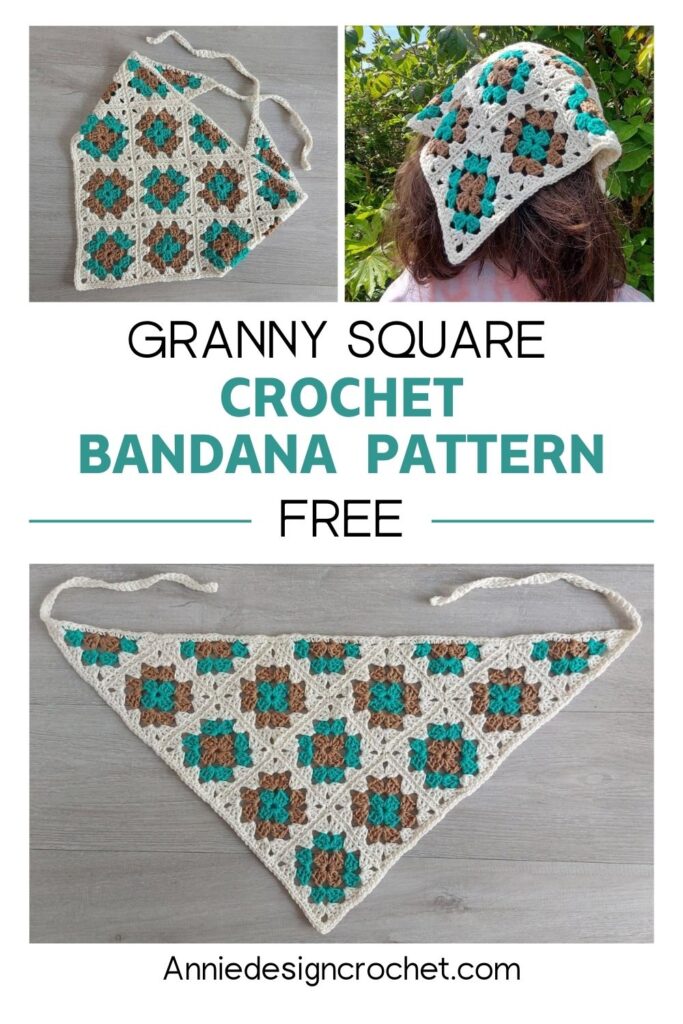
A fun triangle Granny Square Bandana makes the perfect accessory for that trendy Summer vibe! A pretty crochet bandana is the perfect way to keep your hair neat and tidy. It’s a great option for festivals, beach days, or sunny afternoons in the garden.
Enjoy the Free Pattern (with photo tutorial) for this easy-to-crochet bandana in the classic granny stitch. It’s a fun project, where you will learn how to crochet a bandana using granny squares. One size will fit nearly everyone!
This collection of 19 Crochet Bandana Free Patterns includes so many options for a beautiful head scarf. You will also love my Boho Tote bag for a Summer fun project too!
How to get the Pattern for the Crochet Granny Bandana
- Free Pattern: Scroll down this blog post for the written pattern Instructions for the crochet bandana
- Printable PDF: Adfree printable PDF pattern with 6 pages including all details. Thank you for your support! – Purchase on Ravelry and on Etsy
How many Granny Squares do you need for a Head Scarf
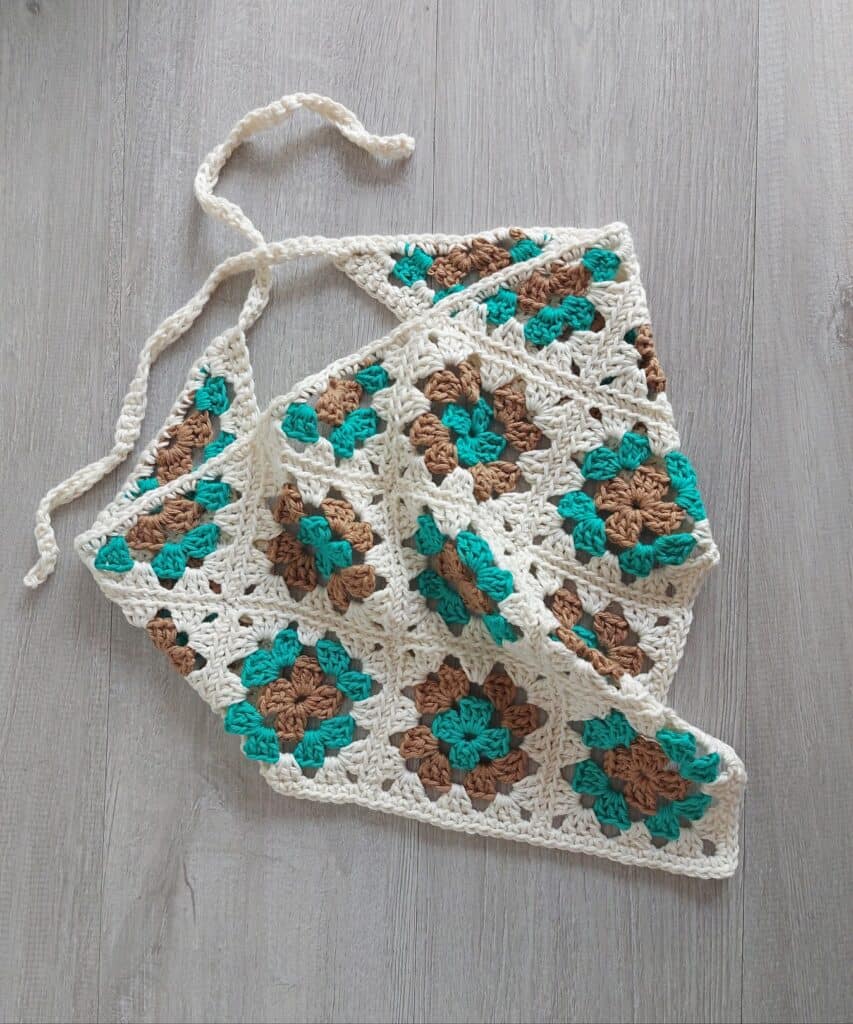
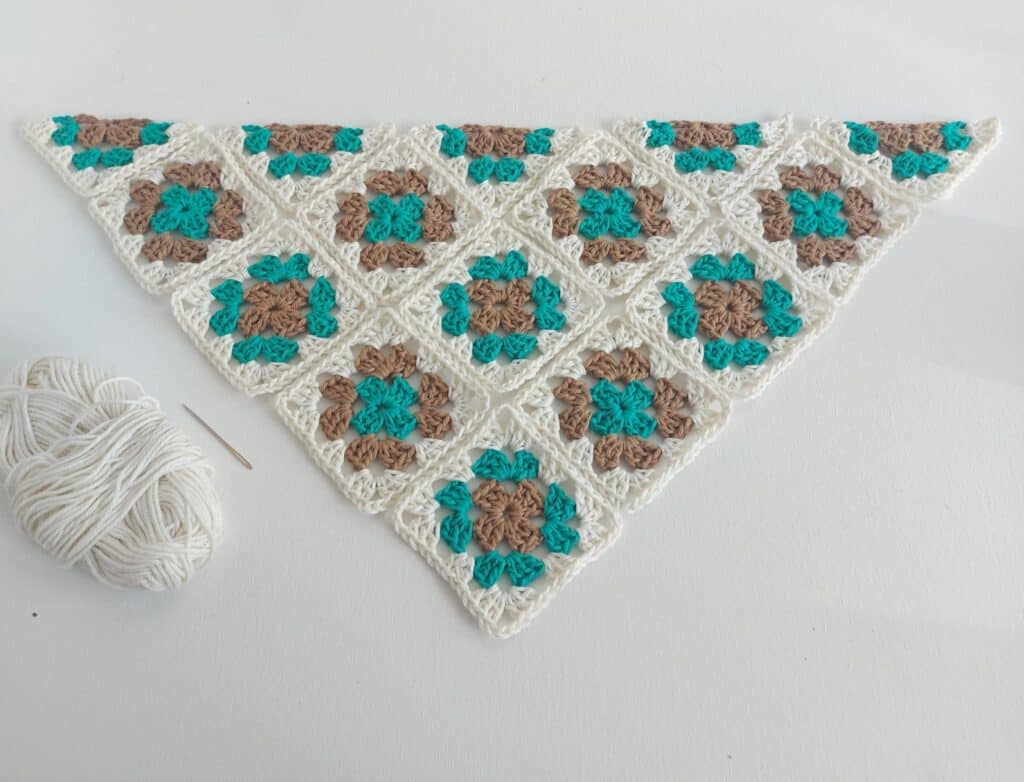
For a crochet head kerchief in this size, you will need 10 granny squares and 5 granny triangles (or half granny squares). I have provided a picture below showing the layout of the pieces.
This simple pattern also makes a great template for a more advanced crocheter to experiment with any number of crochet square designs. You can substitute any granny square, like my African Flower Granny square. Simply make a quick gauge swatch and adjust your hook size to make the squares 3.5 in [9 cm].
For a different granny motif shape, you may enjoy my easy granny hexagon pattern.
Best Yarn for Crochet Bandana Pattern
Any DK weight/light worsted weight yarn will work great for this pattern. Cotton yarn works best as it holds its shape well and is breathable and easy to wash.
A cotton/acrylic yarn would also work well. I used Cotlin from Knitpicks which was gifted to me by WeCrochet for this project.
If you would like to make a bandana in fingering weight yarn, you will love my Patchwork Crochet Bandana for using up your yarn scraps! Or try this Easy Crochet Lace Bandana, that is so fast to work up.
As this cute crochet bandana scarf pattern uses only small amounts of yarn, you could choose different colors from your stash to create a boho-chic vibe! Choose one ball of yarn as your main color (approx 100m) and add small amounts of contrast shades.
Finished Size of the Crochet Head Scarf
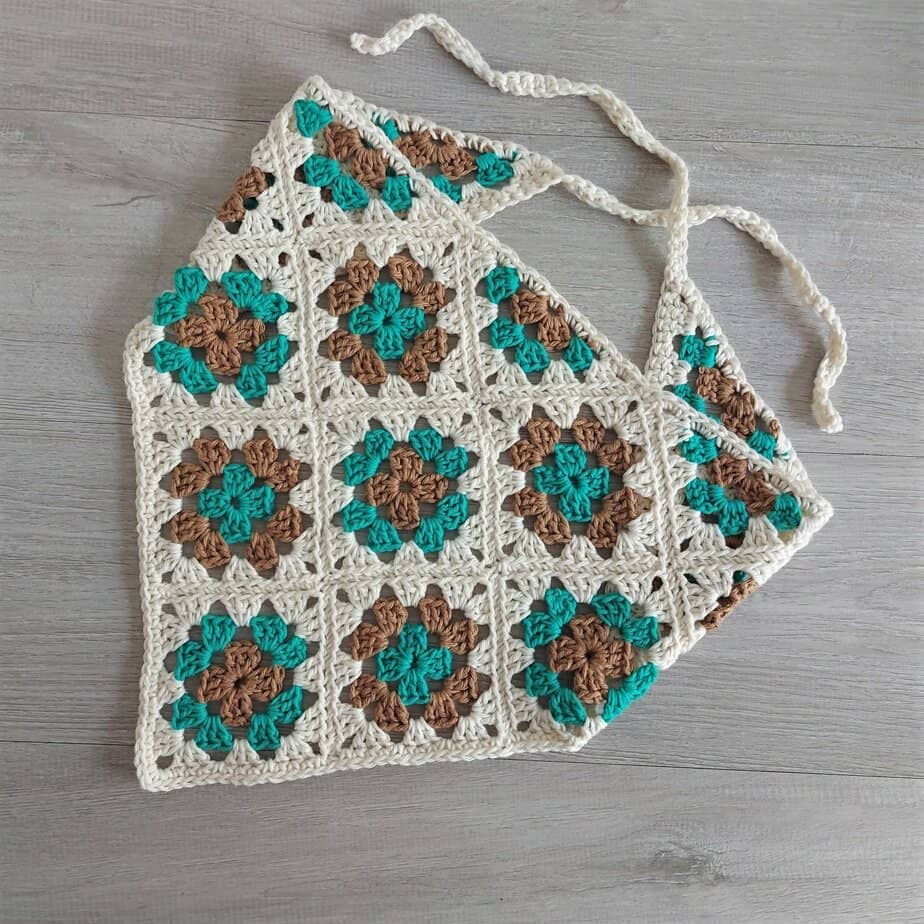
Scarf pictured measures 24in [61cm] wide and 12in [30cm] deep after light blocking. The ties are 12in [30cm] long but you could choose to make them longer if you wish.
Granny Square Bandana Construction
This project uses the popular crochet granny square which is one of my favourite things to crochet. I used a granny flower square as an edging to this gorgeous summer scarf!
You will make 10 squares and 5 triangles.
You will then attach the pieces together following the layout picture below and then add a border and ties.
This collection includes some creative projects for granny squares to inspire you.
You might like to check out more more Free Patterns for Scarves on my blog!
Skill Level –Easy
Only basic crochet stitches are used in this scarf pattern so is suitable for a beginner. You need to be familiar with making a granny square.
This pattern is in US Crochet terms
Materials
Cotlin from Knitpicks: 123yds [112m]: 70% Cotton, 30% Linen/50gr
- Main Colour (Yarn A) – 1 ball in Swan
- Yarn B – approx. 50m in Marina
- Yarn C – approx. 50m in Cashew
- 4 mm [G/6} crochet hook
- Scissors
- Yarn needle
You can use approx. 200m of any DK weight yarn.
Measurements
Scarf pictured measures 24in [61cm] wide and 12in [30cm] deep after light blocking. The ties are 12in [30cm] long

Gauge
· Each square is 3.5in [9cm] approx.
· Each triangle is 3.5in x 4.8in [9cm x 12cm] approx. Gauge is not important.
Abbreviations
US crochet terms
- Beg beginning
- Ch chain
- St stitch
- Sl st slip stitch
- Dc double crochet
- Yo yarn over
- Sp space
- RS right side
Notes (read carefully)
- Ch 3 at beginning of a round counts as 1 dc
- Ch 4 at beginning of a row counts as 1 dc and ch-1
- Includes written instructions. Pattern written in US crochet terms
- The head scarf is made up of 10 squares and 5 triangles sewn together following assembly layout picture below, and then a border and ties are added.
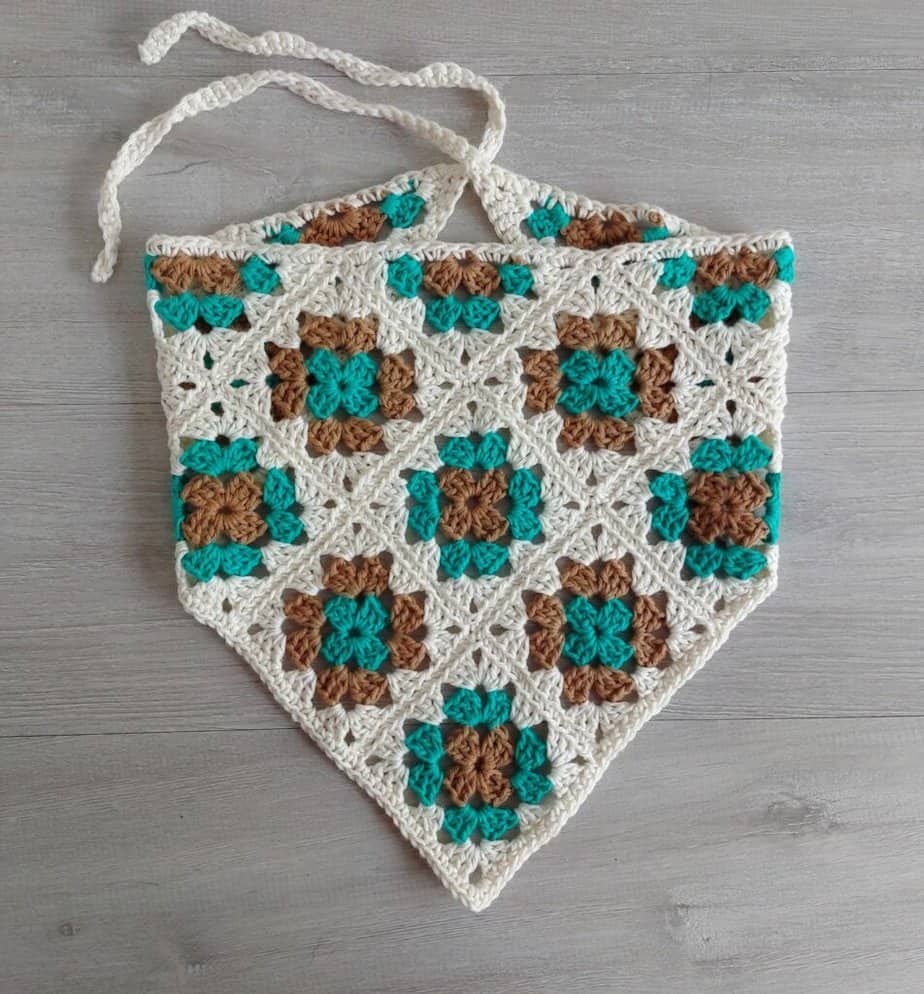
Color Combinations
6 x squares in yarn B,C and A.
4 x squares in yarn C,B and A.
5 x triangles in yarn C,B and A.
(see layout picture below for reference)
Instructions for Granny Square Bandana
Granny Square (make 10)
Each round is worked in a different color. Use yarn A for round 3 in all motifs.
With first color, ch 5 and sl st to 1st ch to form a ring
Round 1 (RS): Ch 3 (counts as 1 dc here and throughout at beg of a round), 2 dc in ring, [ch 3, 3 dc in ring] 3 times, ch 3, join with a sl st in 3rd ch of beg ch. Fasten off yarn.
Round 2: Join 2nd colour in any corner ch-3 sp, ch 3, (2 dc, ch 3, 3 dc) in same ch-sp, [ch 1, (3 dc, ch 3, 3 dc) in next ch-3 sp] 3 times, ch 1, join with a sl st in 3rd ch of beg ch. Fasten off yarn.
Round 3: Join 3rd colour in any corner ch-3 sp, ch 3, (2 dc, ch 3, 3 dc) in same ch-sp, [ch 1, 3 dc in next ch-1 sp, ch 1, (3 dc, ch 3, 3 dc) in next ch-3 sp] 3 times, ch 1, 3 dc in next ch-1 sp, ch 1, join with a sl st in 3rd ch of beg ch. Fasten off yarn and weave in threads.
Triangle (make 5)
(there is no RS for triangles, both sides are the same)
With first color, ch 5 and sl st to 1st ch to form a ring
Row 1: Ch 4 (counts as 1 dc and ch-1 sp here and throughout at beg of a row), 3 dc, ch 3, 3 dc, ch 1, 1 dc in ring, turn. Fasten off yarn.
Row 2: Join 2nd colour in last dc made in row 1, ch 4, 3 dc in 1st ch-1 sp, ch 1, (3 dc, ch 3, 3 dc) in corner ch-3 sp, ch 1, (3 dc, ch 1, 1 dc) in last ch-1 sp, turn. Fasten off yarn
Row 3: Join 3rd colour in last dc made in row 2, ch 4, 3 dc in 1st ch-1 sp, ch 1, 3 dc in next ch-1 sp, ch 1, (3 dc, ch 3, 3 dc) in corner ch-3 sp, ch 1, 3 dc in next ch-1 sp, ch 1, (3 dc, ch 1, 1 dc) in last ch-1 sp. Fasten off yarn and weave in threads.
Blocking Squares
It is recommended that you block each square and triangle before you attach them. Pin each motif to an even shape and spray with water (or hover a steam iron over each piece) and leave to dry. It will make attaching them later much easier.
Assembly
Layout your squares and triangles following placement in picture below. Holding RS of motifs together, you will now join your motifs in back loop only by sewing (whip stitching) together.
Try to make your stitches loosely to avoid the piece puckering and join your motifs as evenly as you can. Pin out your finished piece and steam block lightly.
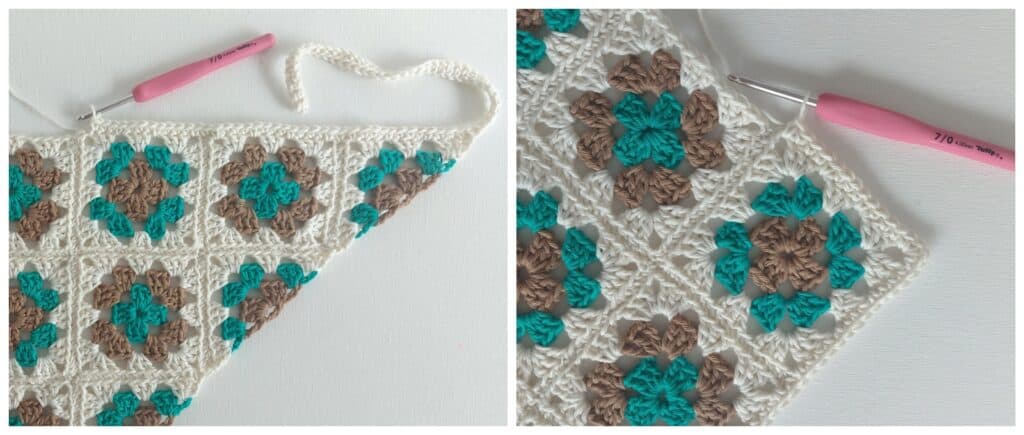
Border and Ties
Join Yarn A in top left corner of your finished triangle. Ch 40, 1 sc in 2nd ch from hook and in each ch across (39 sc). Sl st back to main piece.
Make a sc in each dc and ch-1 sp down the side of piece, making 1 sc in space between each motif. Make (2 sc, ch 1, 2 sc) in the ch-3 sp at bottom peak of triangle (see pic).
Working up the other side to top right corner, make a sc in each dc and ch-1 sp, making 1 sc in space between each motif.
When you reach right corner, ch 40,1 sc in 2nd ch from hook and in each ch across (39 sc). Sl st back to main piece.
Working across top of head scarf, make 3 sc in each row end of each triangle, 1 sc in each beg ch 5 and 1 sc in space between each motif. Join with a sl st to beg ch and weave in all ends.
You may like to add more chains to make your ties longer
Find more Free patterns here
No unauthorized reproduction, in whole or in part, or distribution of this pattern or content is permitted. If you make this pattern, don’t forget to follow me on Instagram and be sure to tag me in your photos so I can see it too, @anniedesigncrochet or #anniedesigncrochet – I can’t wait to see what colours you use with this pattern!
The photographs and pattern contained on this page are the property of Annie Design Crochet.com.
This pattern is for personal use only. You may make items to sell from this pattern and linking back to my blog is appreciated. Thank you!
The coupon code button isn’t working for the pattern on revelry. Just giving you a head’s up.
Hi Christina, I think it may not have clicked in until later but thanks!
Thanks for this cute pattern.
Is there a video tutorial for this? I’m having so much difficulty with the second round of the squares
I am sorry but there is no video for this pattern. You will find videos for granny squares on youtube that may help you:)
No, but yes, not for the pattern itself, but the granny squares, triangles, and how to join them together can be found on youtube. I followed this video and it was really helpful. https://youtu.be/RZfuYPWLtJw?si=4BTZhPlSxHbMlSFa
I would love to have a copy of the crochet bandana pattern!!!!
Hi! The link to the low cost pdf pattern is in the blog post.