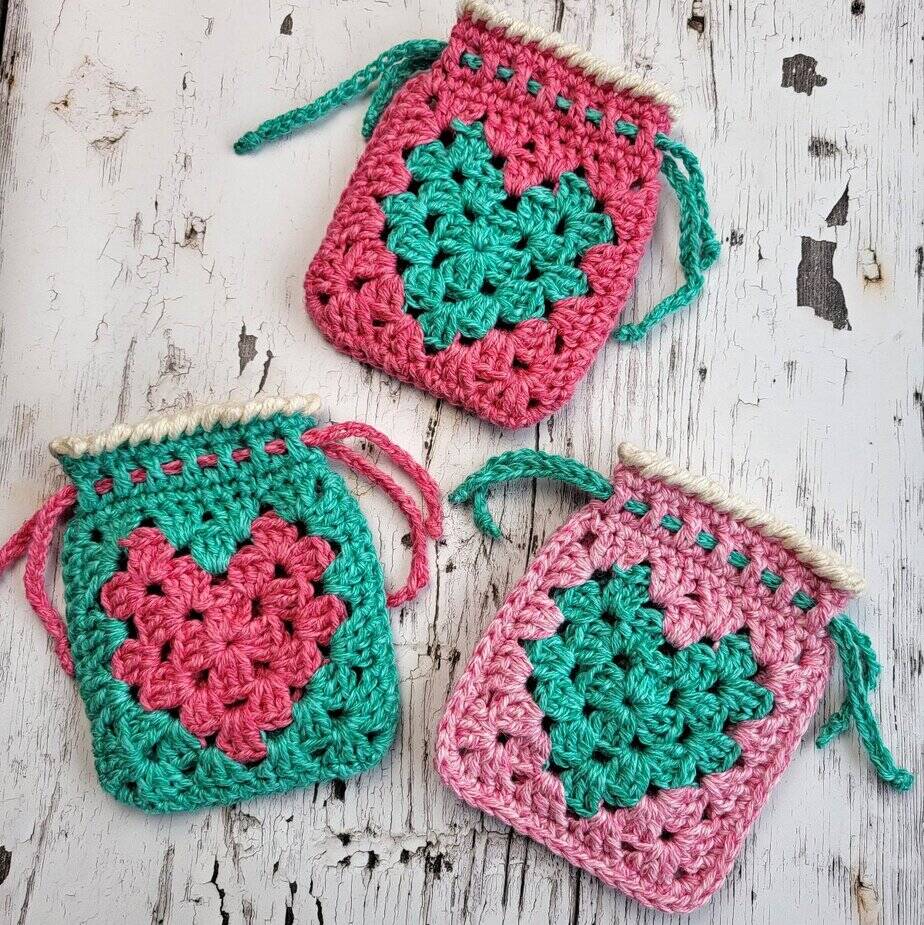
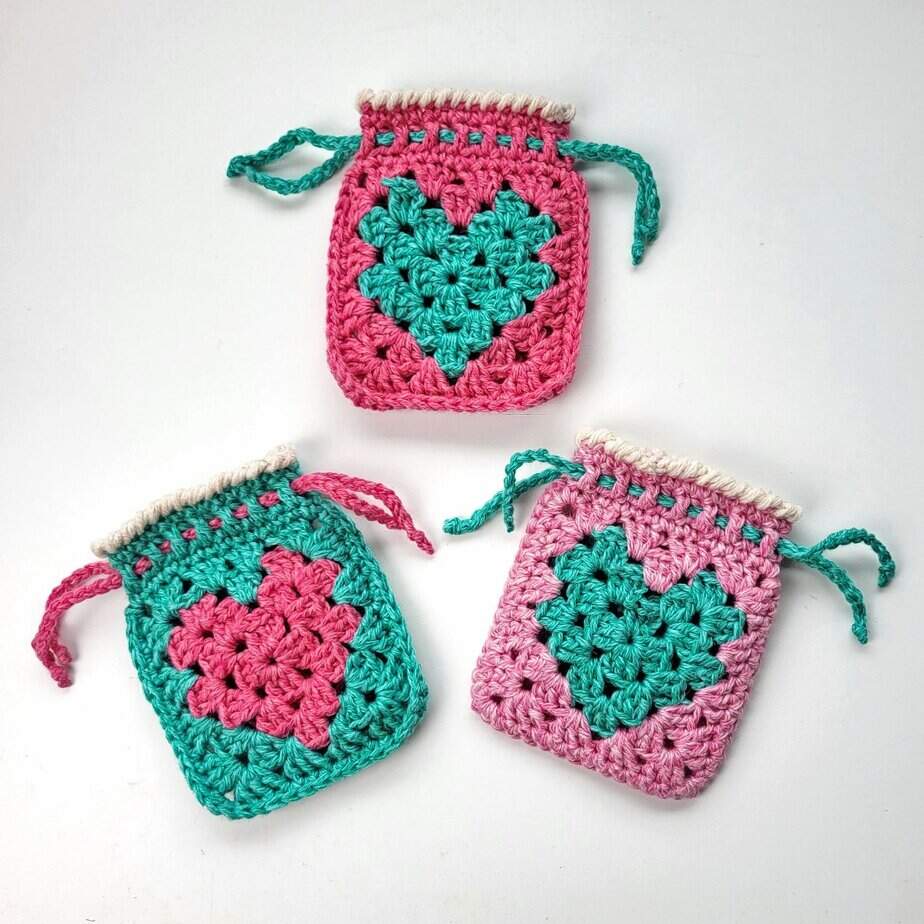
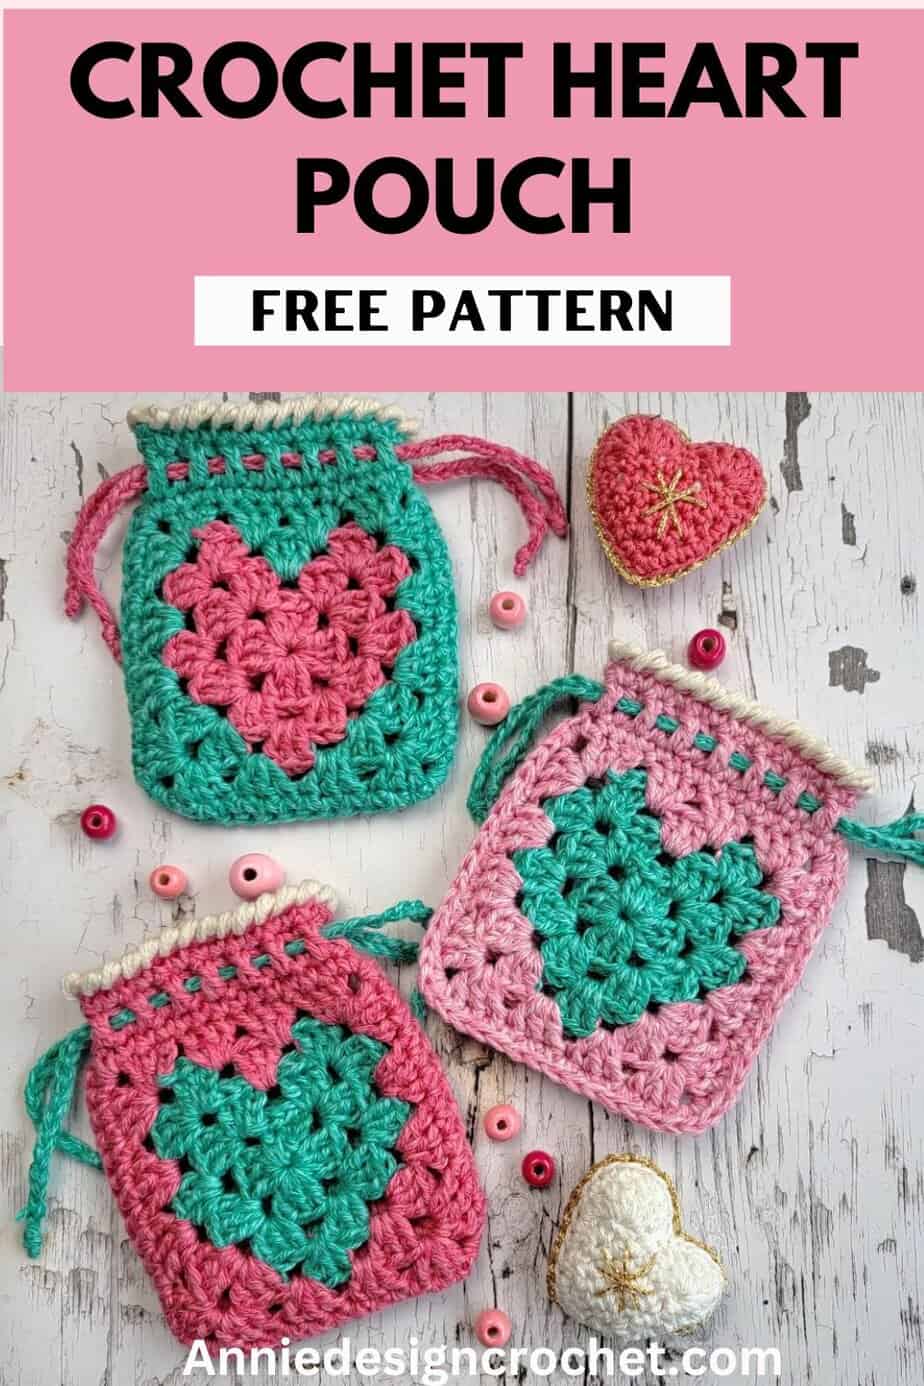
Looking for a crochet granny heart pouch pattern? This adorable small crochet bag makes the perfect Valentine’s Day gift or for any time of year. It is an easy pattern using a granny heart square, and and a few extra rounds for the bag. Once you have made one, you won’t want to stop!
You can find the complete free pattern below, along with step-by-step instructions and gifting ideas. The crochet pouch uses only small amounts of DK weight yarn, so it’s perfect for using up your scraps. Whether you need a Valentine gift or a fun small crochet project, you’ll love making this one!
Why Make a Crochet Heart Pouch?
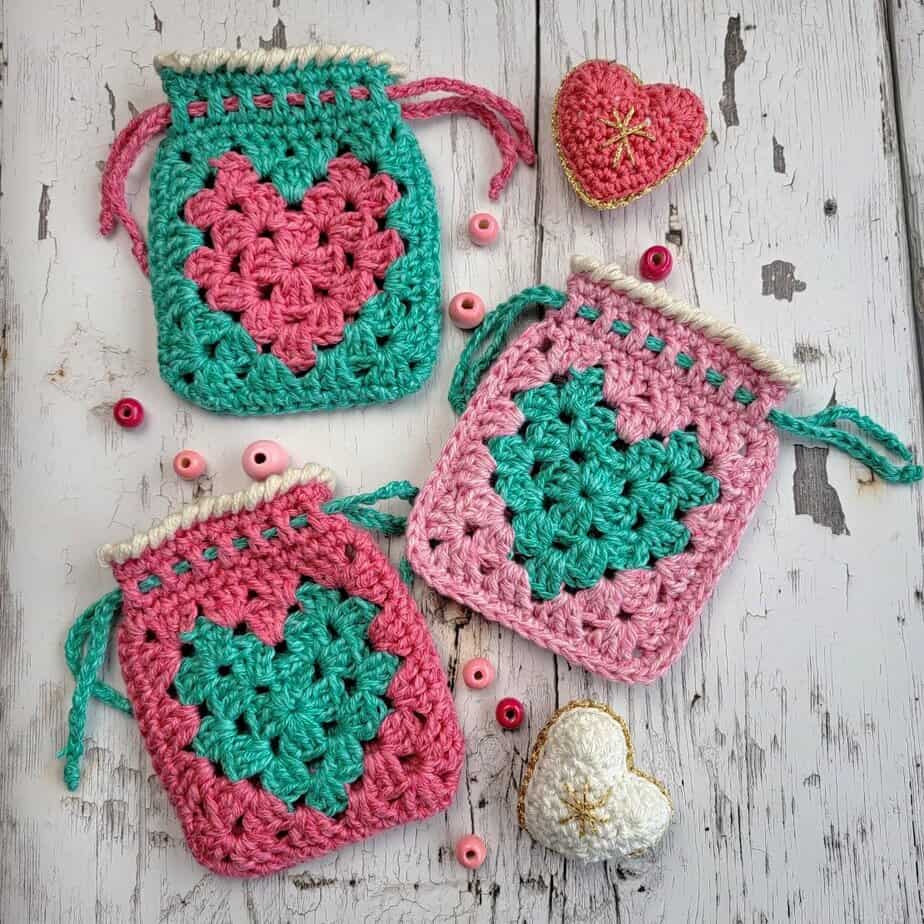
My granddaughters were absolutely delighted with these pouches (of course!). Little ones always want a special place to keep their treasures, and there’s something lovely about a handmade bag just their size.
Here are some ideas for using them:
- Gift fillers – Tuck inside sweets, chocolate, or a small treat
- Jewellery storage – Perfect for rings, bracelets, or hair clips
- Stocking stuffers – Fill with stickers, bookmarks, or small toys
- Keep-sake bags – Store buttons, beads, or crafting supplies
- Party favors – Make a few for friends or a gift exchange
- Travel pouches – Handy for storing small items on the go
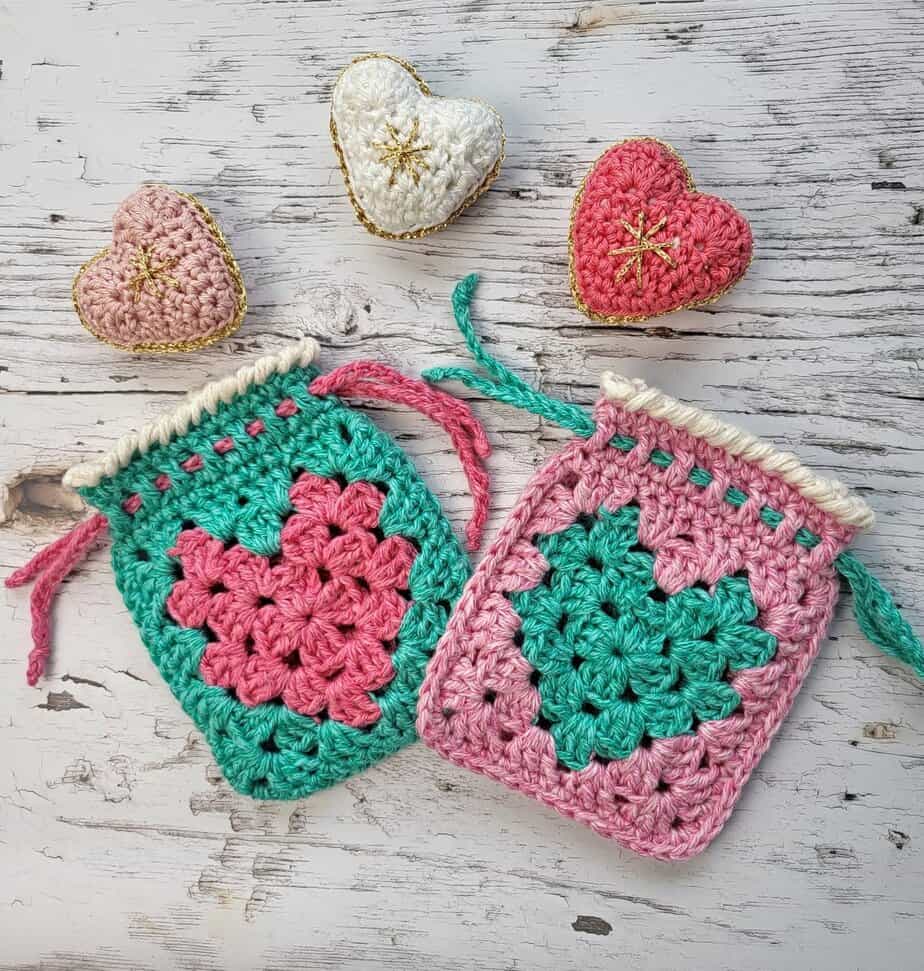
It’s a quick crochet Valentine project that won’t take long to complete! You could also add some small crochet hearts (you will find the pattern for the stuffed little hearts in this post) to include in the pouch.
- Free Crochet Pattern: scroll down the blog post for the free pattern instructions.
- Printable PDF: Ad-free PDF pattern for the Crochet Heart Pouch. Thank you for your support! Purchase on Ravelry and on Etsy
Details of the Crochet Heart Pouch
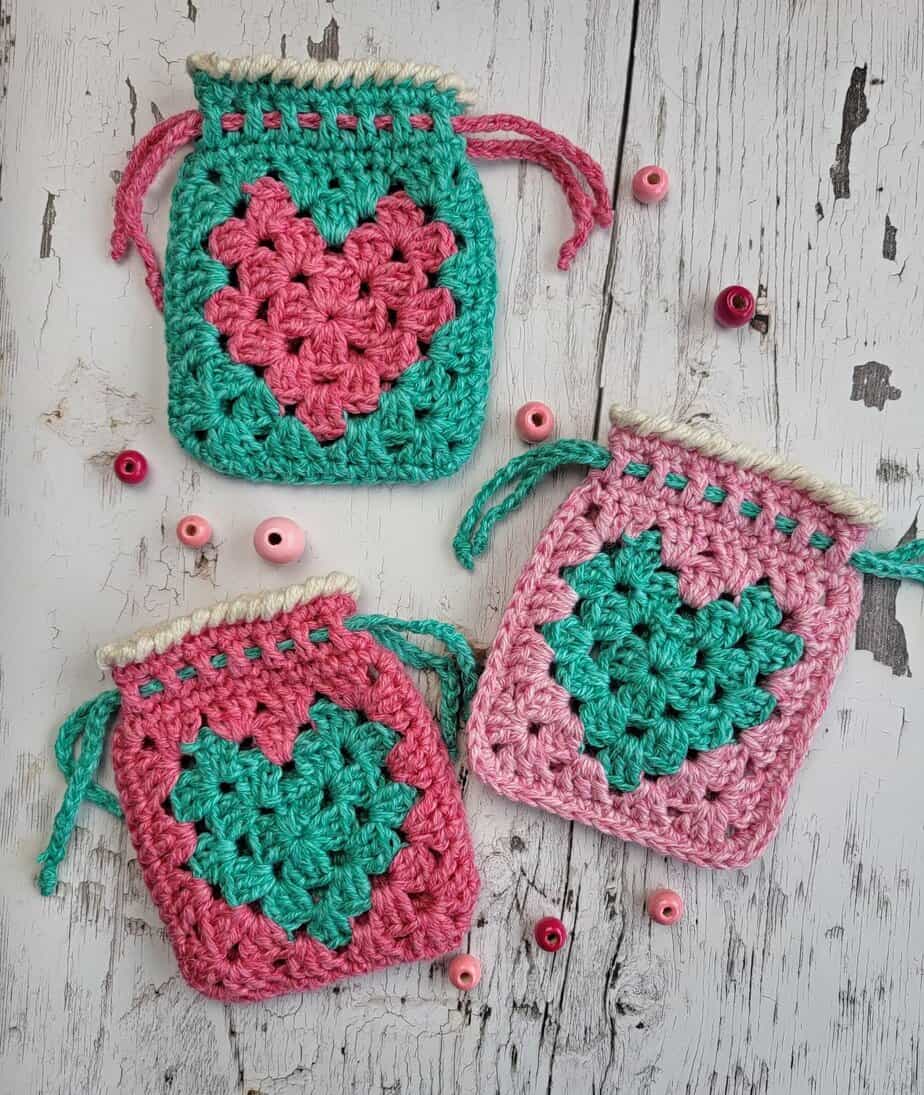
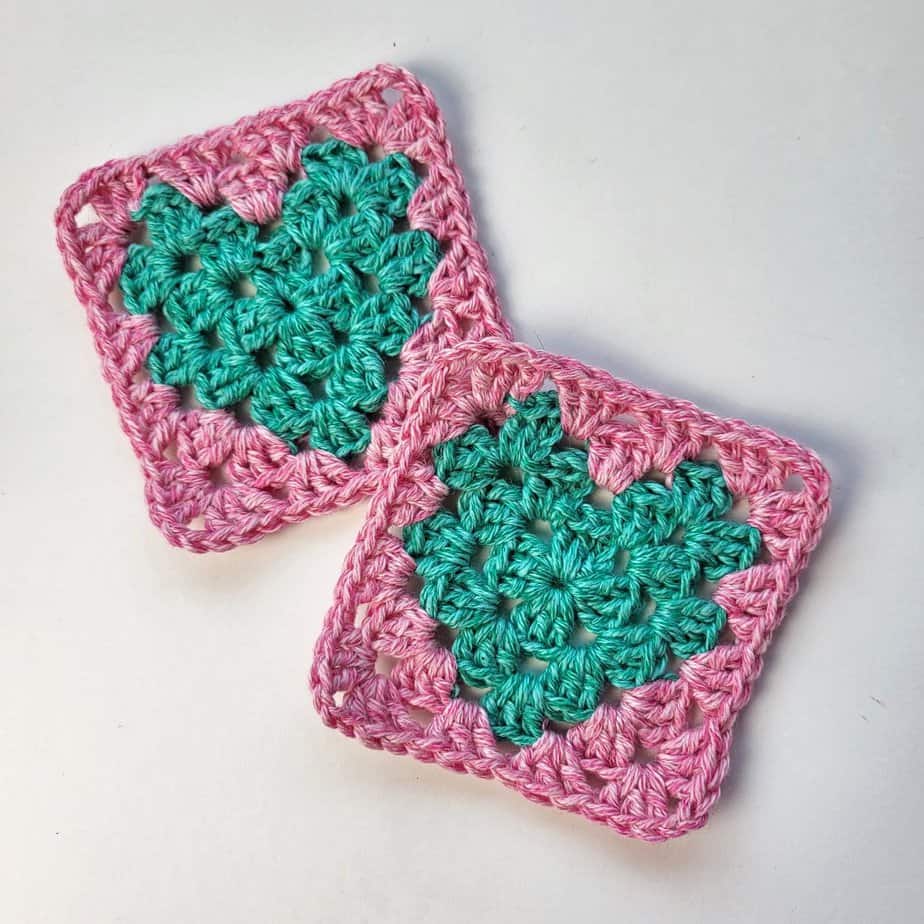
You will make two crochet granny heart squares to create the front and back of your pouch.
In Round 3, change color on the last yarn over and carry the unused yarn behind your stitches until you pick it up again. They won’t be visible on the inside of the bag. If you prefer, you can cut yarn for each color change and weave in threads as you work.
Join both squares with a single crochet seam along three edges, leaving the top open. Add three or four more rounds to extend the pouch length. Then finish with two crochet chain drawstrings threaded through the edge stitches.
More free Crochet Patterns for Valentines Day
- Granny Hearts Pillow – a fun way to add a Valentine’s touch to your home
- Crochet Lace Heart Coaster – a beautiful vintage doily inspired coaster
- Valentine Hearts Crochet Garland – pretty crochet hearts and flowers in any color combination!
- Crochet Hearts – pretty hearts and an easy pattern!
- Stuffed Crochet Heart – adorable and perfect for gifts
Crochet Heart Valentine Pouch
Materials
- Small amounts of DK weight/light worsted weight yarn
- I used small amounts of Hobbii Yarn – Happy Place Solid – 50% Cotton, 50% Superwash Wool, 100g/250 m (273 yds) – (1) Almond, (14) Lollipop, (25) Aqua,
- Hobbii Yarn – Happy Place Melange – 50% Cotton, 50% Superwash Wool, 100g/250 m (273 yds) – (14) Lollipop
- 4 mm crochet hook
You can use any yarn weight and matching hook to make this square though yarn amounts will vary
Measurements
Bag is 4 inches wide x 4.75 inches long [10 x 12 cm]
Gauge
Square is approx. 3.5 x 3.5 in [9 x 9 cm] in DK weight/light worsted weight yarn and 4mm hook
Abbreviations
US Crochet terms
- sl st slip stitch
- sc single crochet
- dc double crochet
- ch chain
- st stitch
- rep repeat
- beg beginning
- sp space
- WS wrong side
Notes
- The pattern is written in US crochet terms.
- Ch 3 at beginning of a round counts as 1 dc.
- Ch 1 at beginning of a round does not count as a stitch.
- 3 dc = 3-dc group.
- Each round begins in a corner of the square.
- In Round 3, you will change color on the last yarn over and carry the unused yarn behind your stitches until you pick it up again.
- If preferred, you can cut yarn for each color change and weave in threads as you work.
- You will crochet 2 squares, which are joined together on 3 sides. You will work 3 rounds of crochet around the top of the squares to form a pouch.
- Use an invisible join (Instructions below) for your final round for a neat finish.
Special Stitches
I worked the last round of the top of the pouch in a crab stitch edging but you can leave that out if you prefer.
Find a video tutorial here: Crab Stitch Video
Printable PDF: Ad-free PDF pattern for the Crochet Heart Pouch. Thank you for your support! Purchase on Ravelry and on Etsy
Granny Heart Square Pattern
(Do not turn your square after each round)
With Yarn A, ch 5 and sl st to 1st ch to form a ring
Round 1 (RS): Ch 3 (counts as 1 dc here and throughout at beg of a round), 2 dc in ring, [ch 2, 3 dc in ring] 3 times, ch 2, join with a sl st in 3rd ch of beg ch 3. Sl st into the next 2 dc and the next ch-2 sp, ready for Round 2.

Round 2: Ch 3, (2 dc, ch 2, 3 dc) in same ch-sp, [(3 dc, ch 2, 3 dc) in next ch-2 sp] 3 times, join with a sl st in 3rd ch of beg ch 3. Sl st into the next 2 dc and the next ch-2 sp, ready for Round 3.

Round 3: Ch 3, (2 dc, ch 2, 3 dc) in same ch-sp, 3 dc in next sp between 3-dc groups on previous round, drop Yarn A and change to Yarn B, (3 dc, ch 2, 3 dc) in next ch-2 sp) drop Yarn B and change to Yarn A, 3 dc in next sp between 3-dc groups, drop Yarn A and change to Yarn B,

(3 dc, ch 2, 3 dc) in next ch-2 sp) drop Yarn B and change to Yarn A, 3 dc in next sp between 3-dc groups, (3 dc, ch 2, 3 dc) in next ch-2 sp) drop Yarn A and change to Yarn B, 3 dc in next sp between 3-dc groups, drop Yarn B and change to Yarn A, join with a sl st in 3rd ch of beg ch 3. Sl st into the next 2 dc and the next ch-2 sp, changing to Yarn B on the last yarn over. Fasten off yarn A. You are now ready to work Round 4 with Yarn B.

Round 4: Ch 3, (2 dc, ch 2, 3 dc) in same ch-sp, [(3 dc in next sp between 3-dc groups on previous round) 2 times, (3 dc, ch 2, 3 dc) in next ch-2 sp] 3 times, (3 dc in next sp between 3-dc groups) 2 times, join with a sl st in 3rd ch of beg ch 3. Fasten off yarn and join with invisble join (see below for instructions)
Joining Squares Together
Hold both squares with WS together (make sure the hearts are the right way up) and insert your hook in the top left ch-2 sp of both squares.
Joining Round: Ch 1, 1 sc in same sp, work 1 sc in each st (of both squares) around 3 sides only. Work 3 sc in bottom left and right corner ch-2 sps. Work 1 sc in last ch-2 sp (top right of square), leaving the 4th side open. Do not fasten off yarn.
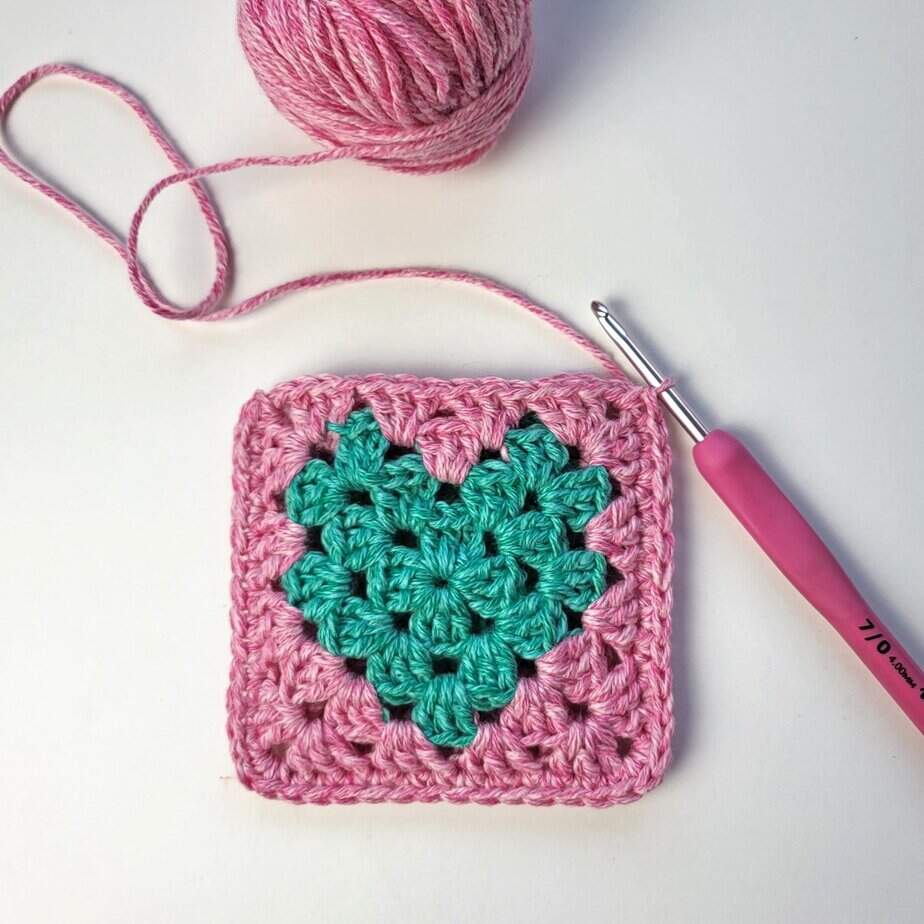
Top edge of Pouch
We will be working around the top of the bag to extend the length, working into both squares separately.
Round 1: Ch 1, 1 sc in same ch-sp, 1 sc in each st across front square, 1 sc in last ch-sp. Turn so you are now working on back square, 1 sc in 1st ch-sp, 1 sc in each st across, 1 sc in last ch-sp, join with a sl st to 1st sc. Do not turn – 28 sc
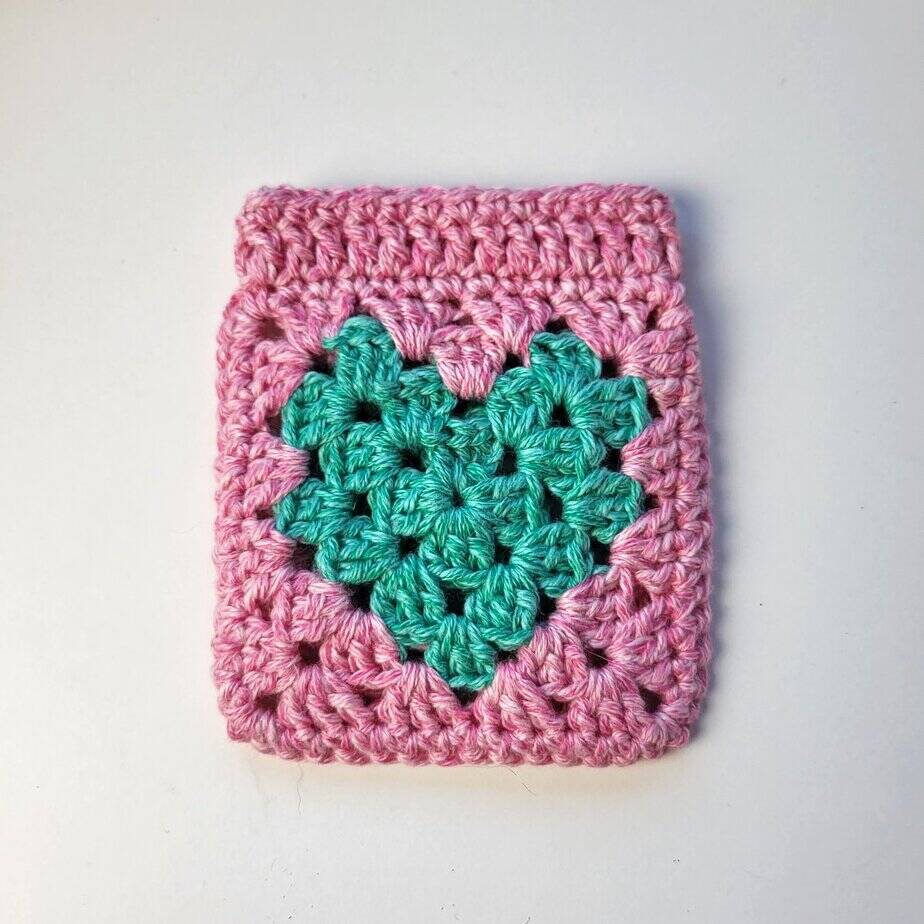
Round 2: Ch 3 (counts as 1 dc), 1 dc in each st around, join with a sl st to beg ch 3. Do not turn – 28 dc
Round 3: Ch 1, 1 sc in each st around, join with an invisible join (see below for instructions). Fasten off yarn – 28 sc
Round 4: Using a contrast color, work 1 row of crab stitch if you wish. Weave in all threads.
Drawstrings (make 2)
Using a contrast yarn, ch 40, fasten off and weave in ends.
Weave the drawstrings through the double crochet stitches from Rd 2. Weave 1 drawstring in the front of the pouch and one in the back.
You can also use ribbon or twine for a drawstring if you prefer. Happy crocheting!
Invisible Joining (Invisible Needle Join)
Complete the final stitch of your round. Cut yarn leaving a long tail. Drop your hook and pull the tail all the way through the stitch and thread the yarn tail through a yarn needle.
- Insert the needle from the front to the back under the top two loops of the first complete stitch made to your left (after the beg ch 3). See Picture 1
- Pull yarn through. See Picture 2
- Insert your needle in the back loop only of the last stitch made to your right. See arrow on Picture 3
- Pull through loop gently and weave in ends. See Picture 4
PIN FOR LATER
Don’t forget to follow me on Instagram and be sure to tag me in your photos so I can see it too, @anniedesigncrochet or #anniedesigncrochet – I can’t wait to see what colours you use with this pattern!
The photographs and pattern contained on this page are the property of Annie Design Crochet.com.
You are welcome to use this pattern to make items to sell, and I would appreciate that you include a link to the free pattern with credit for the designer, thank you!
No unauthorized reproduction, in whole or in part, or distribution of this pattern or content is permitted.
Thank you for this cute little project. Greetings from GermanyGermany ♥️