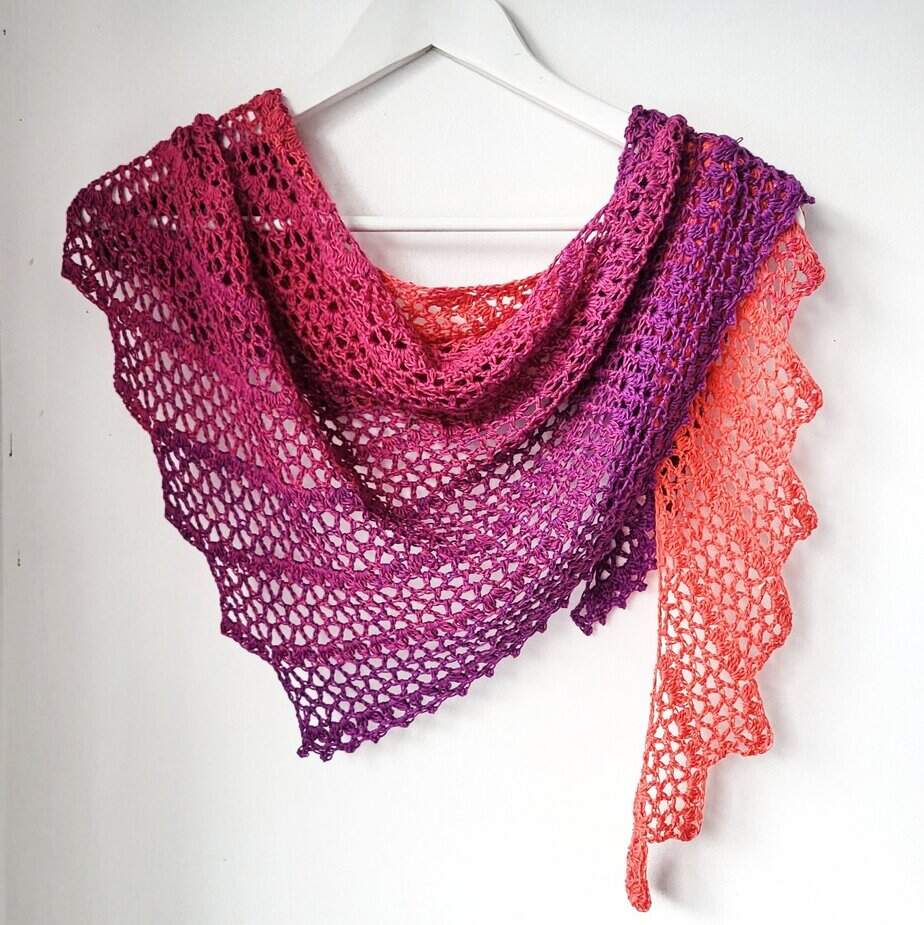
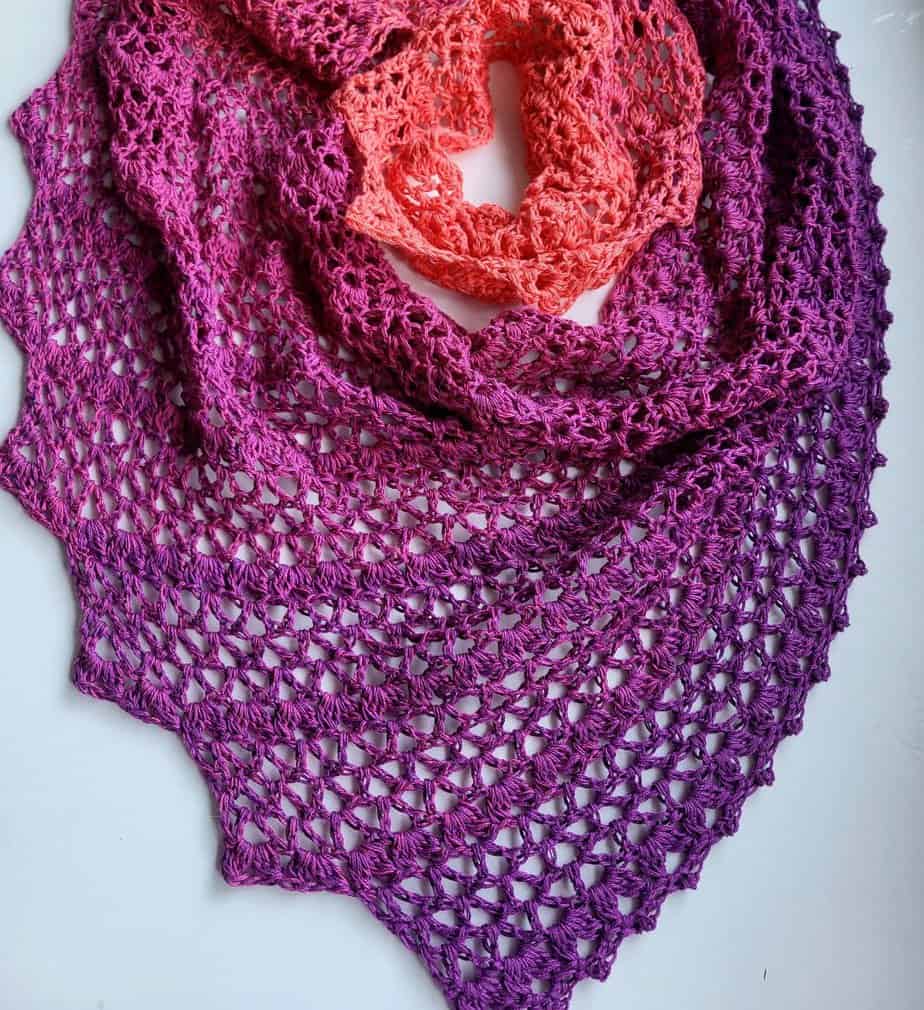
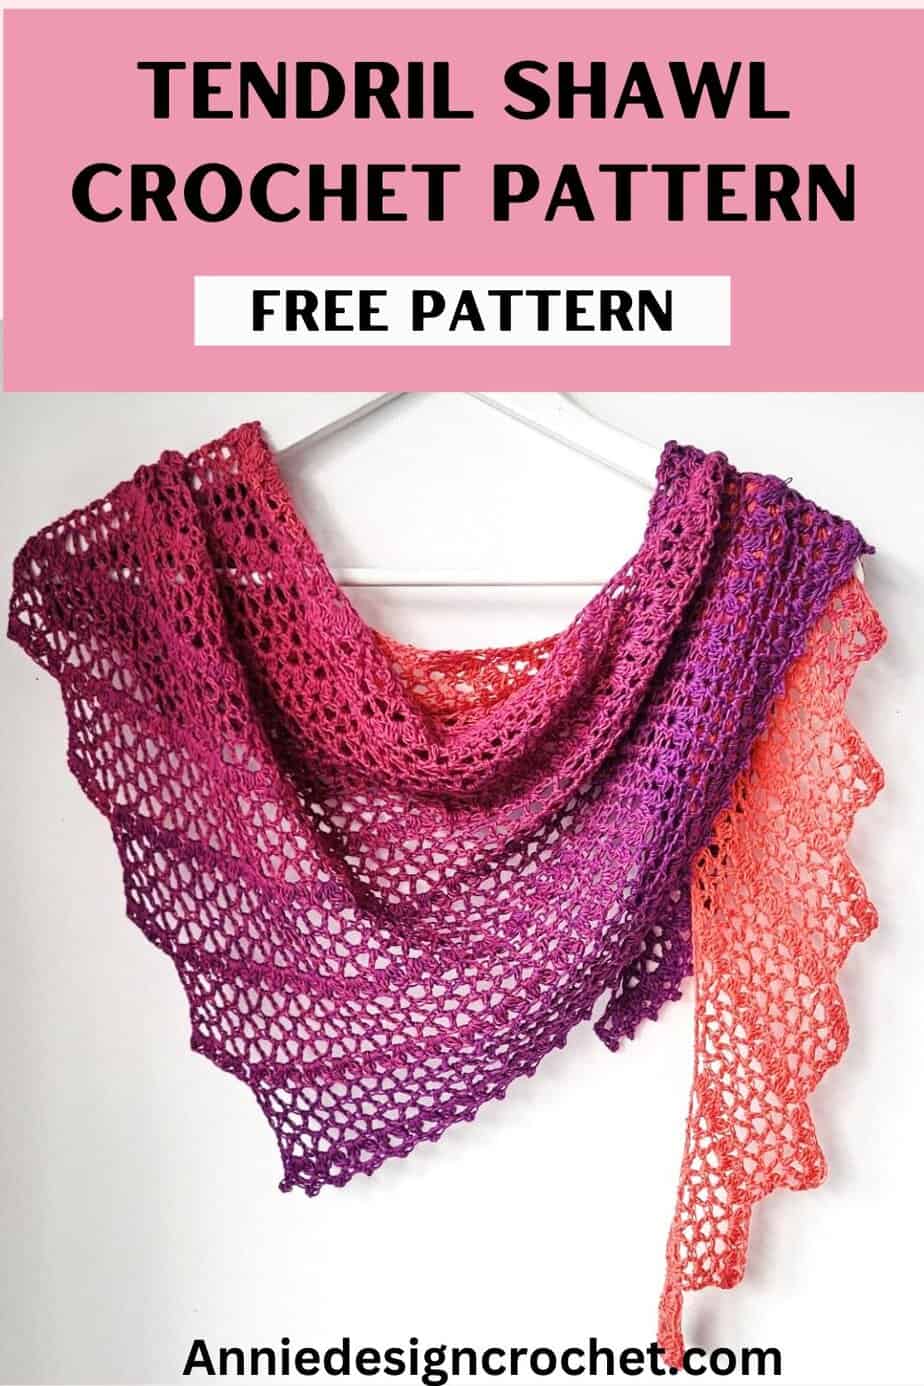
Tendril crochet shawl was one of my first shawls, and it’s still one of my most loved designs. This popular crochet shawl uses just one skein of yarn and simple stitches to create something elegant and wearable.
For this version, I wanted to revisit the pattern and enjoy it again with a slightly different yarn choice, while keeping everything you already love about the original Tendril crochet shawl design.
Tendril shawl has been made hundreds of times by crocheters all over the world – check out all the projects on Ravelry and I often see new versions popping up on social media! The original video tutorial for this design can be found below.
A Timeless Crochet Shawl Design
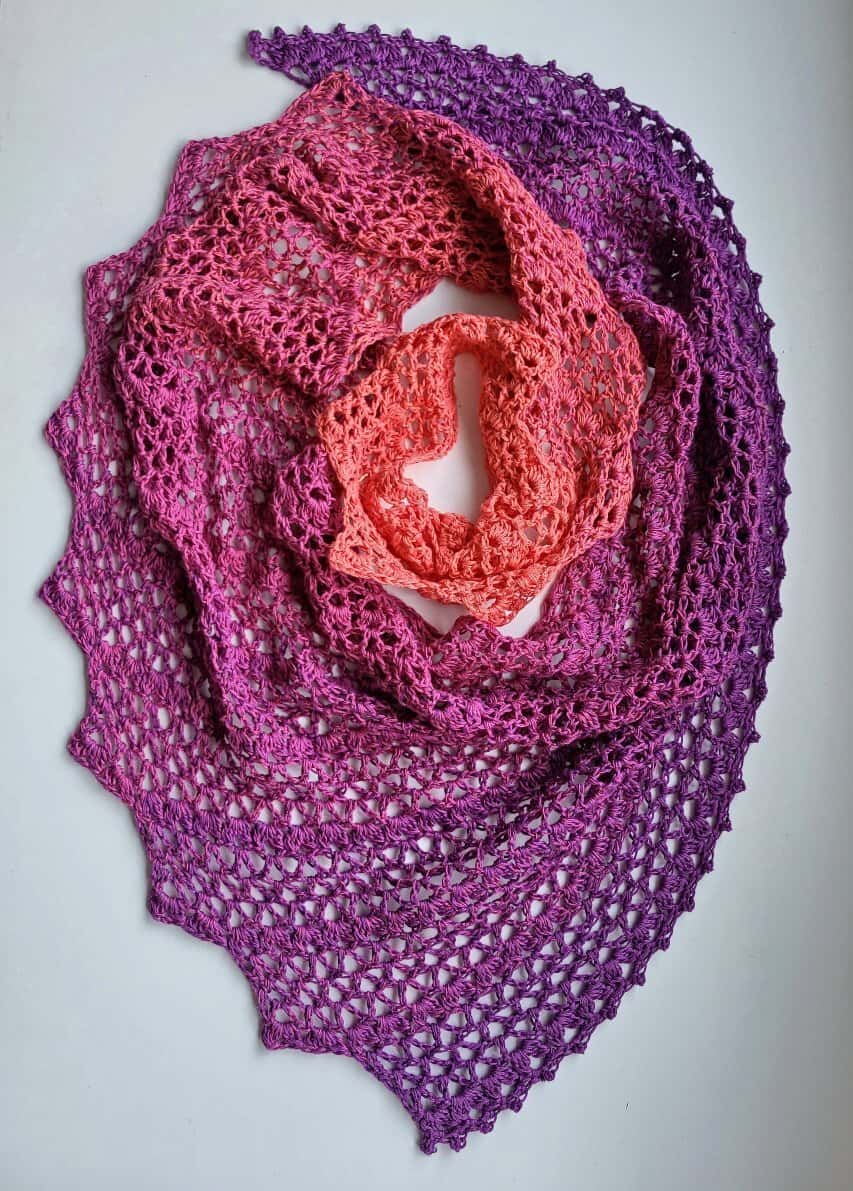
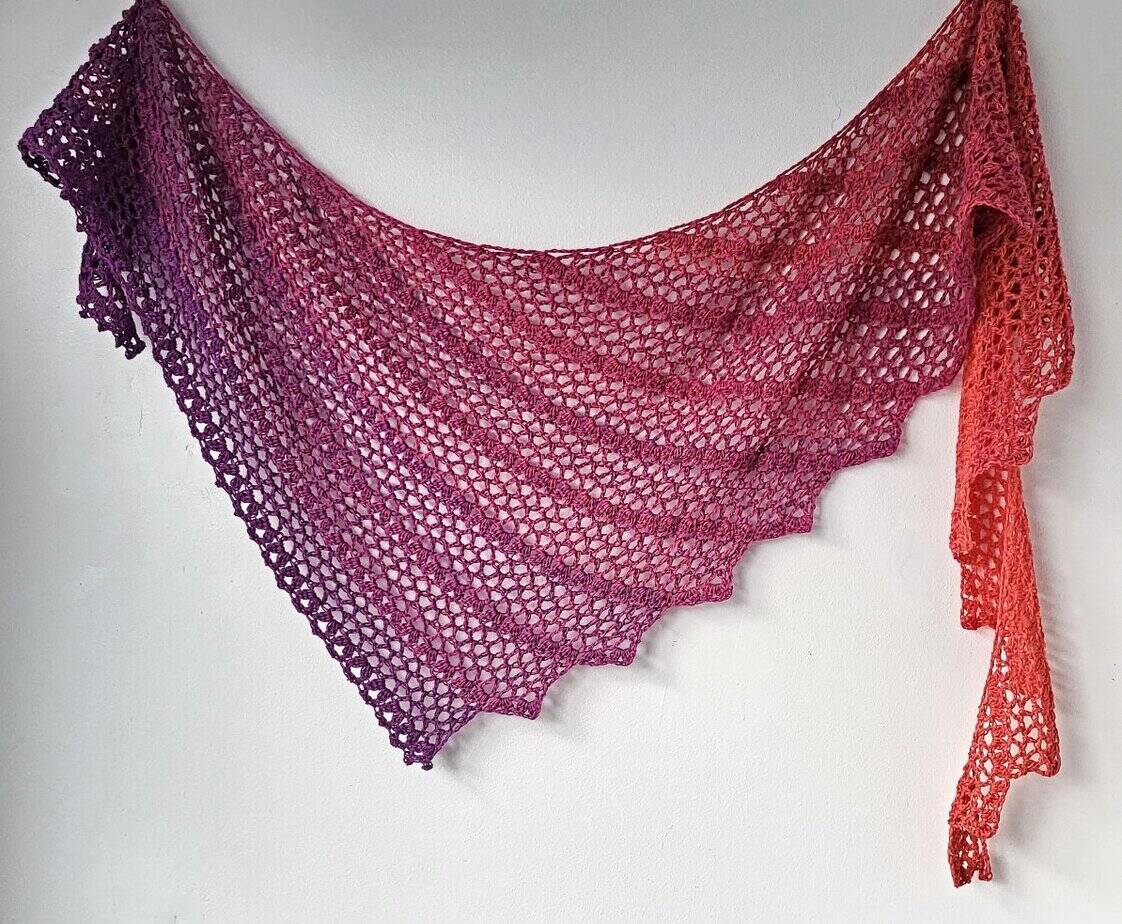
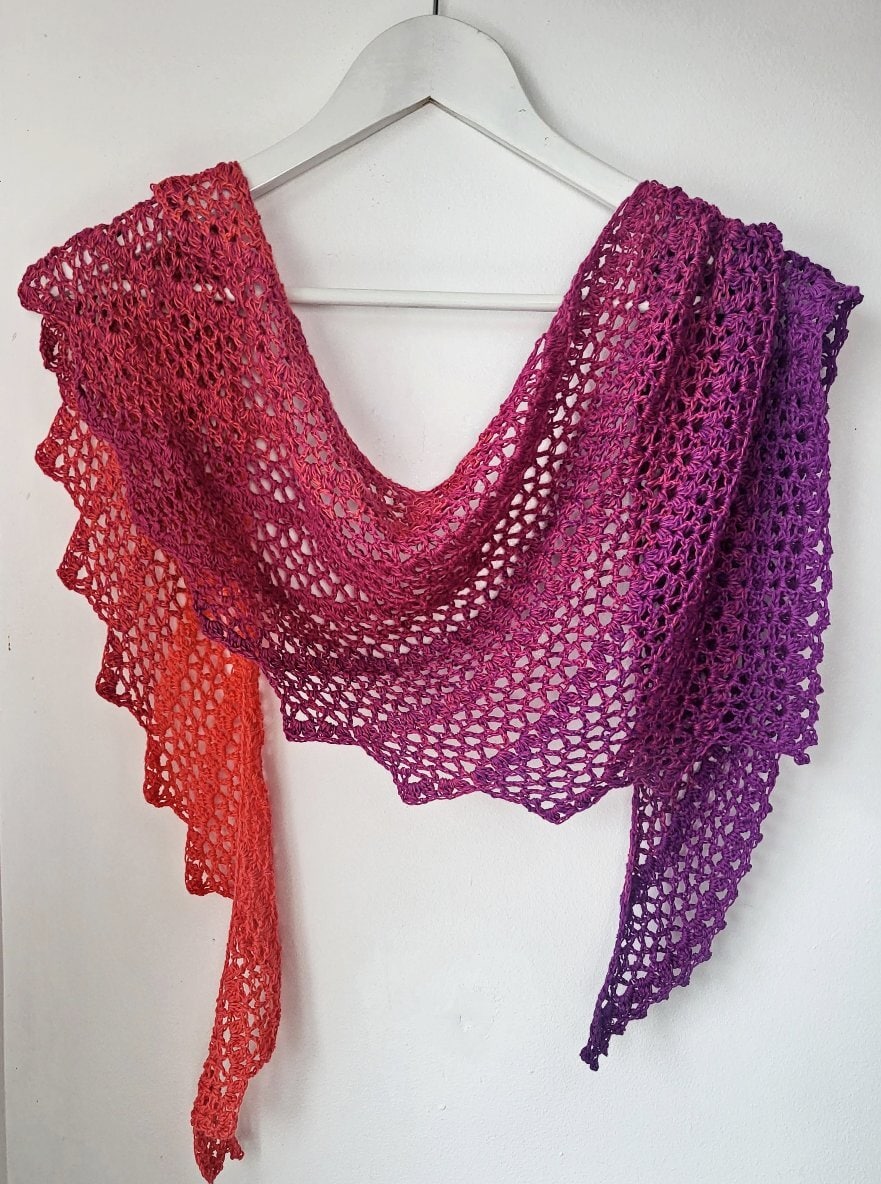
Tendril Shawl is a small crescent-shaped crochet shawl with a flowing lace stitch pattern that’s easy to settle into once you find the rhythm. It’s relaxing to make and creates a soft, textured fabric with a lovely drape.
It’s a wearable, practical crochet shawlette that you can wear wrapped around the shoulders, or styled like a scarf.
- Free Crochet Pattern: scroll down the blog post for the pattern instructions.
- Printable PDF: Ad-free PDF pattern for the original Tendril Shawl in US and UK terms plus a helpful crochet chart. Thank you for your support! Purchase on Ravelry and on Etsy
Yarn Choices That Work Well for Tendril Shawl
One of the reasons this crochet shawl has remained so popular is its versatility. Tendril Shawl works beautifully in:
- Solid colours
- Semi-solids and speckles
- Gradual colour changes or gentle gradients
For this sample, I chose a small gradient yarn cake with gentle colour changes to enjoy the stitch pattern in a new way. I used a smaller hook and 500m of a 3 ply yarn, and the shawl measurements were the same as the original.
If you’ve made the Tendril Shawl before, you can follow the pattern exactly as written. This version is simply a reminder of how versatile the design can be with different yarn choices. You may also like to visit the original Tendril Shawl blog post to see earlier versions.
More Crochet One Skein Shawls
- Vintage Peach – a light and airy one skein crochet shawl
- Gloaming Shawl – beautiful lightweight crochet shawl
- Red Clover – a pretty one skein crochet shawl with lovely drape
- Green Olive – a delicate lace triangle shawl
Materials
- Blooming Yarns by KW: 3 Ply – 50% Cotton/50% Acrylic – 100g/500m
- 3.5mm crochet hook
- You can use 500m of any light fingering weight yarn or yarn weight of your choice and matching hook.
- Any gradient yarn cake would work well for this pattern
Measurements
Shawl pictured measures 70in [178cm] on the longest length and 32in [82cm] on the shortest side (border) after blocking
Abbreviations (US Terms)
- Beg – beginning
- Ch – chain
- St – stitch
- Sp – space
- Dc – double crochet
- Tr – treble crochet
Notes (read carefully)
- Shawl starts at one end. Working in rows, increasing each row on one side only, and decreasing in ‘steps’ every 4 rows on the other side, until desired size is reached.
- Shawl needs strong blocking to give it its shape
- Ch 4 at beginning of a row counts as 1 tr throughout
- Ch 2 at beginning of a row does not count as a stitch
- The shawl can be made larger or smaller by working more or fewer pattern repeats. This will alter the amount of yarn required.
- The free pattern includes written instructions and the low cost PDF contains a chart.
- Pattern written in US crochet terms
- Gauge is not important. To achieve a light drape tension, I suggest make a swatch of the first 5 rows and see what hook size works best for you.
- I have included some tips in the first 8 rows to help stitch placement. Once you have the 4-row pattern repeat established, the shawl will work up quickly!
- Stitch counts (in Itallics) are included at the end of the first 8 rows to help you
Link to Tendril Shawl – Video
Special Stitches
- Double Crochet 3 Together (dc3tog): In indicated space or st, work (yo, insert hook in space/st, yo and pull up loop, yo and pull through 2 loops on hook) 3 times, yo and pull through all 4 loops on hook.
- Shell: [dc3tog, ch 2, dc3tog]
- V – Stitch (v-st): [1 dc, ch 2, 1 dc]
- Picot: Ch 3, sl st into 3rd ch from hook
Instructions for Tendril Shawl
Set-up Row: Ch 6 (counts as beg ch,1 dc, ch 2), 1 tr in 6th ch from hook, turn – 2 tr
Row 1: Ch 6 (counts as 1 tr, ch 2 here and throughout), v-st (see special stitches) in ch-2 sp (you insert your hook into the ch 6 of set-up row), turn – 1 tr, 1 v-st
Row 2: Ch 2 (does not count as a st here and throughout), v-st in 1st ch-2 sp, [v-st, ch 2, 1 tr] in last ch-2 sp (you insert your hook into the beg ch 6 of previous row), turn – 1 tr, 2 v-st
Row 3: Ch 6, v-st in 1st ch-2 sp, [v-st in next ch-2 sp] 2 times, 1 dc in beg ch-2 (you can insert your hook into the space if you prefer), turn – 1 tr, 3 v-st, 1 dc
Row 4: Ch 2, shell (see special stitches) in 1st v-st, [shell in next v-st] 2 times, [shell, ch 2, 1 tr] in last ch-2 sp, turn – 1 tr, 4 shells
Row 5: Ch 6, v-st in 1st ch-2 sp, [v-st in next ch-2 sp] 2 times, 1 dc in next sp (between last and next shell), turn, leaving last 2 shells unworked – 1 tr, 3 v-st, 1 dc
Row 6: Ch 2, v-st in 1st ch-2 sp, [v-st in next ch-2 sp] 2 times, [v-st, ch 2, 1 tr] in last ch-2 sp, turn – 1 tr, 4 v-st
Row 7: Ch 6, v-st in 1st ch-2 sp, [v-st in next ch-2 sp] 4 times, 1 dc in beg ch-2, turn – 1 tr, 5 v-st, 1 dc
Row 8: Ch 2, shell in 1st v-st, [shell in next v-st] 4 times, [shell, ch 2, 1 tr] in last ch-2 sp, turn – 1 tr, 6 shells
You should now be getting familiar with the pattern. The next 4 rows (rows 9-12) form the pattern repeat for the shawl.
Row 9: Ch 6, v-st in 1st ch-2 sp, * v-st in next ch-2 sp; rep from * across until 2 shells remain,1 dc in next sp (between last and next shell), turn, leaving last 2 shells unworked.
Row 10: Ch 2, v-st in 1st ch-2 sp, *v-st in next ch-2 sp; rep from * across until last ch-2 sp, [v-st, ch 2, 1 tr] in last ch-2 sp, turn
Row 11: Ch 6, v-st in 1st ch-2 sp, * v-st in next ch-2 sp; rep from * across, 1 dc in beg ch-2, turn.
Row 12: Ch 2, shell in 1st v-st, * shell in next v-st; rep from * across, ending with [shell, ch 2, 1 tr] in last ch-2 sp, turn.
Rows 13 – 64 (or until you wish to finish): Repeat rows 9 – 12
*You can make your shawl small or larger by working fewer or more pattern repeats. Make sure you finish on a row 12
Final Row (Border): Ch 1, * [1 sc, picot (see special stitches), 1 sc] in next ch-2 sp; rep from * across, ending with [1 sc, picot, 2 sc] in last ch-2 sp. Fasten off.
Finishing
Weave in all loose ends. Soak your shawl in lukewarm water and gently wring in a towel. Lay project out to finished size and pull gently into shape. Pin in place and leave to dry. Take your time pinning finished shawl, and use a pin on each ‘point’…….it will make a huge difference to the finished piece!
The photographs and pattern contained on this page are the property of Annie Design Crochet.com.
You are welcome to use this pattern to make items to sell, and I would appreciate that you include a link to the free pattern with credit for the designer, thank you!
No unauthorized reproduction, in whole or in part, or distribution of this pattern or content is permitted.