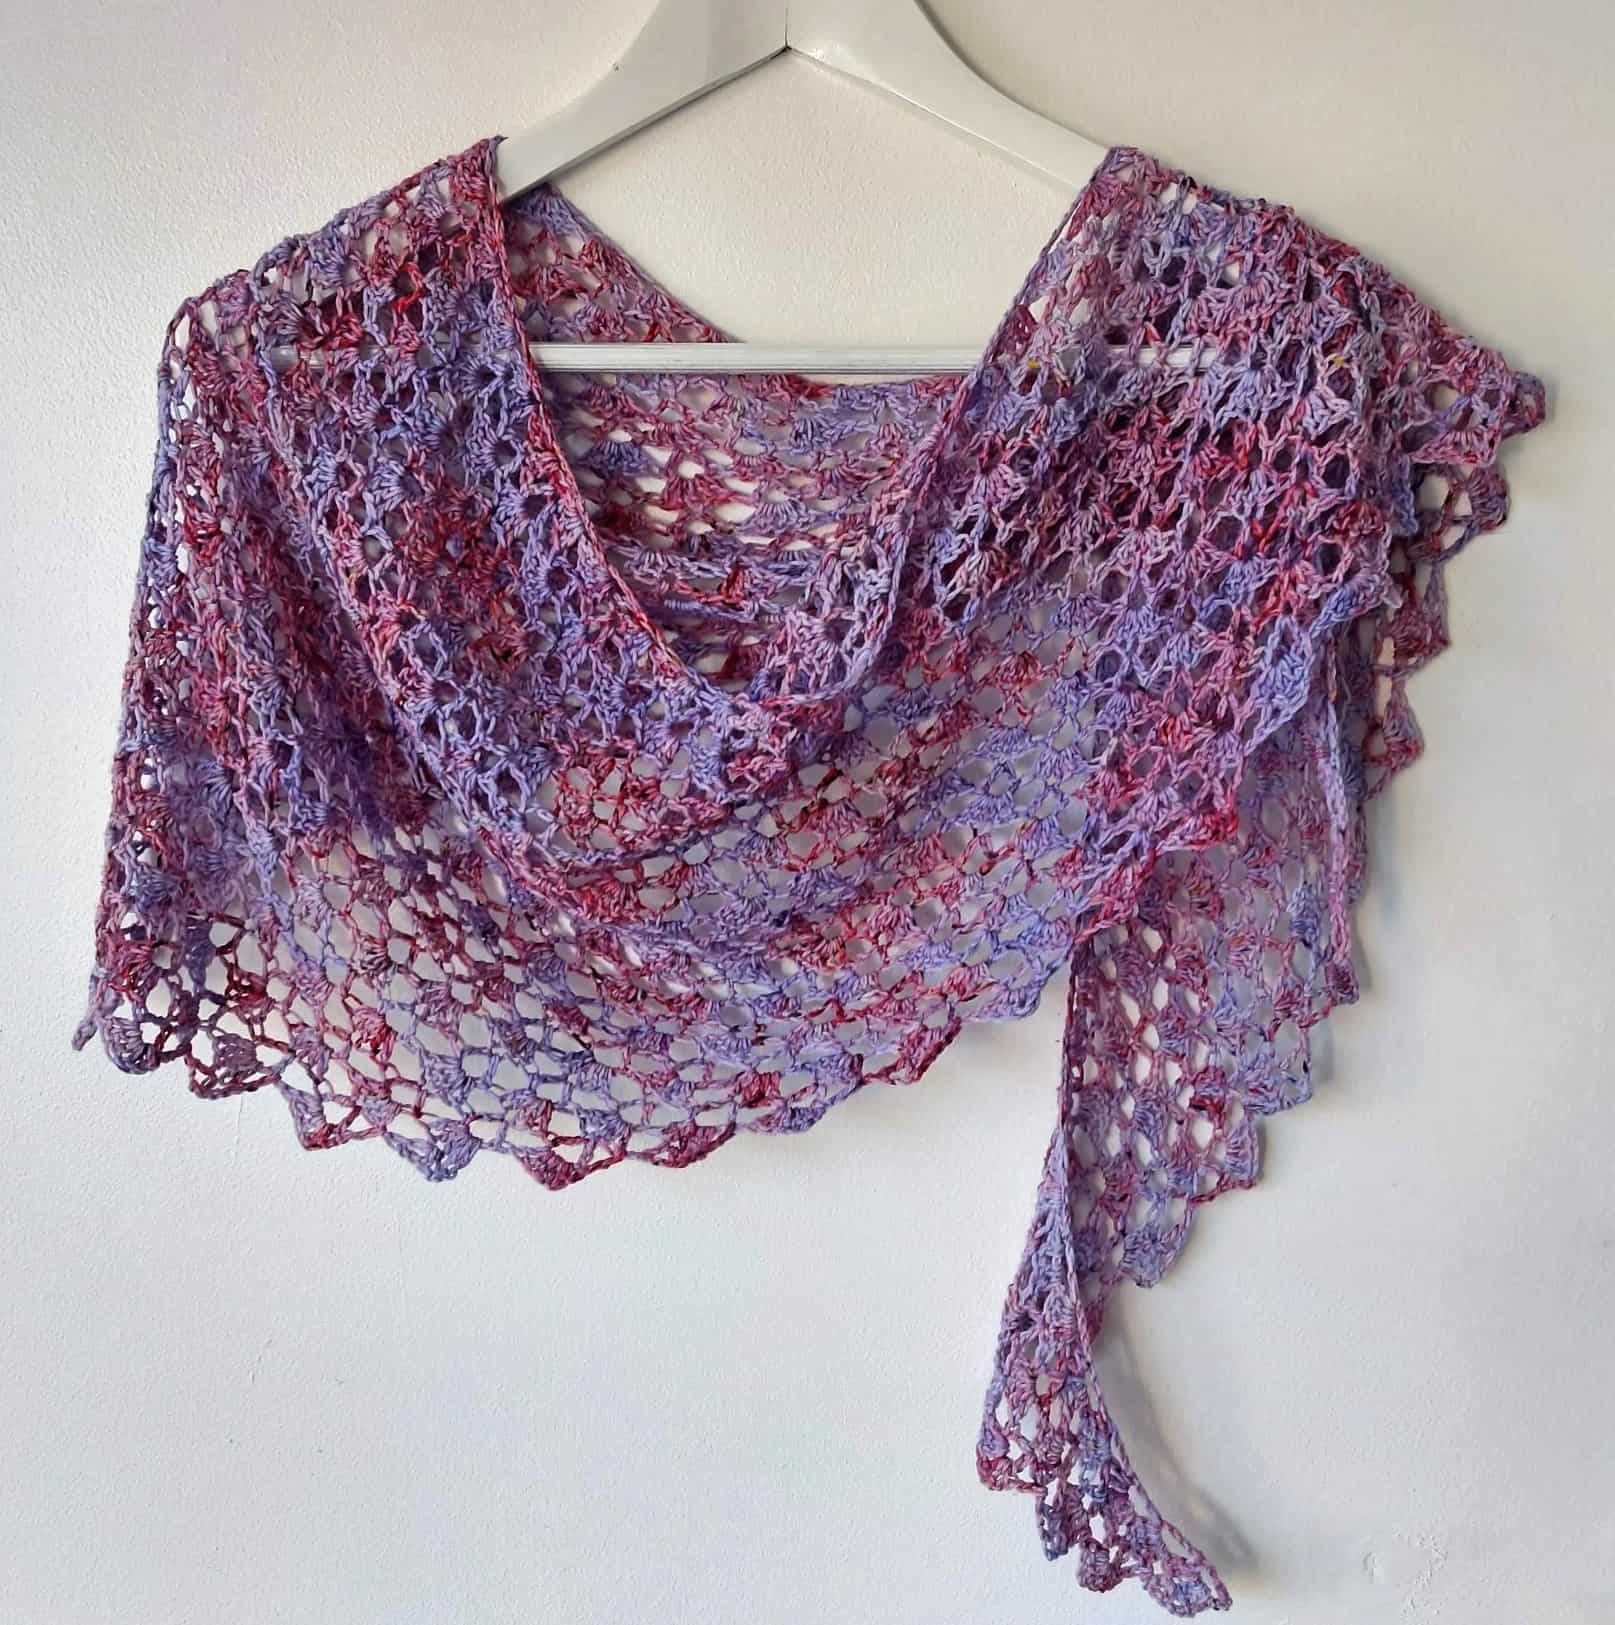
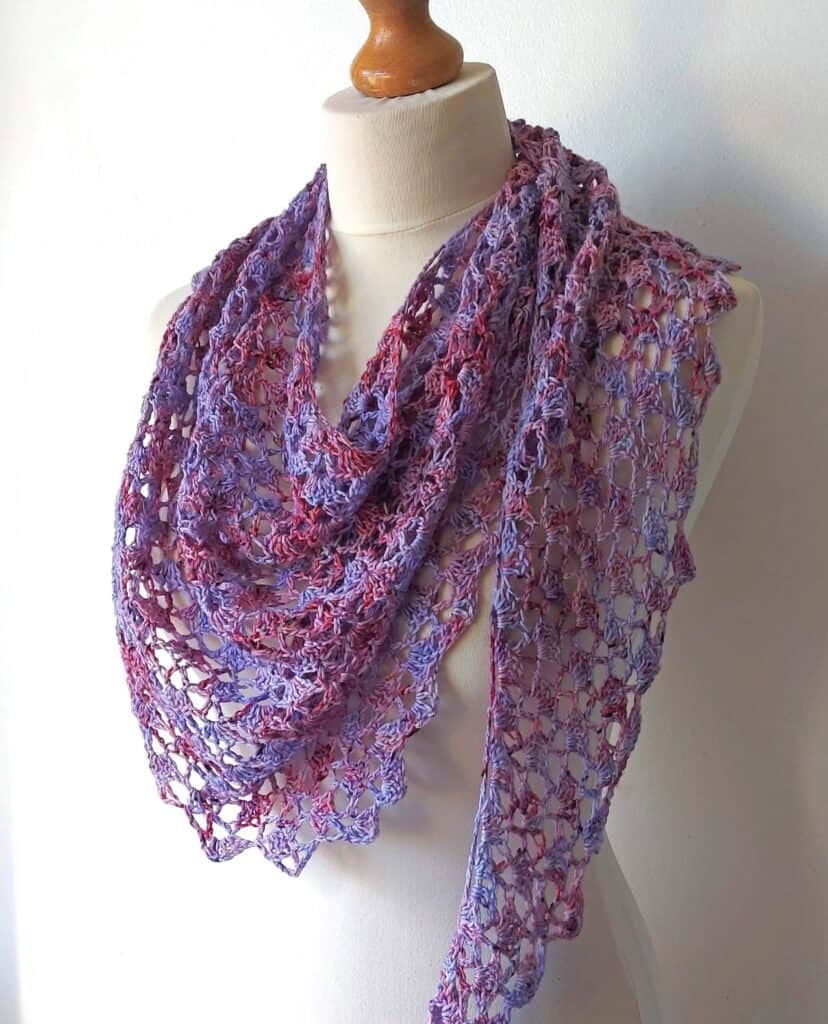
A very pretty shawl design with a lovely drape, using approx. 400m of fingering weight yarn. One beautiful skein of yarn is all that is needed to show off this asymmetrical shawl in an easy 4-row repeat pattern.
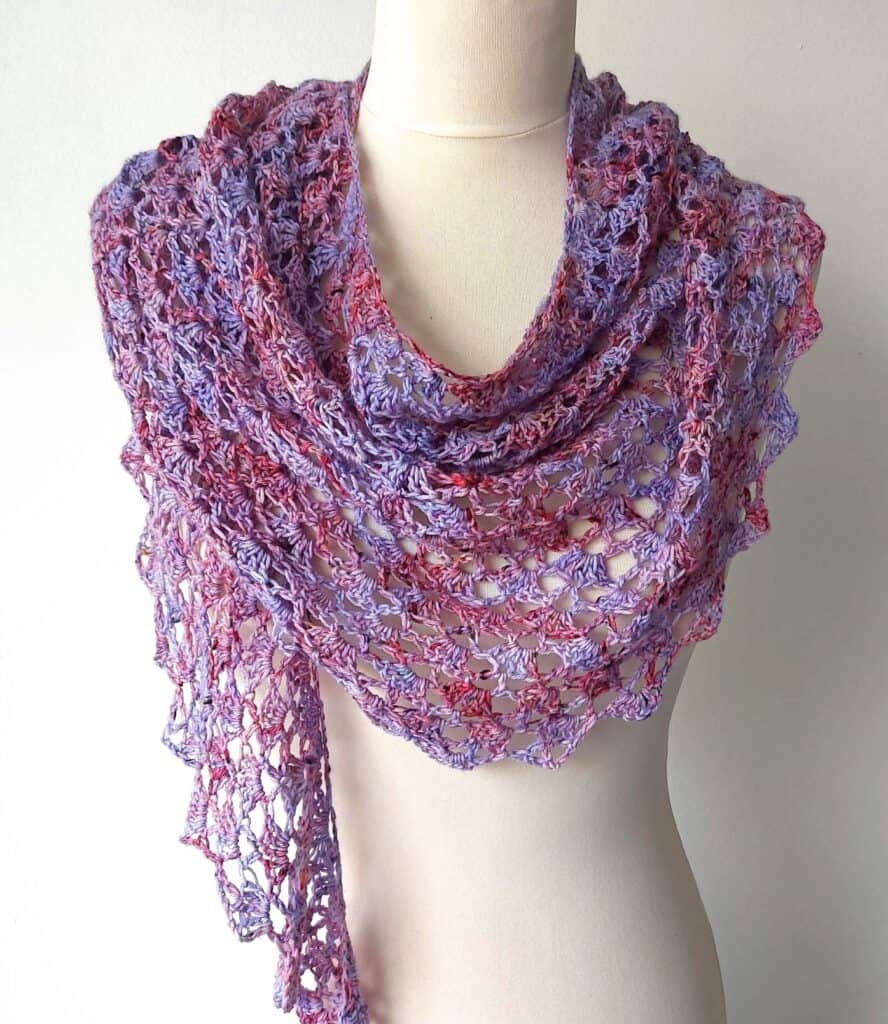
The shawl is perfect to wear as a light crochet scarf to add a pop of colour.
Made using basic crochet stitches that combine to create an interesting pattern, that is relaxing and quick to crochet.
Find the Free pattern below or you can purchase an ad-free PDF on Ravelry or Etsy
The Yarn
I had a beautiful skein of yarn from Life in the Long Grass an independent artisan dye studio in Co. Cork here in Ireland, just waiting to made into an Easy One Skein Crochet Shawl. Red Clover is the result!
The yarn has beautiful purple, lilac and red tones running through and like all colours from LITLG the combinations are meticulous and inspiring. I have more skeins in my stash and can not wait to create another design!
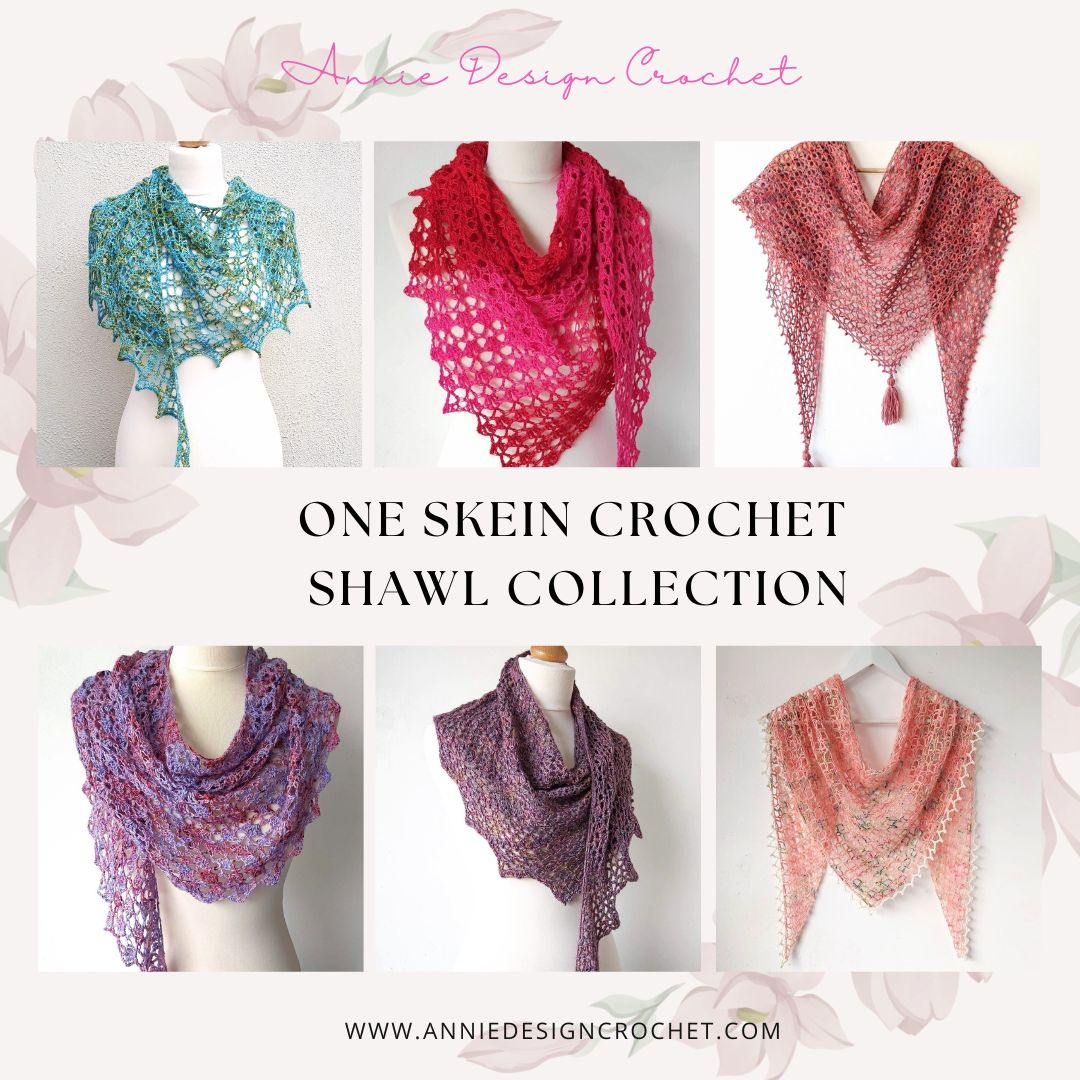
Purchase One Skein Crochet Shawl eBook
It contains 6 of my most popular one skein shawls!
One Skein Crochet Shawl Details
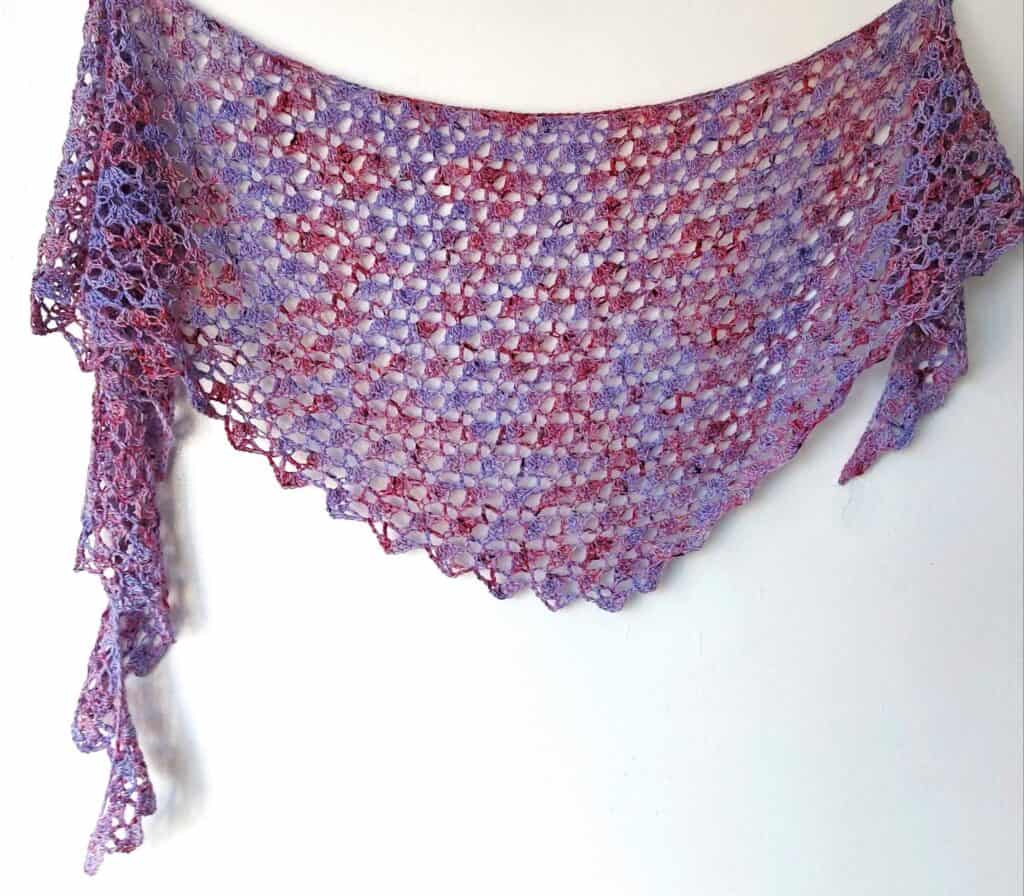
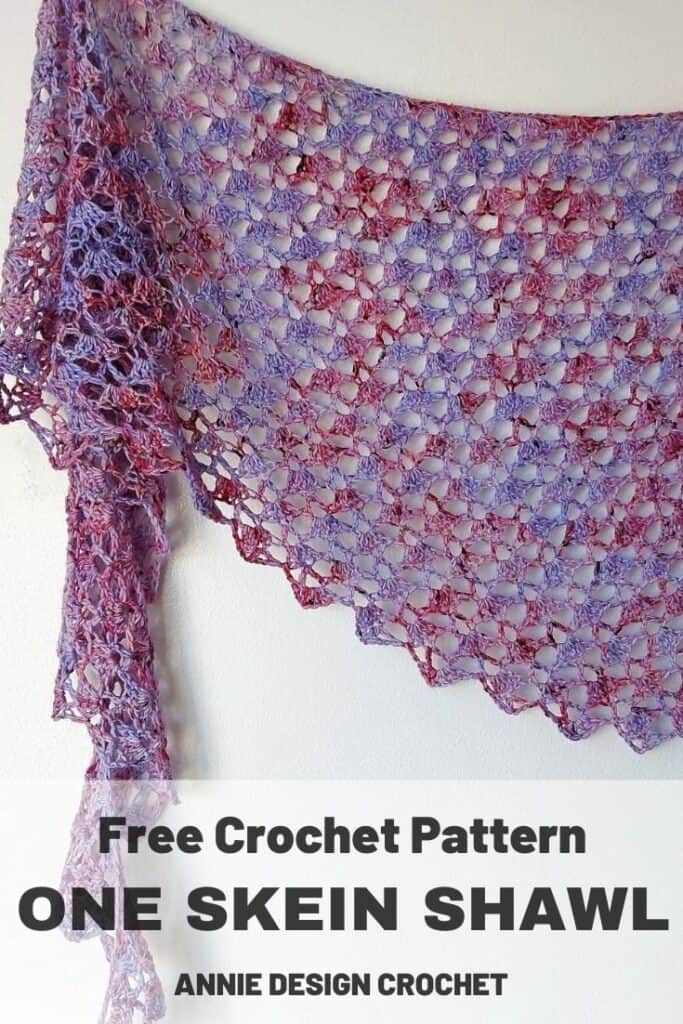
The shawl starts at one end working in rows, increasing each row on one side only, and decreasing in ‘steps’ every 2 rows on the other side, until the desired size is reached. Blocking is important to open up your lovely stitches.
The shape will naturally block with a gentle curve.
As always I have included some tips in the first 8 rows to help stitch placement. Once you have the 4-row pattern repeat established, the shawl will work up quickly!
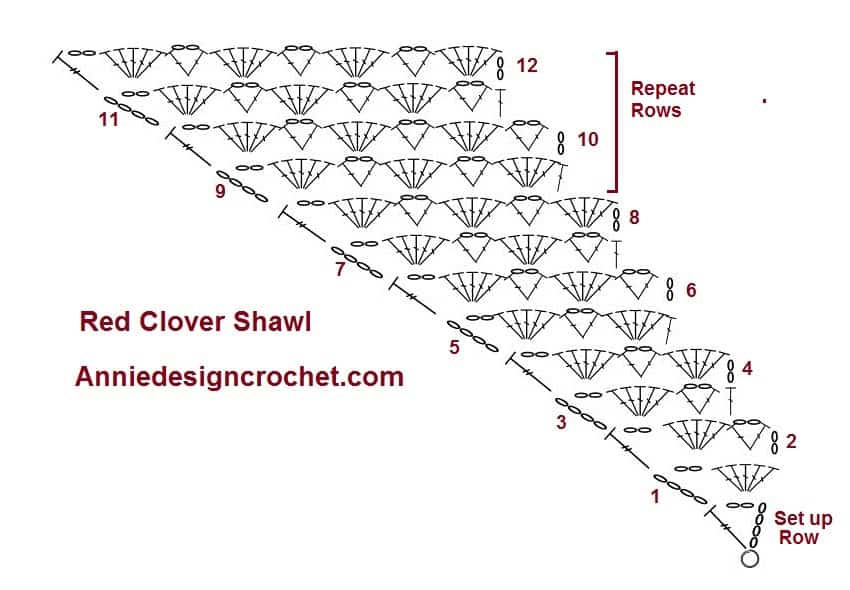
The pattern also includes a crochet chart which you can find below.
More Free Crochet Shawl Patterns
Check out the many Free Patterns for Crochet Shawls on my blog in all shapes and sizes! You may like this lovely lace crochet shawl, or this very popular one skein shawl that uses fingering weight yarn. Or this pretty crochet shawl in an asymmetrical shape.
Tendril shawl revisted uses a beautiful gradient yarn cake.
Find the Free pattern below or you can purchase an ad-free PDF on Ravelry or Etsy
Skill Level – Easy
Only basic stitches are used in this shawl but some concentration is required until the row increases are established.
Materials
- LITLG Life In The Long Grass: 4 Ply/fine sock – 75% SW Merino /25% Nylon – 100g/435m
- Colour – Saturn
- 4mm crochet hook
You can use approx. 400m of any fingering weight yarn or yarn weight of your choice and matching hook.
Measurements
Shawl pictured measures 68in [173cm] on the longest length and 17in [43cm] depth after blocking
Abbreviations
US crochet terms
- Beg beginning
- Ch chain
- St stitch
- Sc single crochet
- Dc double crochet
- Tr treble crochet
- Sp space
UK crochet terms
- Beg beginning
- Ch chain
- St stitch
- Dc double crochet
- Tr treble crochet
- Dtr double treble crochet
- Sp space
Notes (read carefully)
- Shawl starts at one end. Working in rows, increasing each row on one side only, and decreasing in ‘steps’ every 2 rows on the other side, until desired size is reached.
- Blocking is important to open up your lovely stitches. The shape will naturally block with a gentle curve.
- Ch 6 at beginning of a row counts as 1 tr and ch-2 throughout.
- Ch 2 at beginning of a row does not count as a stitch.
- The shawl can be made larger or smaller by working more or fewer pattern repeats. This will alter the amount of yarn required.
- Includes written instructions. .
- Gauge is not important. To achieve a light drape tension, I suggest make a swatch of the first 8 rows and see what hook size works best for you.
- I have included some tips in the first 8 rows to help stitch placement. Once you have the 4-row pattern repeat established, the shawl will work up quickly!
- Stitch counts (in Italics) are included at the end of the first 8 rows to help you.
- Stitch Chart included.
- Pattern is in US crochet trems.
Special Stitches
V – Stitch (v-st): [1 dc, ch 2, 1 dc]
Instructions for Easy One Skein Crochet Shawl
Make a magic ring
Set-up Row: Ch 6 (counts as 1 tr, ch 2), 1 tr in 6th ch from hook, turn – 2 tr, 1 x ch-2
Row 1: Ch 6 (counts as 1 tr, ch 2 here and throughout), 5 dc in next ch-2 sp (you insert your hook into the ch 6 of set-up row), turn – 1 tr, 5 dc, 1 x ch-2 sp
Row 2: Ch 2 (does not count as a st here and throughout), skip next 2 sts, v-st (see special stitches) in next st (centre dc of 5 dc from previous row), skip next 2 sts, [5 dc, ch 2, 1 tr] in last ch-2 sp (you insert your hook into the beg ch 6 of previous row), turn – 1 tr, 5 dc, 1 v-st, 1 x ch-2 sp
Row 3: Ch 6, 5 dc in 1st ch-2 sp, skip next 2 sts, v-st in next st, skip next 2 sts, 1 dc in next sp (between last 5 dc and next v-st), turn, leaving last v-st unworked – 1 tr, 1 v-st, 6 dc, 1 x ch-2 sp
Row 4: Ch 2, 5 dc in 1st v-st, skip next 2 sts (tip–when skipping sts, do not count dc from v-st), v-st in next st (centre dc of 5 dc from previous row), skip next 2 sts, [5 dc, ch 2, 1 tr] in last ch-2 sp turn – 1 tr, 1 v-st,10 dc, 1 x ch-2 sp
Row 5: Ch 6, 5 dc in 1st ch-2 sp, skip next 2 sts, v-st in next st, skip next 2 sts, 5 dc in next v-st, 1 dc in next sp (between last v-st and next 5 dc), turn, leaving last 5 dc unworked – 1 tr, 1 v-st,11 dc, 1 x ch-2 sp
Row 6: Ch 2, skip st at base of ch 2 and next 2 sts, v-st in next st, skip next 2 sts, 5 dc in next v-st, skip next 2 sts, v-st in next st, skip next 2 sts, [5 dc, ch 2, 1 tr] in last ch-2 sp turn – 1 tr, 2 v-st,10 dc, 1 x ch-2 sp
Row 7: Ch 6, 5 dc in 1st ch-2 sp, skip next 2 sts, v-st in next st, skip next 2 sts, 5 dc in next v-st, skip next 2 sts, v-st in next st, skip next 2 sts, 1 dc in next sp, (between last 5 dc and next v-st), turn, leaving last v-st unworked – 1 tr, 2 v-st,11 dc, 1 x ch-2 sp
Row 8: Ch 2, 5 dc in 1st v-st, skip next 2 sts, v-st in next st, skip next 2 sts, 5 dc in next v-st, skip next 2 sts, v-st in next st, skip next 2 sts, [5 dc, ch 2, 1 tr] in last ch-2 sp turn – 1 tr, 2 v-st,15 dc, 1 x ch-2 sp
You should now be getting familiar with the pattern. See image below for first 8 rows. The next 4 rows (rows 9-12) form the pattern repeat for the shawl.

Row 9: Ch 6, 5 dc in 1st ch-2 sp, * skip next 2 sts, v-st in next st, skip next 2 sts, 5 dc in next v-st; repeat from * across until 5 dc remain, 1 dc in next sp (between last v-st and next 5 dc), turn, leaving last 5 dc unworked.
Row 10: Ch 2, skip st at base of ch 2 and next 2 sts, v-st in next st, skip next 2 sts, * 5 dc in next v-st, skip next 2 sts, v-st in next st, skip next 2 sts; repeat from * across until last ch-2 sp, [5 dc, ch 2, 1 tr] in last ch-2 sp turn
Row 11: Ch 6, 5 dc in 1st ch-2 sp, skip next 2 sts, v-st in next st, skip next 2 sts, * 5 dc in next v-st, skip next 2 sts, v-st in next st, skip next 2 sts; repeat from * across until 1 v-st remains, 1 dc in next sp, (between last 5 dc and next v-st), turn, leaving last v-st unworked
Row 12: Ch 2, 5 dc in 1st v-st, skip next 2 sts, v-st in next st, skip next 2 sts, * 5 dc in next v-st, skip next 2 sts, v-st in next st, skip next 2 sts; repeat from * across until last ch-2 sp, [5 dc, ch 2, 1 tr] in last ch-2 sp turn
Rows 13 – 64: Repeat rows 9 – 12
You can make your shawl small or larger by working fewer or more pattern repeats. Make sure you finish on a row 12 of repeat
Final Row: Ch 6, * 5 dc in 1st ch-2 sp, skip next 2 sts, 1 sc in next st, skip next 2 sts; repeat from * across until 5 dc remain, skip next 2 sts, 1 sc in next st. Fasten off and weave in ends.
Finishing
Weave in all loose ends. Soak your shawl in lukewarm water and gently wring in a towel. Lay project out to finished size and pull gently into shape. It will curl in a slight angle. Pin in place and leave to dry. Take your time pinning the finished shawl…….it will make a huge difference to the finished piece!
Crochet Chart (rows 1 – 12)

You can purchase the ad-free PDF version of this pattern on Ravelry or on Etsy. The PDF is designed for printing. Thank you for your support!
Find more Free patterns here
If you make this pattern, don’t forget to follow me on Instagram and be sure to tag me in your photos so I can see it too, @anniedesigncrochet or #anniedesigncrochet – I can’t wait to see what colours you use with this pattern!
The photographs and pattern contained on this page are the property of Annie Design Crochet.com.
You are welcome to use this pattern to make items to sell, and I would appreciate that you include a link to the free pattern with credit for the designer, thank you!
No unauthorized reproduction, in whole or in part, or distribution of this pattern or content is permitted.

Could you possibly post a picture of the yarn you used? Or suggest yarns that may have a similar color variation? I love the way the colors come together in this shawl and I’d like to replicate it as closely as possible but I can’t purchase artisan yarn from Ireland.
It is a beautiful yarn and I understand. I can not find a link to the colour, it may be discontinued. I suggest you take a look on Etsy for hand dyed yarn to find something similar!
Hallo Carmen,
It’s a beautyfull design and i have a question what to do after row 64.
You scribe to do the final row, but it looks on the photo of the shawl that at the end you are decreasing? The shawl is following a spiral, maybe i’m looking strange to the photo and is the shawl enting in a point.
I think it is the final shape of the shawl that makes it look like that. The shawl has an asymmetrical shape when blocked:)
Do you have a tutorial of red clover
Do you mean a video tutorial? I don’t have a video for this pattern but it does have a crochet chart
Hello. And oh dear! I am muddled on row 9 of Red Clover Shawl. As I work the pattern across (basically alternate 5 dcs & v-stitches) I’m stuck when I reach the point where the previous row ended with the ch2 & treble, which seems to make it look as if the space created after the 5dcs is another v-st. Do I treat it as such? I tried working across it to the last 5dc, as per your instructions, but the work then’bumps up’ rather than being flat.
I’m so sorry. I hope this makes sense & that you can help.
Rita
Hi Rita. Sorry for delay! Can you follow the crochet chart? It will really help you locate where to place your hook. You end the row in the space created by the ch 2 + treble (ch 6) from the previous row. You will work 5 dc, ch 2, 1 tr in that space. I hope it works out for you!
Thank you..I gave up and bought another of your patterns (copper beach) and I’m learning a bit more about how the shape grows…. It’s an easier pattern, I think, and I’m grasping it better. I’ll then have another go with your red clover pattern, and will definitely try to get an idea of how the chart works. With a bit of practice, I’ll succeed. If not, I’ll come back to you for further guidance.
Best regards and more thanks for your reply and comments.
Rita
Thanks so much Rita! Once you get the hang of a chart, it is much easier!
I just love your designs esp the 1 skien ones. Thank you so much for sharing your skills and creativity with us. Your designs are so well put together- the pattern, photos and charts are all easy to follow ( once you get the hang of them) and they help me make exceptional shawls and my only struggle is when j have to give them away !
Aww thank you so much!
Hello ! Sorry if my english is not very good, but I m french 😅.
My question is when I have to repeat rows 9-12, Must I make the same number of stitches and the shawl will increase or must I increase numbers of stitches ? For exemple In row 13 should I have 4 shells or 3 shells like in row 9 ? (I think it s 4 shells but I m not sure, I m sorry If my question is stupid 😅).
Have a good day !
Hi! Can you use the crochet chart provided with the pattern? I think you would find it very helpful:)
How is a magic circle done?
Hi! The best place to learn is to do a search on YouTube:)