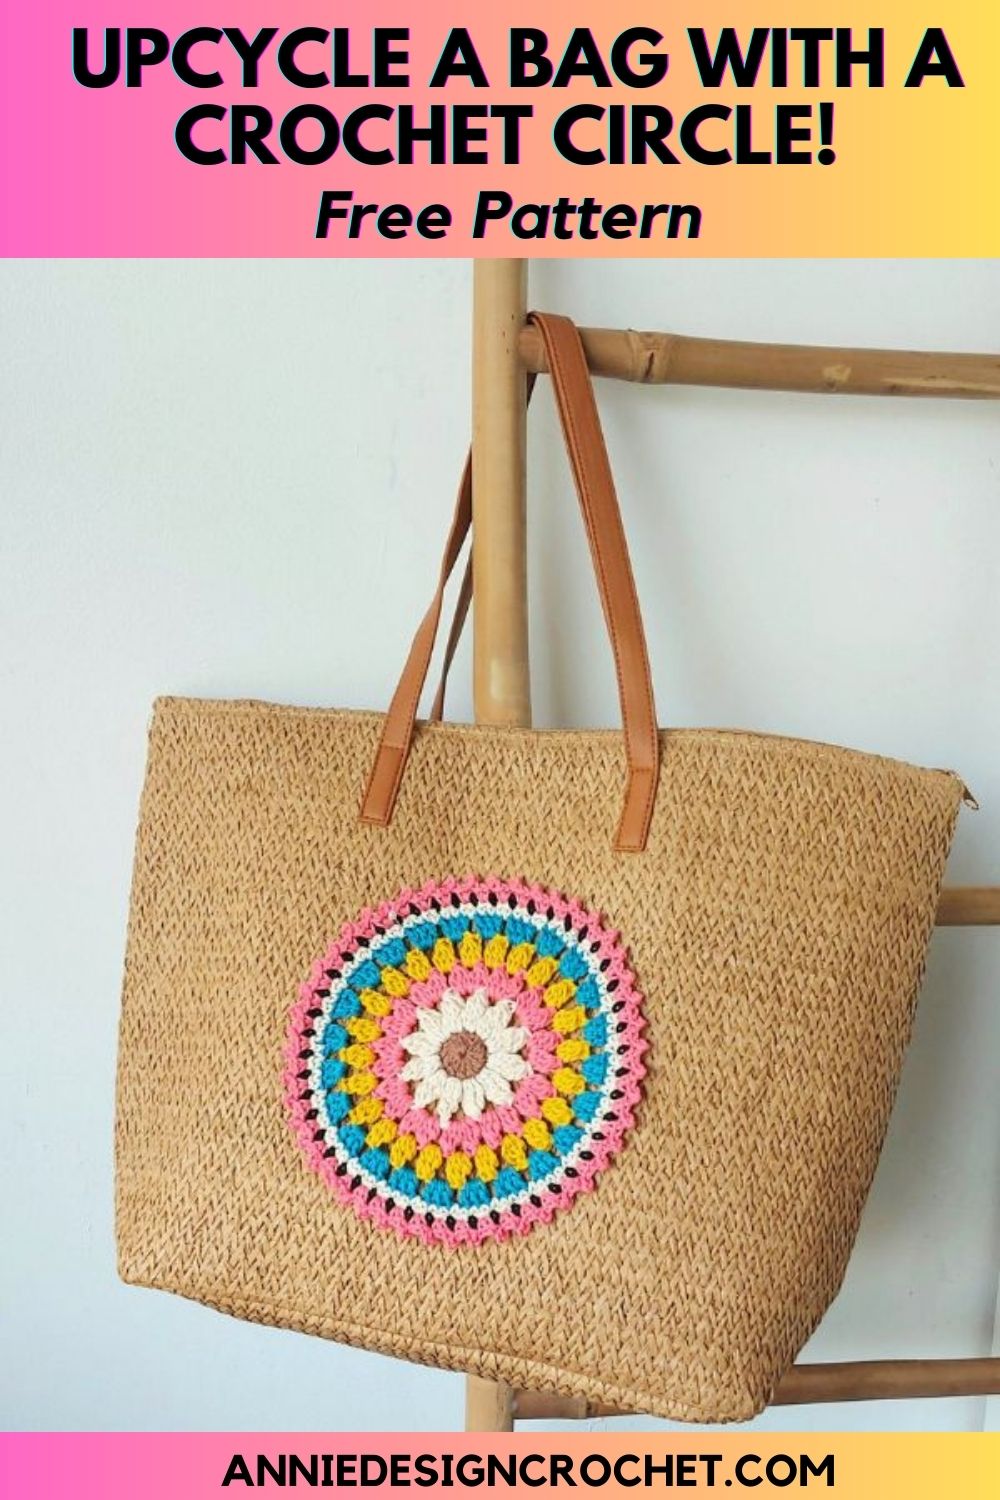
Upcycle a bag with a crochet circle for a fun and eco-friendly accessory that’s perfect for summer.
With this easy-to-follow pattern, and some scraps of yarn from your stash, you’ll have this crocheted in no time!
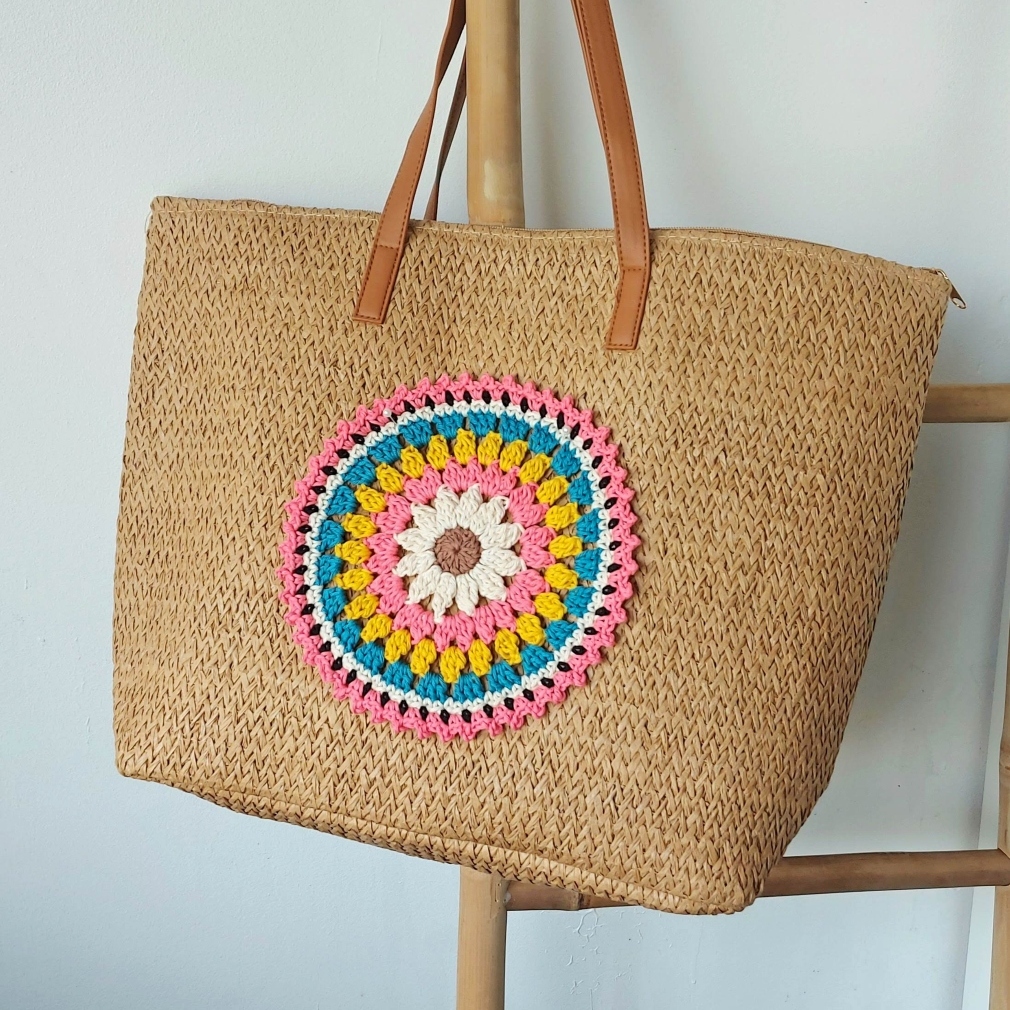
You can choose to repurpose a bag you already have at home or use a store-bought bag. This easy project with its eye-catching details, is the perfect bag for anyone who wants to make a statement!
Get the Free Pattern below including details how to attach the crochet circle to a bag, or purchase the adfree printable PDF on Ravelry and Etsy
Benefits of Upcycling a Shop Bought Bag
Not only is upcycling a market bag with crochet a great way to reduce waste and personalize your accessories, but it also makes for a fun and creative FAST crochet project!
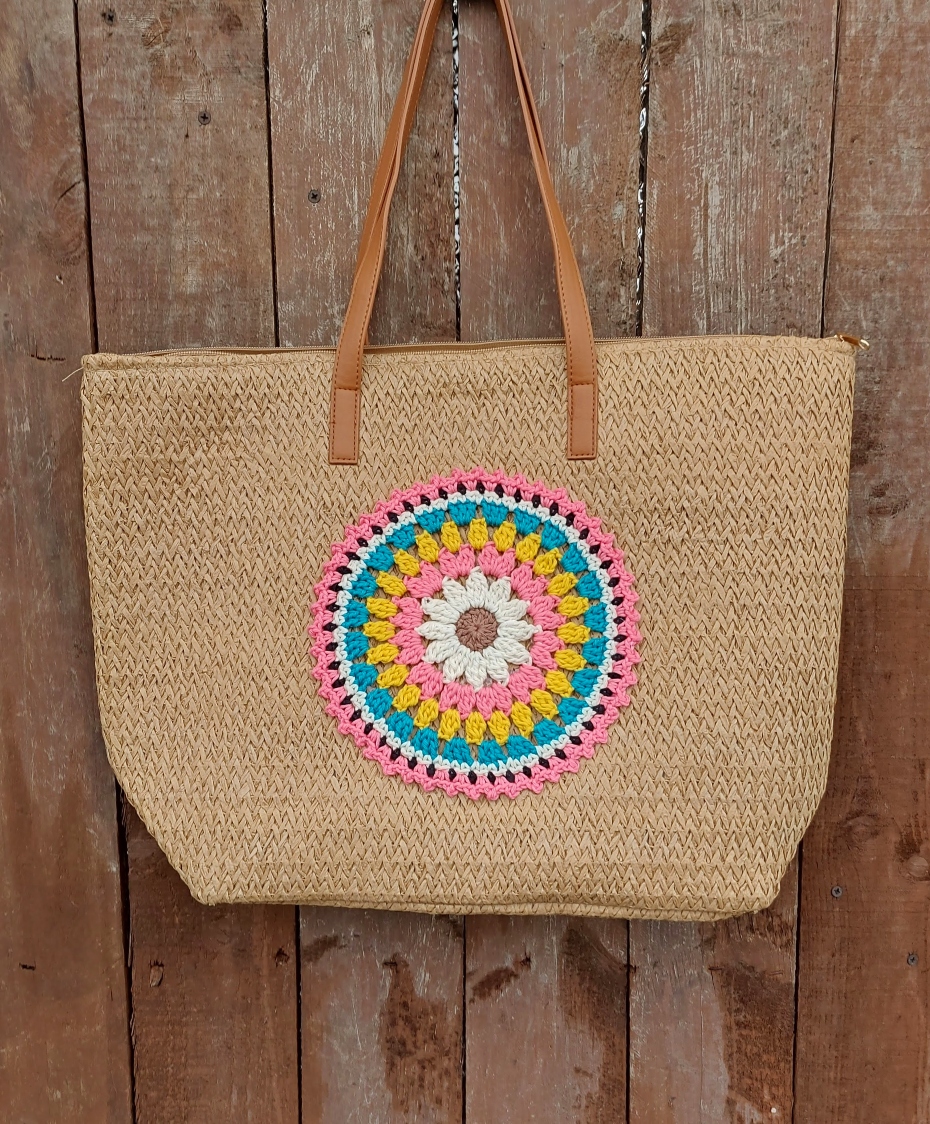
A crochet circle motif will add color, texture, and even cover up imperfections on your bag.
And if you’re feeling extra creative, why not make two circles and attach one to the opposite side? Consider adding other embellishments like tassels or pom-poms to give your bag an extra flair.
You could also upcycle your market bags and reduce the need for plastic bags when you go shopping!
Crochet Circle Patterns
There are many other patterns for crochet circles on my blog that you could add to your bag to make it unique and eye-catching. For instance, you could use my crochet mandala pattern, which is more lacy and intricate and would be the perfect size for a larger bag.
This pattern for a crochet doily only uses double crochet stitches and would look stunning attached to a canvas bag.
Yarn
I recommend Cotton Yarn for best results. Cotton is durable and easy to wash and dry, and also holds its shape well.
It also absorbs spills and any dampness and can manage high temperatures.
I used a DK weight cotton yarn for my crochet circle but you could use a worsted weight yarn and larger crochet hook if you wish to make a larger circle.
Alternatively, a cotton blend yarn can work just as well.
PIN FOR LATER
What Kind of Bags are Suitable to Upcycle with Crochet?
- Canvas tote bags: These are popular choices for upcycling because they’re affordable, sturdy, and come in a variety of colors and sizes, including circle bags.
- Backpacks: If you have an old backpack that’s still in good condition but could use a little sprucing up, add a crochet circle for a fresh new look
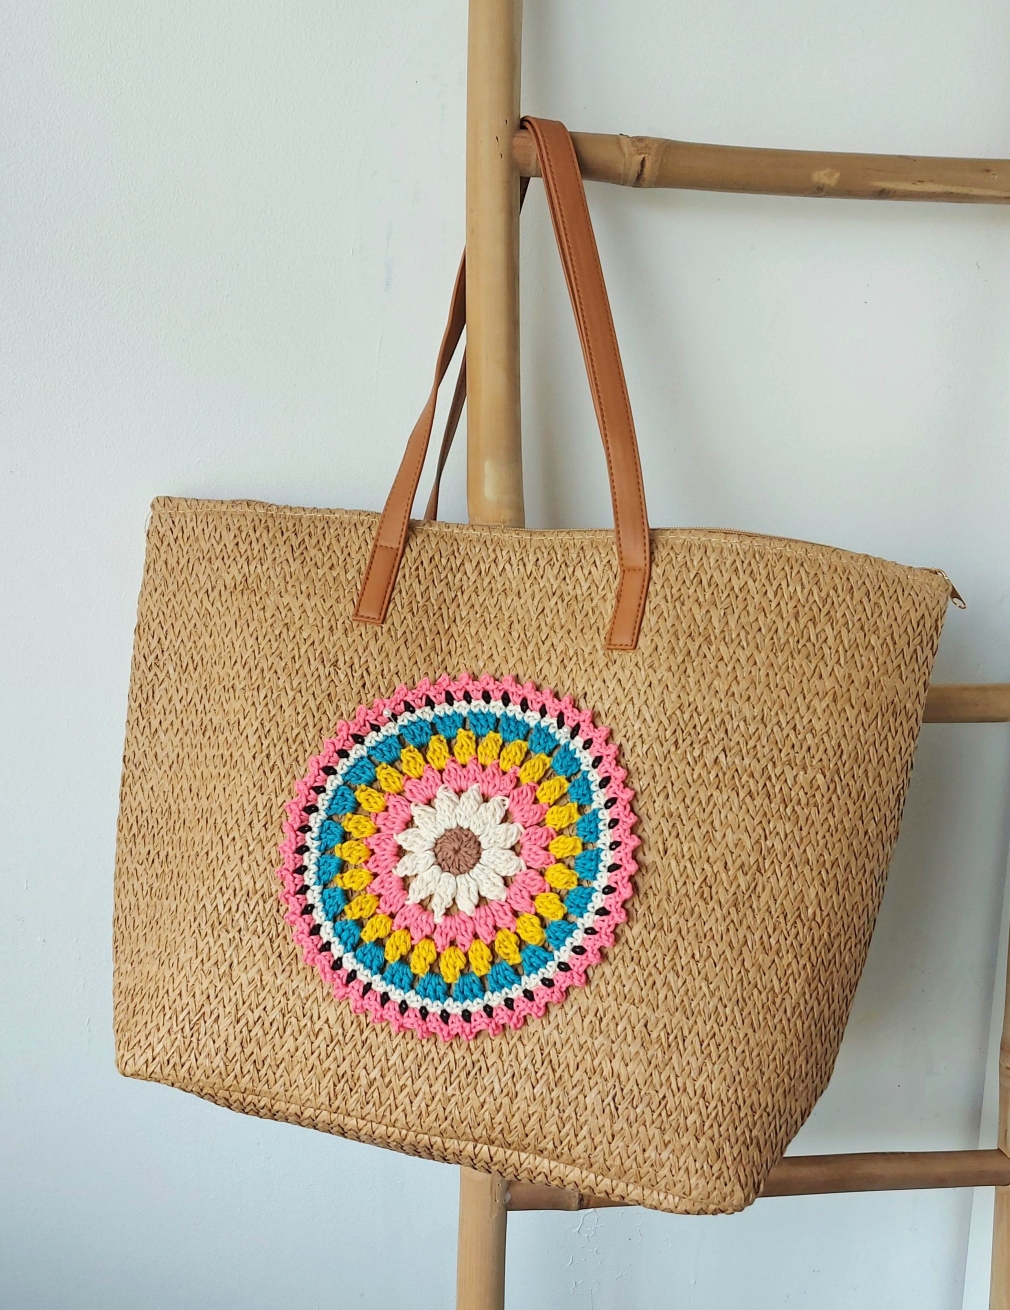
- Straw bags: Enhance your farmers market bag with a vibrant crochet motif and reduce the need for plastic bags when you go shopping
- Beach bags: Upcycling a plain bag with a crochet circle can give it a fun, bohemian vibe for beach day!
- Messenger bags: Breathe new life into a worn-out messenger bag by adding a crochet circle.
How to Crochet the Circle Details
Skill Level
Only basic stitches are used in this pattern. Stitches include treble crochet, double crochet and single crochet stitches
This pattern is in US Crochet terms
Materials
- Small amounts of DK weight cotton yarn in your chosen colours.
- Bag for upcycling
- 4mm Crochet Hook
- Yarn Needle to weave in threads
- Scissors
You can use a yarn weight of your choice and matching hook size (cotton recommended)
Measurements
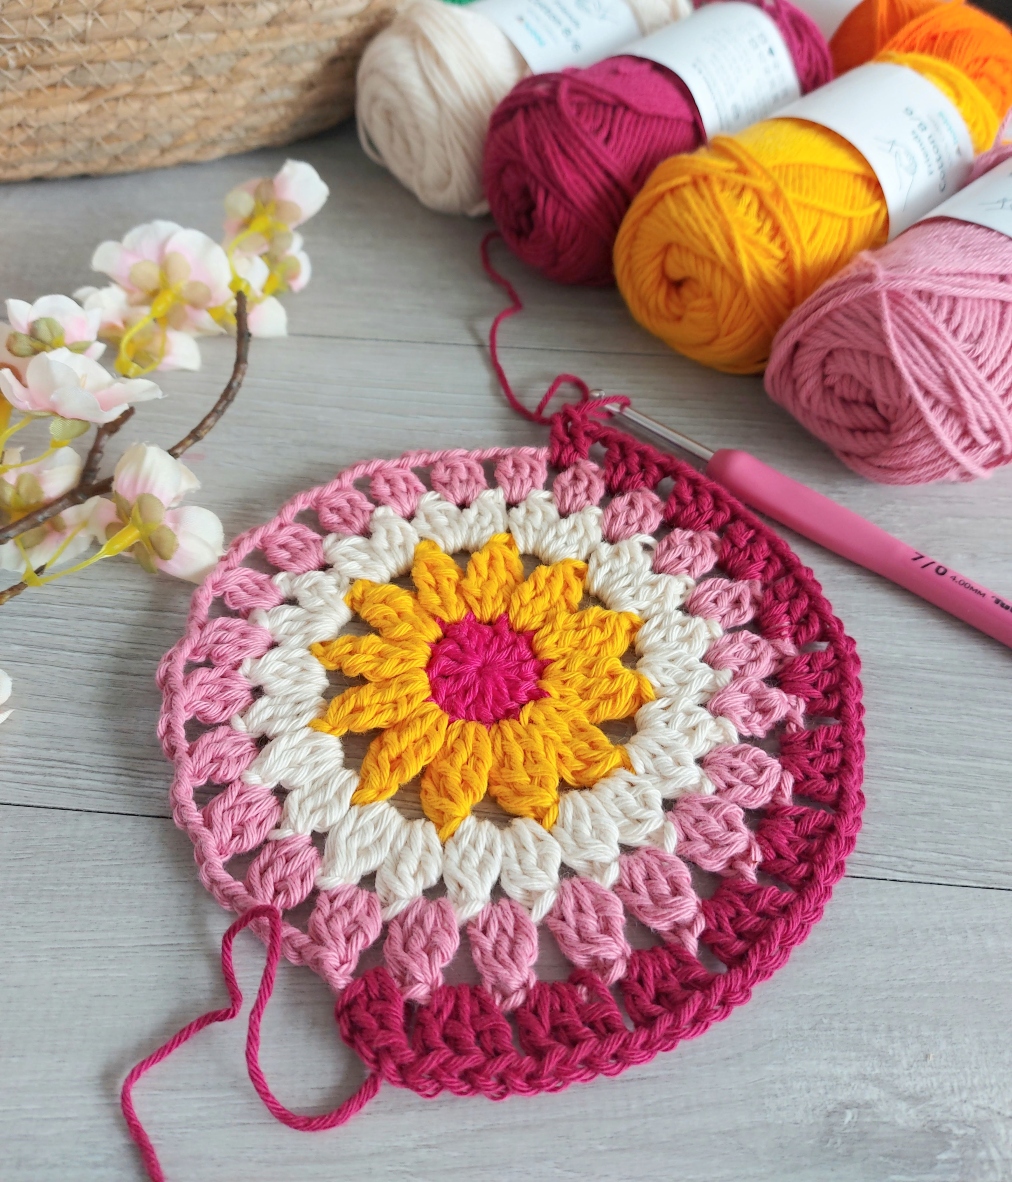
Circle in picture is approx. 8in [20cm] in diameter when using the suggested yarn weight and hook.
Abbreviations
Sl st – slip stitch
Ch – chain
Sc – single crochet
Dc – double crochet
Tr – treble crochet
Yo – yarn over
Beg – beginning
St – stitch
Sp – space
Ch-sp – chain space
Dc2tog – double crochet 2 together
Dc3tog – double crochet 3 together
Tr2tog – treble crochet 2 together
Tr3tog – treble crochet 3 together
Special Stitches
Double crochet 2 together (dc2tog): In indicated sp, work (yo, insert hook in sp, yo and pull up loop, yo and pull through 2 loops on hook) twice, yo and pull through all 3 loops on hook.
Double crochet 3 together (dc3tog): In indicated sp, work (yo, insert hook in sp, yo and pull up loop, yo and pull through 2 loops on hook) 3 times, yo and pull through all 4 loops on hook.
Treble crochet 2 together (tr2tog): In indicated st, work (yo hook twice, insert hook into st, yo and pull up loop, yo and pull through 2 loops, yo and pull through 2 loops) two times, yo and pull through all 3 loops on hook.
Treble crochet 3 together (tr3tog): In indicated st, work (yo hook twice, insert hook into st, yo and pull up loop, yo and pull through 2 loops, yo and pull through 2 loops) three times, yo and pull through all 4 loops on hook.
Picot: Ch 2, sl st in 2nd ch from hook
Notes
- Ch 3 at the beginning of a round counts as 1 dc
- Ch 1 at the beginning of a round does not count as a stitch
- If your circle appears to pucker after round 5, don’t be concerned as it will flatten well for the final rounds.
Get the Free Pattern below including details how to attach the crochet circle to a bag, or purchase the adfree printable PDF on Ravelry and Etsy
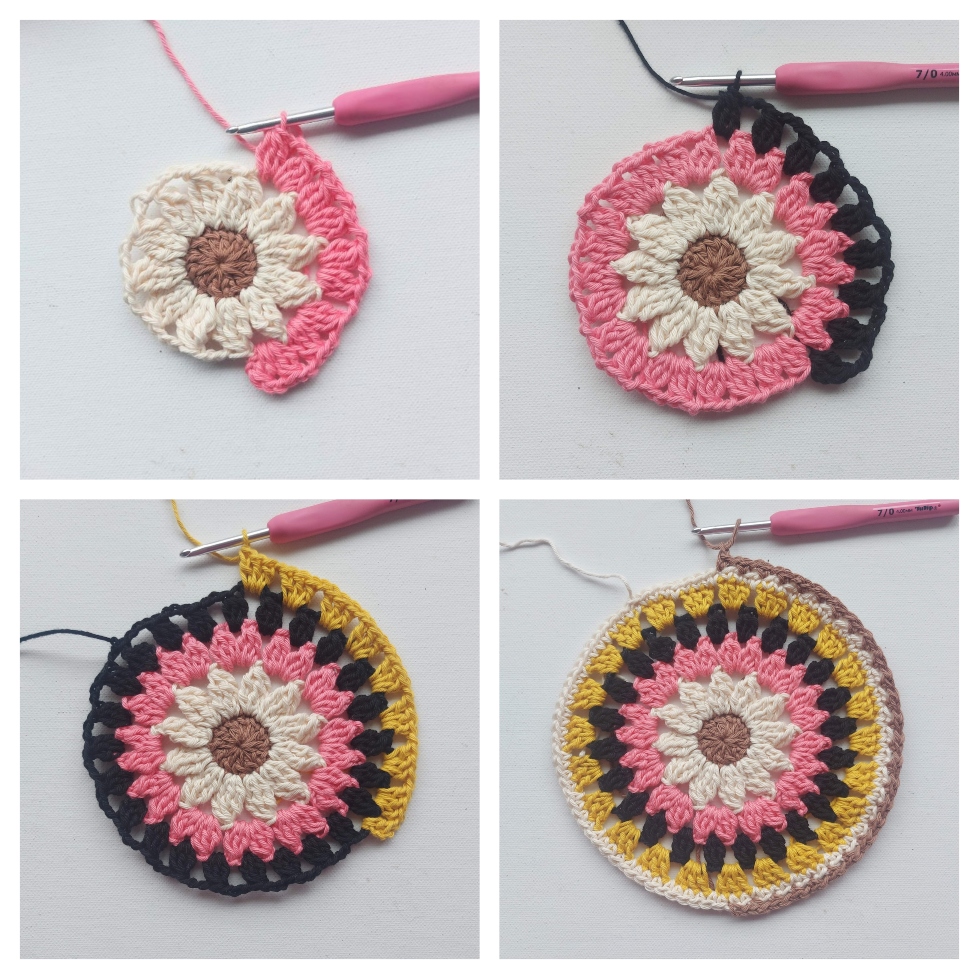
Instructions for Crochet Circle Pattern
Make a magic circle
Round 1: Ch 3 (counts as 1 dc here and throughout at beg of a row)), 11 dc into ring. Join with a sl st in top of beg ch 3. Tighten ring and fasten off yarn – 12 dc
Round 2: Join yarn in any st, ch 4, tr2tog in same st (counts as 1 tr3tog), ch 3, * tr3tog in the next st, ch 3; rep from * around. Join with a sl st in 1st ch-3 sp. Fasten off yarn – 12 x tr3tog, 12 x ch-3 sp
Round 3: Join yarn in any ch-3 sp, ch 3, dc2tog (counts as 1 dc3tog), ch 2, dc3tog in same sp, ch 2, * [dc3tog, ch 2, dc3tog, ch 2] in the next ch-3 sp; rep from * around. Join with a sl st into 1st ch-2 sp. Fasten off yarn – 24 x dc3tog, 24 x ch-2 sp
Round 4: Join yarn in any ch-2 sp, ch 3, dc2tog in same sp (counts as 1 dc3tog), ch 3, * dc3tog, ch 3 in the next ch-2 sp; rep from * around. Join with a sl st into 1st ch-3 sp. Fasten off Yarn – 24 x dc3tog, 24 x ch-3 sp
Round 5: Join yarn in any ch-3 sp, ch 3, 2 dc in same sp, ch 1, * 3 dc in the next ch-3 sp, ch 1; rep from * around. Join with a sl st to beg ch-3. Fasten off yarn – 24 x 3 dc groups, 24 x ch-1 sp
Round 6: Join yarn in any st from round 5, ch 1, 1 sc in same st, work 1 sc in each st and ch-1 sp around. Join with a sl st to beg sc. Fasten off yarn – 48 sc
Round 7: Join yarn in any st from round 6, ch 1, 1 sc in same st, ch 1, * skip 1 st, 1 sc in next st, ch 1; rep from * around. Join with a sl st to beg sc. Fasten off yarn – 24 sc, 24 x ch-1 sp
Round 8: Join yarn in any ch-1 sp from round 7, ch 1, 2 sc in same sp, picot (see special stitches), * 2 sc in next ch-1 sp, picot; rep from * around. Join with a sl st to beg sc. Fasten off yarn – 48 sc, 48 picot
Finishing
Weave in all threads. You can lightly block your circle if you wish, by gently hovering a steam iron over it. Leave to dry.
How to Attach The Crochet Circle to the Bag
After you have finished crocheting your circle, it’s time to attach it to the front of the bag.
You can do this in 2 different ways. I used the hot glue gun method for my bag.
Method 1
- If your bag is a light cotton tote bag, or a crochet market bag you made yourself, it may be suitable to sew your crochet circle with yarn and needle
- Thread your tapestry needle with the same yarn you used to crochet the circle.
- Place the circle on the right side of the bag where you want it to be attached and place a few pins to hold in place.
- Starting from the back of the bag, insert the needle through both the bag and the circle.
- Bring the needle back up through the bag and the circle, making sure to keep the yarn taut.
- Repeat this process, working your way around the circle, until it is securely attached to the bag.
- When you have finished, fasten off the yarn on the inside of the bag and weave in the ends.
Method 2
- Lay your bag flat on a table or work surface, and position your crochet circle where you want it to be attached.
- Apply a small amount of hot glue to the back of the crochet circle, focusing on the outer edge.
- Quickly press the crochet circle onto the front of the bag, making sure it’s centered and straight.
- Hold the crochet circle in place for a few seconds to allow the glue to set.
- Allow the glue to dry completely before using the bag.
Happy Crocheting!
Don’t forget to follow me on Instagram and be sure to tag me in your photos so I can see it too, @anniedesigncrochet or #anniedesigncrochet – I can’t wait to see what colours you use with this pattern!
The photographs and pattern contained on this page are the property of Annie Design Crochet.com.
You are welcome to use this pattern to make items to sell, and I would appreciate that you include a link to the free pattern with credit for the designer, thank you!
No unauthorized reproduction, in whole or in part, or distribution of this pattern or content is permitted.
Bonjour,
Merci beaucoup pour les explications, même si je ne comprends pas l’anglais, quel dommage !
Mais avec les photos, cela va mieux.