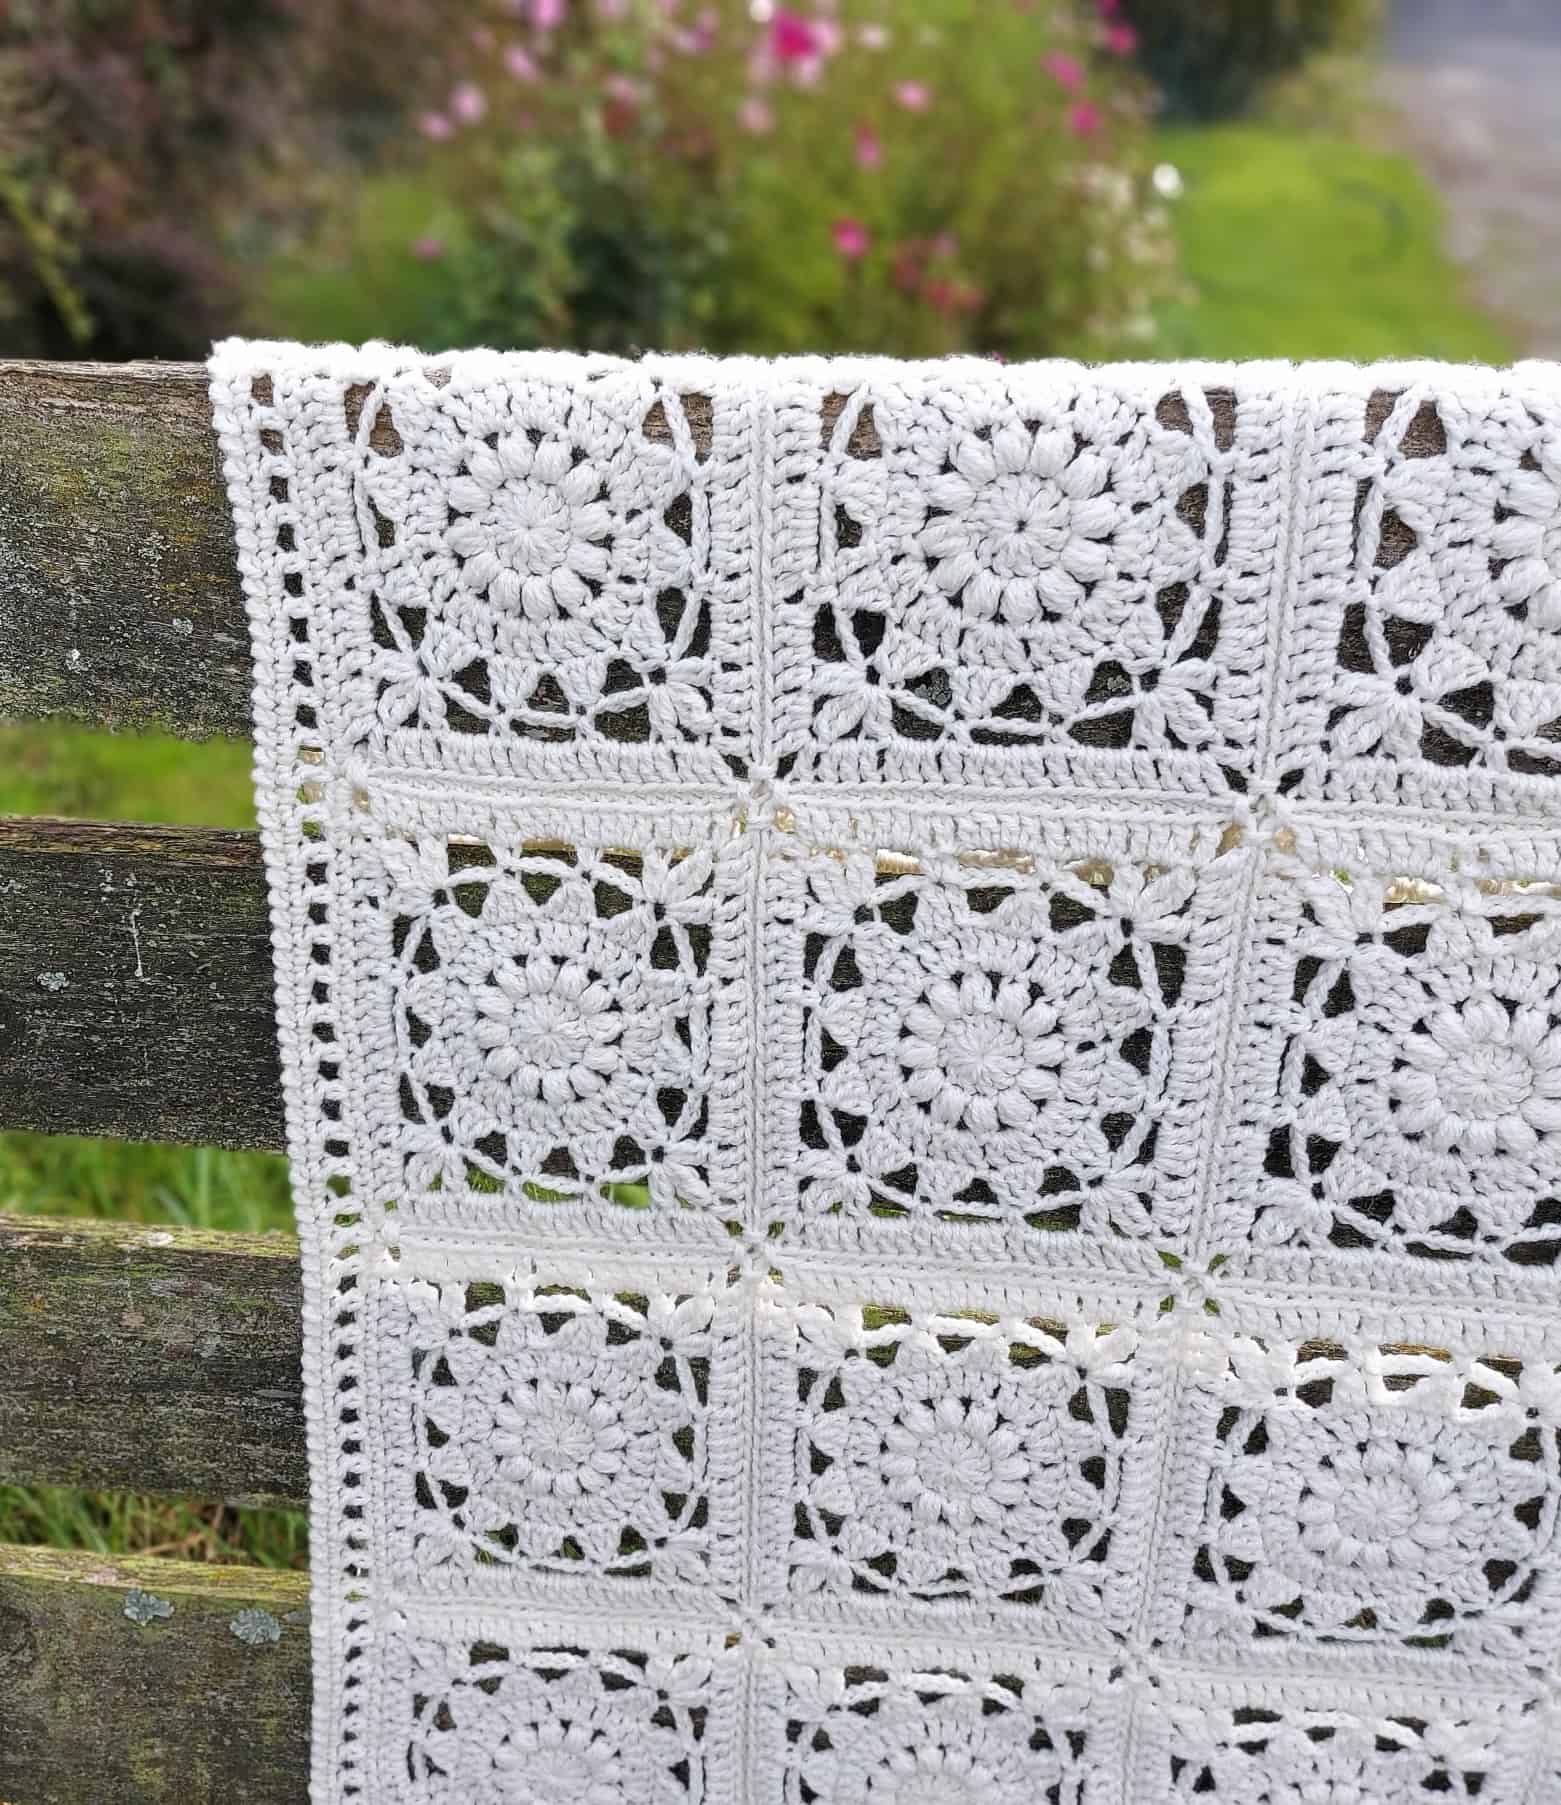
A Vintage-Inspired Crochet Flower Blanket with square motifs that remind me of sweet nostalgic Edelweiss flowers!
I have always loved the Primula Square that I designed for the Blaithin Blanket Stash Busting CAL last year, and when I tried the pattern in a single colour – I fell in love with the beautiful flower it created!
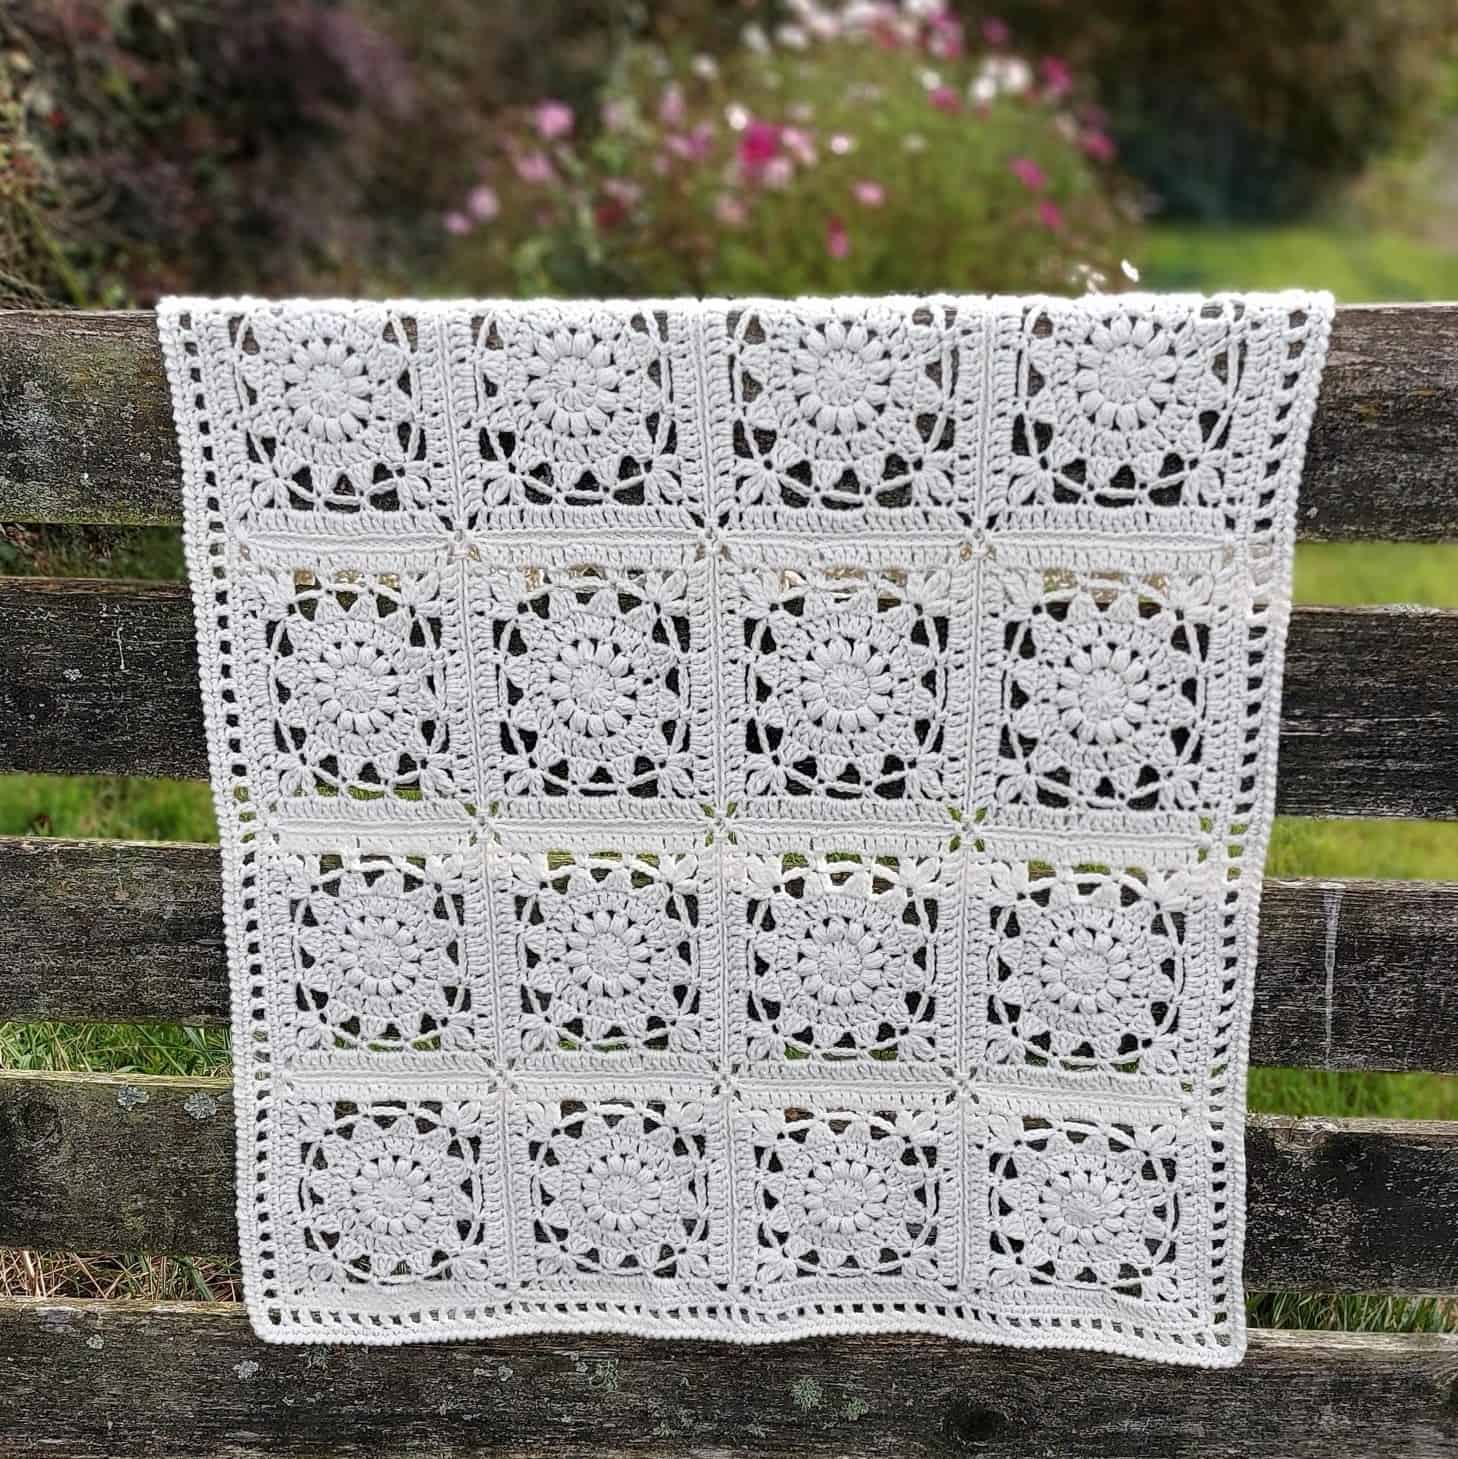
Today I an sharing a cot sized Baby Crochet Blanket which would make a beautiful gift for any new parent. The cream yarn is fresh and neutral, and the Worsted Weight yarn makes this blanket cosy and warm.
More Crochet Blanket Patterns
You might like to take a look at my other crochet blanket patterns, including many beautiful flower squares, all available for free here on my blog! You may enjoy the flower granny square as an option for a blanket as well.
Including Vintage Blooms a beautiful Flower Crochet Blanket with a pretty lacy floral square. And this pretty Daisy Granny baby blanket. Or if you enjoy neutral shades, you may enjoy Oisin crochet baby blanket.
Yarn Details for Crochet Flower Squares
The total meterage of the yarn I used in my blanket is 800m which was 4 x 100g balls of Worsted Weight yarn. You can use any Worsted Weight (Aran weight) yarn to make this blanket that is the given size below.
You can also use a different yarn weight to make a smaller or larger blanket, using a matching hook – bear in mind your yardage requirements will vary.
Or you can make a larger blanket by making more flower squares. It is an easy pattern and I have included a link to a step by step picture tutorial for the square below if you need it.
How to get the Pattern for the Crochet Flower Blanket
- Free Pattern: Scroll down this blog post for the Instructions
- Printable PDF: Adfree printable pattern with 5 pages including all details. Thank you for your support! – Purchase on Ravelry and also on Etsy

Materials
- Approx. 4-6 x 100gr balls of Worsted Weight yarn (approx. 800-1000m) As yarns will vary, you should check your meterage first.
- 6.00mm Crochet Hook
- Stitch markers (optional)
- Scissors
- Darning needle
Abbreviations
US Crochet Terms
- sc single crochet
- dc double crochet
- tr treble crochet
- ch chain
- sl st slip stitch
- st stitch
- rep repeat
- beg beginning
Measurements
Blanket shown has 20 squares in total, 4 squares per row and 5 squares per column and measures 33 x 42 inches [84cm x 107cm]
Each square measures 7.5” [19cm]
Special Stitches (read carefully)
- Puff Stitch (PS): YO and insert hook in indicated stitch and pull up a loop to the height of a hdc, (yo and insert hook in same st and pull up a loop) 3 times in total, yo and pull through all 9 loops.
The following stitches are used in round 4
- Double crochet 2 together (dc2tog) worked over 2 sts: In indicated st, work (yo, insert hook in st, yo and pull up loop, yo and pull through 2 loops on hook) 2 times, yo and pull through all 3 loops on hook.
- Double crochet 3 together (dc3tog) worked over 3 sts: In indicated st, work (yo, insert hook in st, yo and pull up loop, yo and pull through 2 loops on hook) 3 times, yo and pull through all 4 loops on hook.
The following stitches are used in round 5
- Double crochet 2 together (dc2cl) cluster: In indicated space or st, work (yo, insert hook in space/st, yo and pull up loop, yo and pull through 2 loops on hook) twice, yo and pull through all 3 loops on hook.
- Treble crochet 2 together (tr2cl) cluster: In indicated space or st, work (yo hook twice, insert hook into space/st, yo and pull up loop, yo and pull through 2 loops, yo and pull through 2 loops) twice, yo and pull through all 3 loops on hook.
- Crab Stitch (Reverse SC): Moogly has an excellent video here Crab Stitch
Instructions for Edelweiss Crochet Flower Blanket
Square (make 20)
You can find a step by step picture tutorial for this square in the link below:
Primula Square
Using 6mm hook, make a magic ring.
Round 1: Ch 3 (counts as 1 dc), 11 dc in magic ring, join with a sl st to top of beg ch 3. Pull ring tight to close – 12 dc
Round 2: Make [1 PS, ch 2] in each st around. Join with a sl st in 1st ch-2 sp – 12 PS, 12 ch-2
Round 3: Ch3 (counts as 1 dc), 2 dc in same sp, make 3 dc in each ch-2 sp around. Join with a sl st to beg ch 3 – 36 dc
Round 4: Ch 3 (counts as 1 dc) dc2tog over next 2 sts, ch 4 * dc3tog over next 3 sts, ch 4; rep from * around. Join with a sl st to beg dc2tog – 12 petals
Round 5: Ch 1, 1 sc in same sp, ch 3, * [1 dc2cl, ch 2, 1 tr2cl, ch 2, 1 dc2cl] in top of next petal, ch 3, 1 sc in next petal, ch 4, ** 1 sc in next petal, ch 3; rep from * 2 more times, and from * to ** once more. Join with a sl st to beg sc.
Round 6 : Ch3 (counts as 1 dc), * 3 dc in next ch-3 sp, 1 dc in next dc2cl, 2 dc in next ch-2 sp, [1 dc, ch 2, 1 dc] in next tr2cl, 2 dc in next ch-2 sp, 1 dc in next dc2cl, 3 dc in next ch-3 sp, 1 dc in next sc, 4 dc in next ch-4 sp, 1 dc in next sc; rep from * around, leaving out last dc in repeat. Join with a sl st in 3rd ch of beg ch 3. Fasten off yarn – 20 dc in each side
Finishing
Notes for Joining Blanket Squares
- You can use a yarn needle to sew squares together if preferred.
- Layout squares in rows of 4 x 5 squares. Refer to image of the complete blanket as a guideline.
- It may be helpful to use stitch holders to connect the unworked sides and edges of the squares so the strips of squares will hold together until all seams are completed.
- Seams are worked by holding 2 squares with Right Sides together and inserting the hook through back loops only of each square and making a sl st join. If your join appears to be pulling tight, use a larger hook for seaming.
The joining of the squares is done in continuous rows, square by square until an entire row is finished. You will only cut your yarn when you reach the end of a row.
First, join all the horizontal rows of the blanket and then join the vertical rows.
When you are happy with the layout you can begin to join the squares and then make a beautiful border!
Joining Squares
You will join each row to the one below as follows:
Horizontal Join – Using your main colour, take the first square of row 1 and the first square of row 2, and holding RS together, place hook in both ch-2 corner spaces. Ch1, 2 sc in ch-2 corner space of both squares, sl st (loosely) in back loop only in each st of both squares, across to next ch-2 sp, 1 sc in ch-2 sp, * pick up your next 2 squares, 1 sc in next ch-2 sp, sl st in back loop only in each st of both squares across, 1 sc in next ch-2 sp; repeat from * across row, making 2 sc in final ch-2 sp. Fasten off.
Join the third and following rows in the same way until you have 5 strips with 4 squares in each. Fasten off yarn.
Vertical Join – Turn partially joined blanket and work the un-joined squares in the same way as the Horizontal Seams, crocheting over the tops of the Horizontal Seams. (Tip – make a ch-1 over the seams between each 2 sc) Fasten off and weave in ends.
Border
Work border rounds with right side facing throughout.
Round 1: Join yarn in any st, ch 1, 1 sc in each st around. Where the squares meet, work 2 sc in each ch-2 sp and work 3 sc in each corner ch-2 sp. Join with a sl st to beg sc, do not fasten off yarn.
Round 2: Ch 4 (counts as 1 dc, ch 1), * skip 1 st, 1 dc in next st, ch 1; rep from * around blanket, working [1dc, ch 3, 1 dc] in each corner. Join with a sl st to 3rd ch of beg ch 4, do not fasten off yarn.
Round 3: Ch 1, 1 sc in each st and ch-1 sp around, working 5 sc in each corner. Join with a sl st to beg sc, do not fasten off yarn.
Round 4: Work a row of crab stitch (reverse sc) in each st around edge of blanket. Fasten off yarn and weave in all threads.
You can purchase the ad-free PDF version of this pattern on Ravelry or on Etsy. The PDF is designed for printing.
Find more Free patterns here
If you make this pattern, don’t forget to follow me on Instagram and be sure to tag me in your photos so I can see it too, @anniedesigncrochet or #anniedesigncrochet – I can’t wait to see what colours you use with this pattern!
The photographs and pattern contained on this page are the property of Annie Design Crochet.com.
You are welcome to use this pattern to make items to sell, and I would appreciate that you include a link to the free pattern with credit for the designer, thank you!
No unauthorized reproduction, in whole or in part, or distribution of this pattern or content is permitted.
Great post. Many thanks for sharing.
Thank you for this great post.
Very useful information. Thanks for sharing!
thank you for the link to free down in the spring bundle
this is a great travel project, i can visualise the motif made in other yarns suitable for tablecloth and many more items for the home
Thank you! It is a lovely motif and perfect as a travel project!
I am so grateful for your blog. Thanks Again.
this is beautiful, to make this bigger could i make 8 down and 10 across and it be approx. 70by 56 or so
You need to make a single square and then use that measurement to work out the size of the blanket. Depending on tension and yarn used, all measurements may differ:)
This may be an odd question. I wanted to try to make this pattern into a type of summer sweater. I’ve been trying to figure it out but I’m not THAT good, is there a way to convert this pattern into half of a square so that it’s in the shape of a triangle?
There probably is but I don’t have a pattern for that. A normal half granny square would work. Find a pattern for one and make it is as close to the size (half of the Edelweiss square) as you can:)
I would like to make a YouTube and TikTok video doing your pattern and was wondering if that would be okay if I mentioned you and put your Pinterest link in the bio
I am sorry but I don’t allow videos of my patterns:)
Hi and thanks for this great pattern. I used the aran weight stylecraft baby wool and this is my first ever baby blanket! Just about to join it all up etc. But my question is – would you block this, as a baby blanket? The one in your photo looks as though it has been blocked. Its just this is a blanket for a cot so I didnt want it to ‘grow’ too much! (Ive made 20 squares). I usually block crochet blankets i make. But wasnt too sure about a baby blanket in aran weight stylecraft baby wool . Thanks! ☺️
Thank you for your kind words! I think I did block the blanket as it always gives a more even polished finish for photographs. If your squares are all fairly even, blocking won’t be necessary. But if some of them look a bit ‘skewed’ a simple blocking helps to make them all even. No need to stretch the square, just gently pull in shape and pin. Spray with water and leave to dry!
Ooh top tip! Thank you 😃