
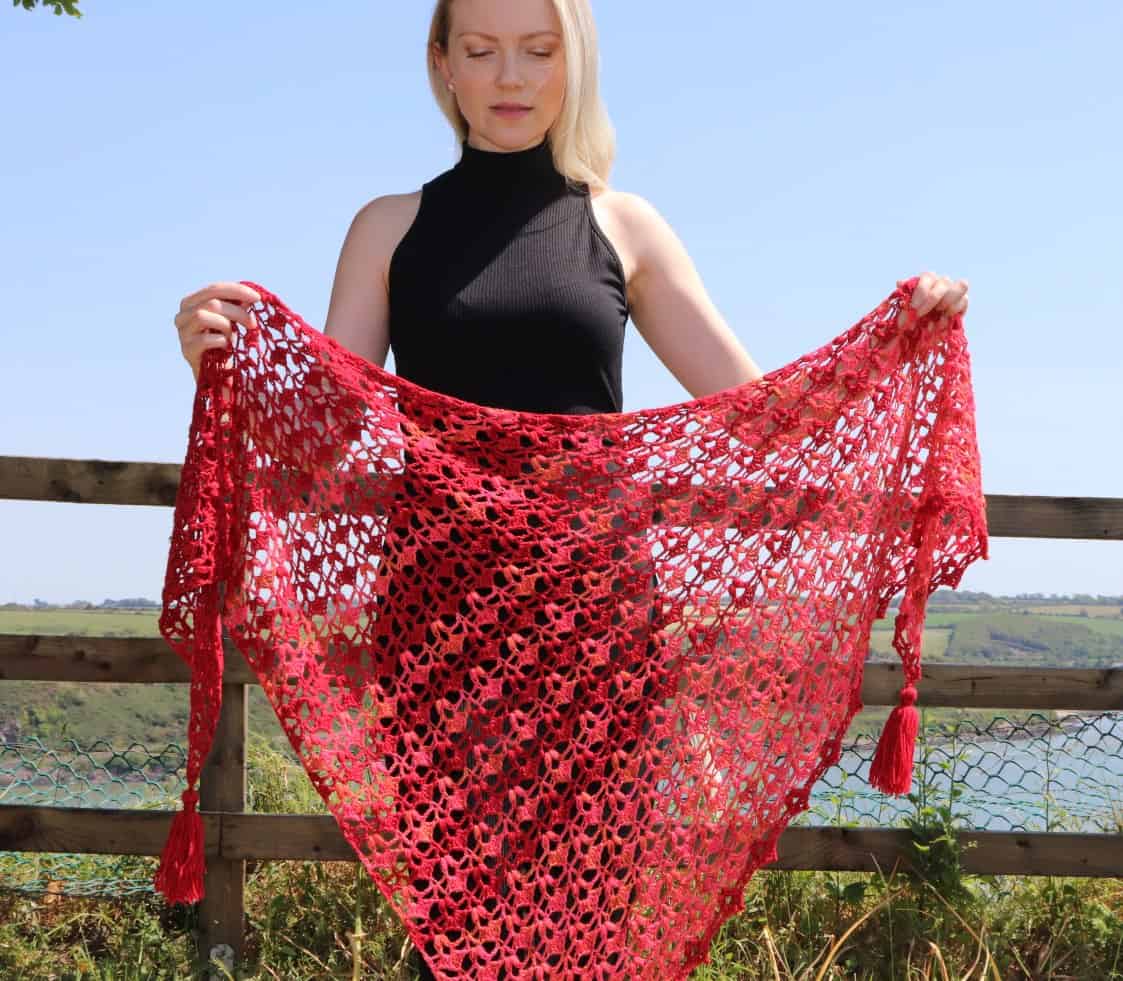
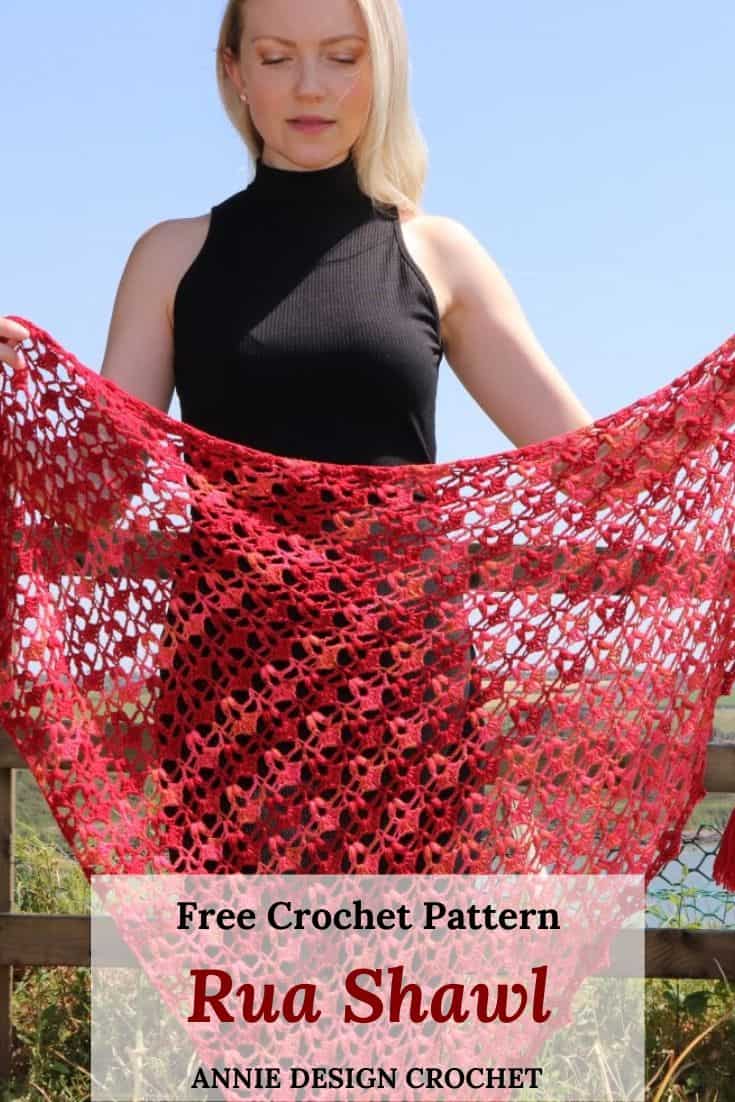
Rua is a Free Crochet Pattern for a Lace Triangle Shawl alternating shell stitches with beautiful puff stitches, to form a pattern with lots of interest and visual texture. This design starts at one narrow point and increases asymmetrically to form a triangle shape with the rows running on a slant.
Get the Free Pattern and Video Tutorial below or purchase the ad-free PDF version of this pattern on Ravelry or on Etsy The PDF is designed for printing.
Lace Crochet Shawl Details
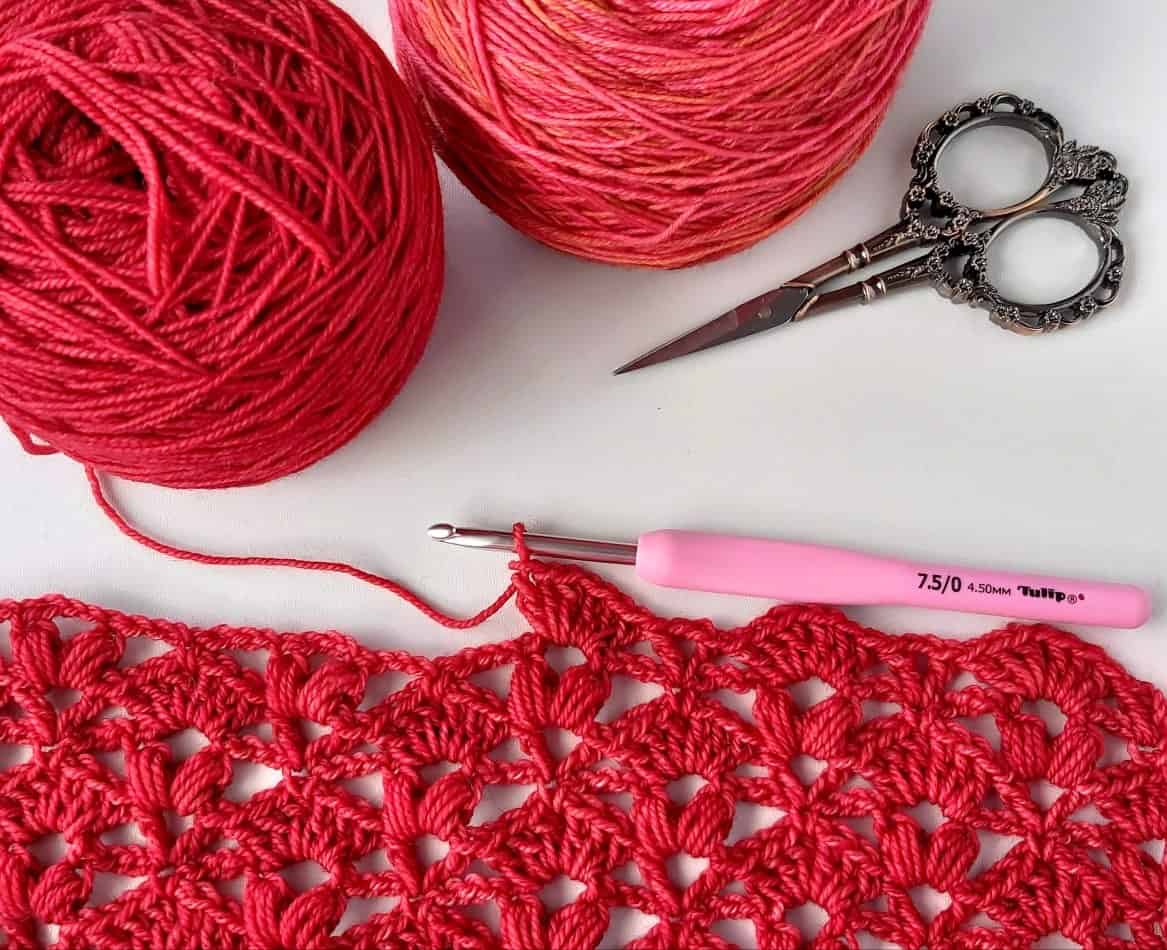
I used a 4.5mm hook as I wanted an open lace drape, which shows up well after blocking. If you have a loose tension, you may prefer a 4mm hook. Swatch the first few rows and see what you prefer. It is always a good idea when starting a shawl to experiment with hook sizes. It is time well spent! You can check out the video further down the page.
You can choose to make the shawl following the colour sequence given (2 skeins), or you may prefer to make the shawl using just one colour (approx. 800m of yarn). Or use a Yarn Cake which would also work well and create a beautiful shawl.
You gradually introduce the 2nd colour in the design and finish with a few rows of the 1st colour as a statement finish. I choose to use 2 skeins of yarn in my favourite colour red that have a very slight difference in tones, but you could choose 2 contrast colours for a different look, which would be fab!
Wearing a Triangle Crochet Shawl
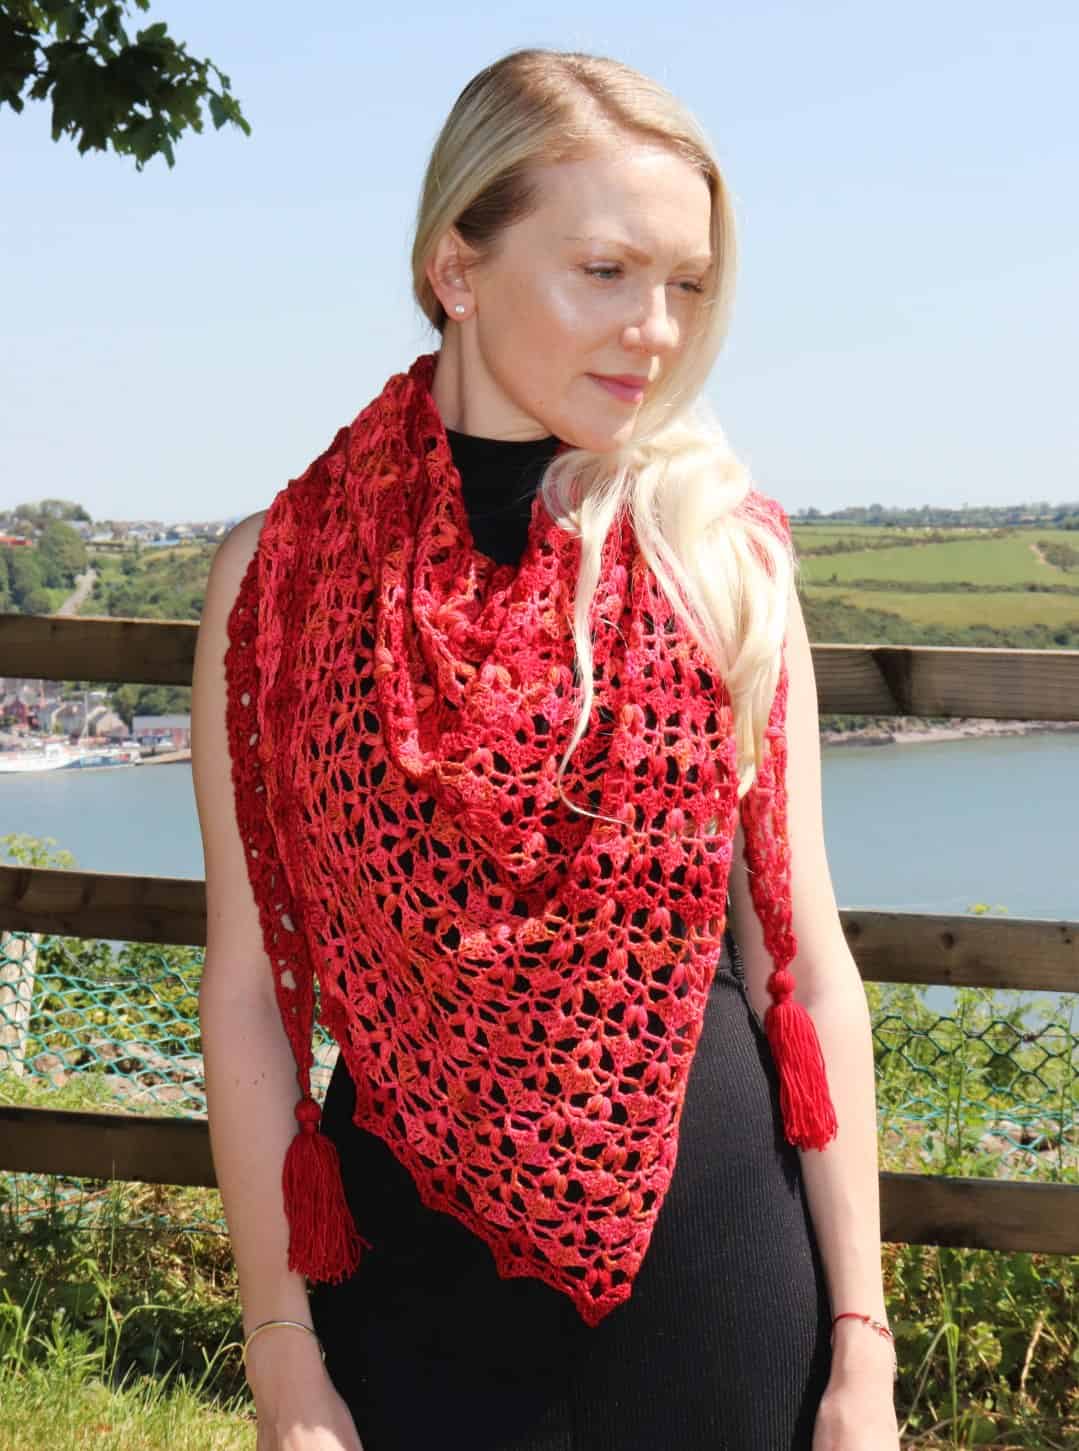
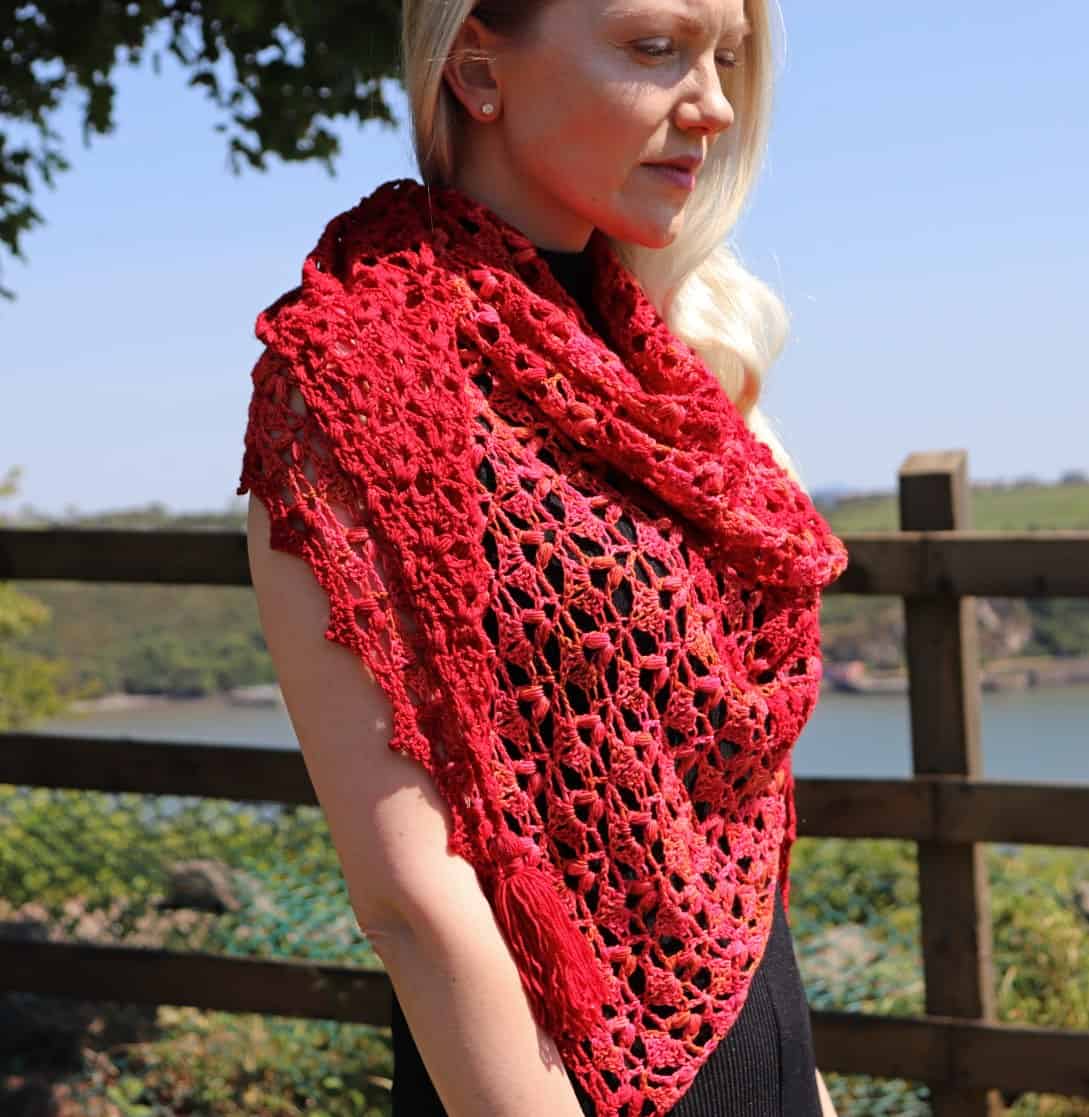
This shawl design is beautiful to wear in any style you like. It has a gorgeous drape so is perfect for wearing around your shoulders, or in front with the lovely tassels showing.
The Free pattern below is in US Crochet Terms
Stitch Details
It is not a difficult pattern to crochet but needs careful attention for the first few rows until your 4-row repeat pattern is established. It includes Puff Stitches and some careful counting in the beginning and I have included a video of the first 13 rows to help you. You can find the video further down the page.
You can also see the tutorial on YouTube
Skill Level
Intermediate
Materials
Yarn A – Malabrigo:4 Ply sock (033) – 100% SW Merino/100g/402m
Yarn B – Giddy Aunts Yarn: Merino Smooth Sock singles (Sorbet) – 75% SW Merino/25% Nylon/100g/425m
4.5 mm crochet hook
You can use 700 – 800m of any fingering weight yarn
Measurements
Shawl pictured measures 74in [188cm] on the longest length at the top and 34in [86cm] depth (from top of shawl to bottom point) after blocking
Abbreviations
US Crochet Terms (UK terms in brackets)
- Beg – beginning
- Ch – chain
- St – stitch
- Sp – space
- Sc – single crochet (UK double crochet)
- Dc – double crochet (UK treble crochet)
- Tr – treble crochet (UK double treble crochet)
Notes (read carefully)
- Shawl starts at one end. Working in rows, increasing each row on one side only
- Shawl needs strong blocking to give it its shape
- Ch 3 at beginning of a row counts as 1 dc throughout
- Ch 5 at beginning of a row counts as 1 tr, ch 1
- The shawl can be made larger or smaller by working more or fewer pattern repeats. This will alter the amount of yarn required.
- Includes written instructions
- Gauge is not important. To achieve a light drape tension, I suggest make a swatch of the first 5 rows and see what hook size works best for you.
- I have included some tips for which stitches you will skip in the first 9 rows to help stitch placement. Once you have the 4-row pattern repeat established, the shawl will work up quickly!
- Stitch counts (in Itallics) are included at the end of the first 9 rows to help you
Special Stitches
Read through carefully and keep them handy for reference for the first few rows, until pattern repeat is established.
Shell – 3 dc, ch 1, 3 dc
V-Stitch (v-st) – 1 dc, ch 2, 1 dc
PS Shell – 1 PS, ch 3, 1 PS
Puff Stitch (PS) modified – Yarn over and insert your hook into the specified stitch/space. Yarn over and pull up a long loop. (Yarn over and insert your hook into the same stitch/space. Yarn over and pull up a long loop) three more times. Yarn over and pull through 8 loops on your hook (leaving 2 loops on hook), yarn over and pull through last 2 loops
Picot Stitch (picot) – Ch 2, sl st back into 2nd ch from hook
Colour Sequence
Rows 1 – 37 Yarn A
Rows 38 – 39 Yarn B
Rows 40 – 43 Yarn A
Rows 44 – 45 Yarn B
Rows 46 – 49 Yarn A
Rows 50 – 51 Yarn B
Rows 52 – 53 Yarn A
Rows 54 – 55 Yarn B
Rows 56 – 57 Yarn A
Rows 58 – 59 Yarn B
Rows 60 – 61 Yarn A
Rows 62 – 63 Yarn B
Rows 64 – 65 Yarn A
Rows 66 – 81 Yarn B
Rows 82 – 83 Yarn A
You can purchase a printable PDF on Ravelry or on Etsy and your support is always appreciated!
Video
This video will help you with the Rua Free Crochet Pattern Lace Triangle Shawl
Instructions for Rua Lace Crochet Shawl
Using Yarn A and 4.5mm hook make a Magic Ring
Row 1: Ch 3 (counts as 1 dc here and throughout at beg of a row), 2 dc, 1 tr in magic ring, turn – 3 dc, 1 tr
Row 2: Ch 5 (counts as 1 tr, ch 1 here and throughout), PS (see special stitches) in 1st st (at base of ch 5), ch 3, skip next 2 dc, 1 sc in last st (top of beg ch 3), turn – 1 tr, 1 PS, 1 sc
Row 3: Ch 3, 1 dc in 1st st (base of ch 3), [skip next ch-3 sp, PS, ch-1 sp] and work [3 dc, ch 1, 2 dc, 1 tr] in the 4th ch of the beg ch 5 from previous row, turn – 7 dc, 1 tr
Tip for ending row 3 and all odd rows – if you prefer, you can finish alternatively by putting your hook directly in the last space (beg ch 5 from previous row) rather than in the 4th ch of beg ch 5.
Row 4: Ch 5, PS in 1st st, ch 3, skip next 2 dc, 1 sc in next ch-1 sp, ch 3, skip next 4 dc, [PS, ch 1, 1 dc] in last st (top of beg ch 3), turn – 1 tr, 2 PS, 1 dc, 1 sc
Row 5: Ch 3, 3 dc in 1st ch-1 sp, [skip next PS, ch-3 sp], v-st (see special stitches) in next sc, [skip next ch-3 sp, PS, ch-1 sp], [3 dc, ch 1, 2 dc, 1 tr] in the 4th ch of beg ch 5 from previous row, turn – 1 tr, 9 dc, 1 v-st
Row 6: Ch 5, PS in 1st st, ch 3, skip next 2 dc, 1 sc in next ch-1 sp, ch 3, skip next 3 dc, PS Shell (see special stitches) in next v-st, ch 3, skip next 3 dc, 1 sc in last st, turn – 1 tr, 1 PS, 1 PS shell, 2 sc
Row 7: Ch 3, 1 dc in 1st st, shell (see special stitches) in next PS shell, v-st in next sc, [skip next ch 3 sp, PS and ch 1 sp], [3 dc, ch 1, 2 dc, 1 tr] in the 4th ch of beg ch 5 from previous row, turn – 1 tr, 7 dc, 1 shell, 1 v-st
Row 8: Ch 5, PS in 1st st, ch 3, skip next 2 dc,1 sc in next ch-1 sp, ch 3, skip next 3 dc, PS shell in next v-st, ch 3, skip next 3 dc,1 sc in ch-1 sp of next shell, ch 3, skip next 3 dc, [PS, ch 1, 1 dc] in last st, turn – 1 tr, 2 PS, 1 PS shell, 1 dc, 2 sc
Row 9: Ch 3, 3 dc in 1st ch-1 sp, [skip next PS, ch-3 sp], v-st in next sc, skip next ch-3 sp, shell in next PS shell, skip next ch-3 sp, v-st in next sc, [skip next ch 3 sp, PS and ch 1 sp], [3 dc, ch 1, 2 dc, 1 tr] in the 4th ch of beg ch 5 from previous row, turn – 1 tr, 9 dc, 1 shell, 2 v-st
Repeat Rows Start
Row 10: Ch 5, PS in 1st st, ch 3, 1 sc in next ch-1 sp, * ch 3, PS shell in next v-st, ch 3, 1 sc in ch-1 sp of next shell; rep from * across, making final sc in last st, turn
Row 11: Ch 3, 1 dc in 1st st, * shell in next PS shell, v-st in next sc; rep from * across to last v-st, skip next ch 3, PS and ch 1, [3 dc, ch 1, 2 dc, 1 tr] in the 4th ch of beg ch 5 from previous row, turn.
Row 12: Ch 5, PS in 1st st, * ch 3, 1 sc in next ch-1 sp, ch 3, PS shell in next v-st; rep from * across, replacing last PS shell with [PS, ch 1, 1 dc] in last st, turn
Row 13: Ch 3, 3 dc in 1st ch-1 sp, v-st in next sc, * shell in next PS shell, v-st in next sc; rep from * across to last v-st, skip next ch 3, PS and ch 1, [3 dc, ch 1, 2 dc, 1 tr] in the 4th ch of beg ch 5 from previous row, turn.
Repeat rows 10 – 13 following colour sequence below. You will finish pattern repeat on row 82 (or a row 10 of repeat) and work one final row to finish shawl
Row 83: Ch 3, 1 dc in 1st st, * [3 dc, picot, 3 dc] in next PS shell, v-st in next sc; rep from * across to last v-st, skip next ch 3, PS and ch 1, [3 dc, ch 1, 2 dc, 1 tr] in the 4th ch of beg ch 5 from previous row, turn.
Finishing
Weave in all loose ends. Soak your shawl in lukewarm water and gently wring in a towel. Lay project out to finished size and pull gently into shape. Pin in place and leave to dry. Take your time pinning finished shawl, and use a pin on each ‘picot’…….it will make a huge difference to the finished piece!
You can purchase a printable PDF on Ravelry
Or purchase on Etsy
Pin For Later
If you make this pattern, don’t forget to follow me on Instagram and be sure to tag me in your photos so I can see it too, @anniedesigncrochet or #anniedesigncrochet – I can’t wait to see what colours you use with this pattern!
The photographs and pattern contained on this page are the property of Annie Design Crochet.com.
You are welcome to use this pattern to make items to sell, and I would appreciate that you include a link to the free pattern with credit for the designer, thank you!
No unauthorized reproduction, in whole or in part, or distribution of this pattern or content is permitted.
This shawl has turned out so lovely! I used some hand-dyed and painted yarn that my mother made and sent me. She dyes yarn and gives me enough to make things for us both. (A fabulous reciprocal relationship!) Even though I did not switch colors, it is still beautiful. I am sure that Mom will love it! I love it enough that as soon as she sends me more yarn I will make one for myself!
You are lucky to have such a talented Mom! Hand-dyed yarn is very special. Thank you!
Hi. I’ve almost finished this with a Rico Creative Degrade yarn cake 4ply which I believe is the fingering weight yarn in the US. I love the asymmetry. I’m going to try it on a 2ply next with a silver merino alpaca skein I’ve been waiting to match with a pattern and I think this is the one. Always admire people who design and write patterns. Thanks very much. Orla
Thanks so much Orla! The texture in the popcorn stitches will look fab in the alpaca!
is row 8 instructions correct?
little confusing as i get a puff shell after v in row 7 and we’re asked to skip 3dc while there is no 3 dc only puff shell
can you clarify
Hi! The pattern is correct and was tested. I am not sure where you are confused as it is difficult to know without seeing your sample. Did you watch the video? It may be helpful. Feel free to contact me if you are still having difficulty:)
Hi, I’m excited to start this. My nan requested I make one. I’m just starting out and a little confused by the instructions after the hyphens (-). eg in Row 1: “1 tr in magic ring, turn – 3 dc 1 tr” I’m confused by the 3dc and 1 tr after the (-). is it additional steps or simplified shorthand of the row? Thank you!
Hi! It is the stitch count for the row (simplified shorthand), to help keep you on track. Happy crocheting!