Are you looking for a stylish and fun crochet granny square bag? Look no further than this beautiful crochet bag with sunflower squares.
This free crochet pattern is the perfect way to use up your stash yarn and make a crochet granny square tote bag, that you’ll love using for years to come.
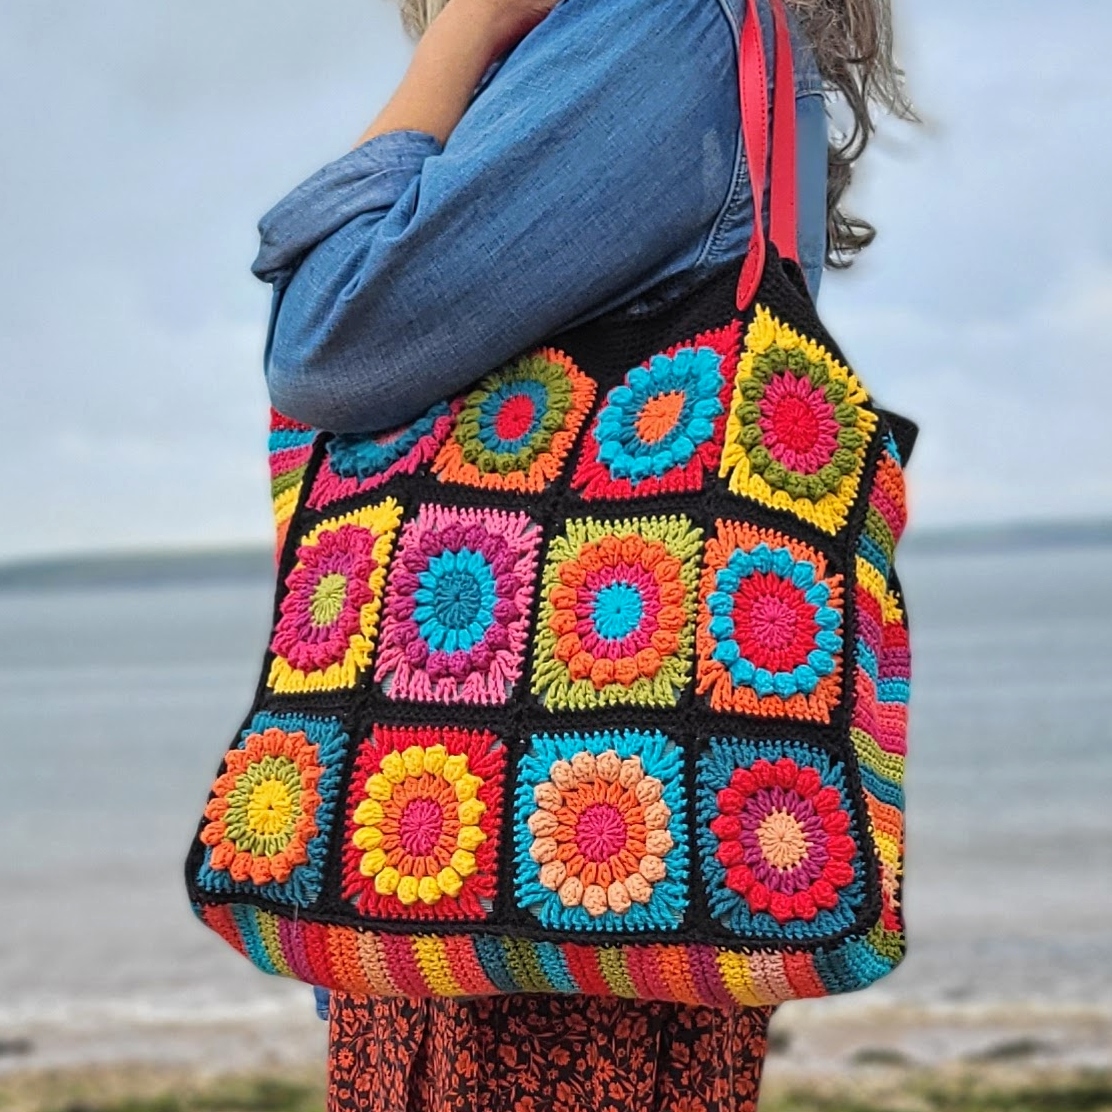
Whether you’re going to the beach, the park, or just running errands, this bag will add a touch of style!
How to get the Pattern for Granny Sunshine Bag
- Free Crochet Pattern: Scroll down this blog post for the free pattern and written instructions
- Printable PDF: Ad-free PDF pattern with 6 pages including all details. This helps me continue to provide free patterns. Thank you for your support! – Purchase on Ravelry and on Etsy
You will need about 300 – 400m of dk weight (light worsted) yarn for your main color, and about the same amount in contrast colors. Perfect for stash yarn! If you are on a bag making kick, check out the daisy granny square bag or the stunning crochet African flower bag!
You will love my boho crochet market bag and if you prefer the classic granny square, you will enjoy this free granny square scarf or this smaller granny square crochet bag.
Construction of the Crocheted Bag with Granny Squares
This beautiful bag is spacious and is the perfect size to hold all of your essentials.
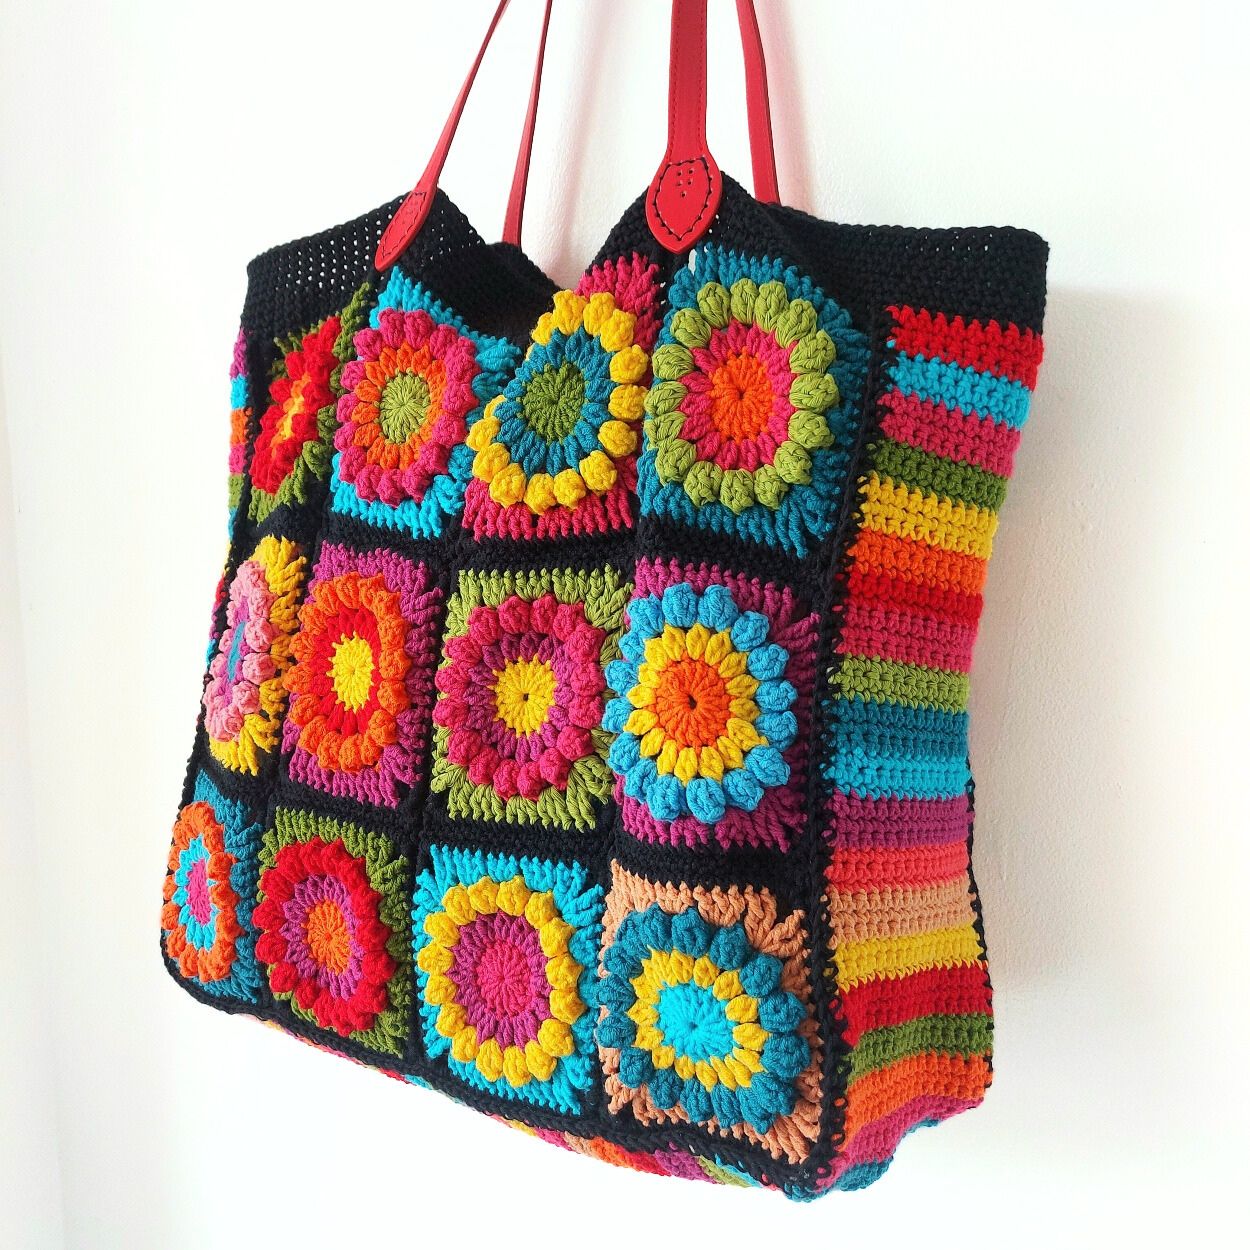
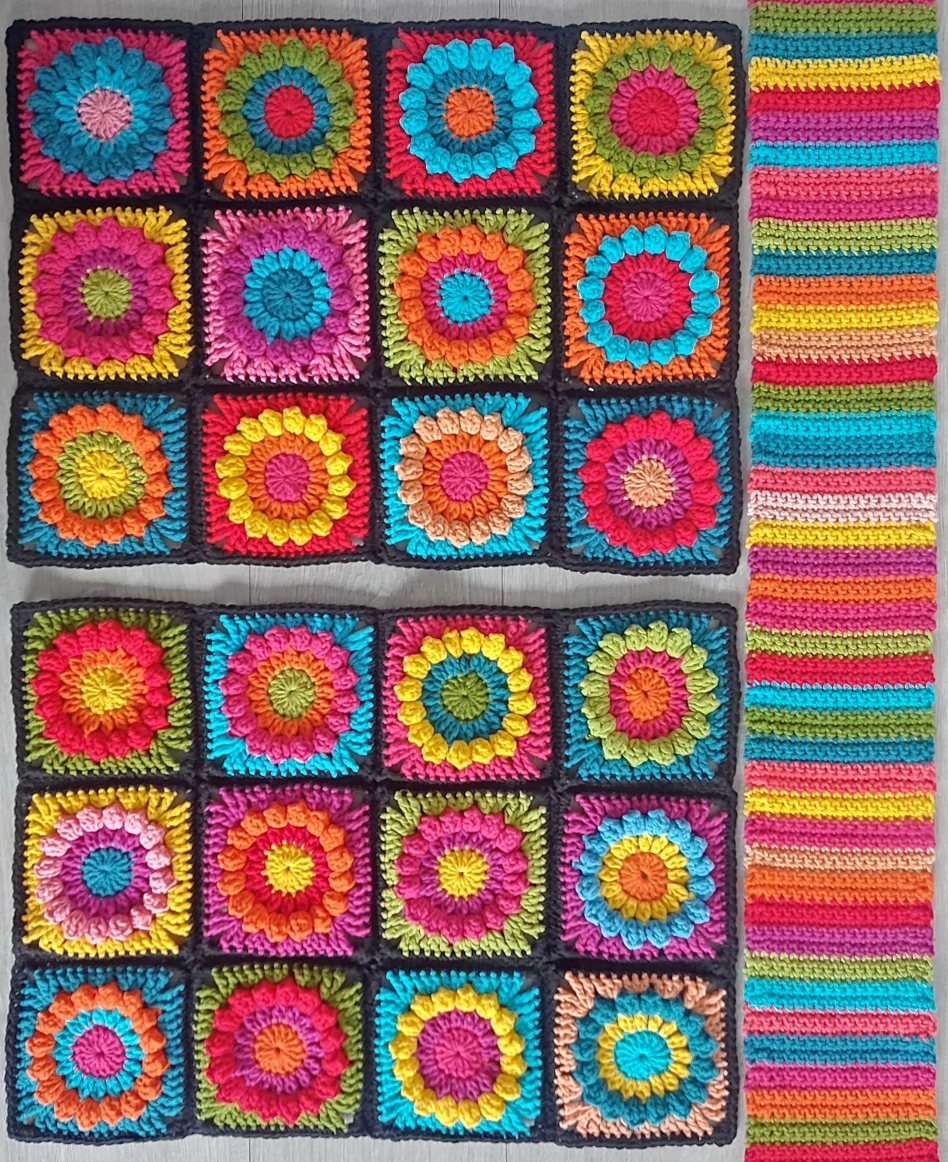
It is made up of 24 granny sunflower squares, with a long strip of colorful rows of crochet for the sides and the bottom of the bag.
You will add an edging to the top of the bag before adding the leather handles. You could also crochet a shoulder strap if you prefer.
The bag doesn’t necessarily need a lining but you can definitely add one. It’s an excellent way to give your own bag a bit more structure and protect your items inside.
Granny Sunflower Square Pattern
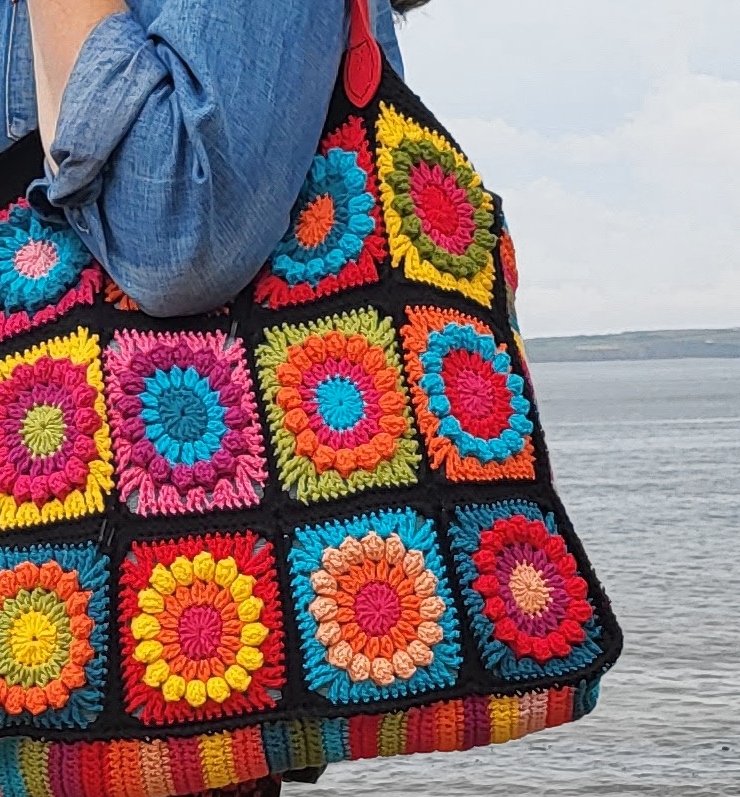
I used my popular sunflower granny square pattern to create this bag because I love the texture that the popcorn stitches give to the design. Here is a video tutorial for the sunflower square.
The sunflower squares are worked in a variety of color combinations, creating a beautiful and eye-catching design. Choose your favorite colors from your stash and make a bag that is truly unique.
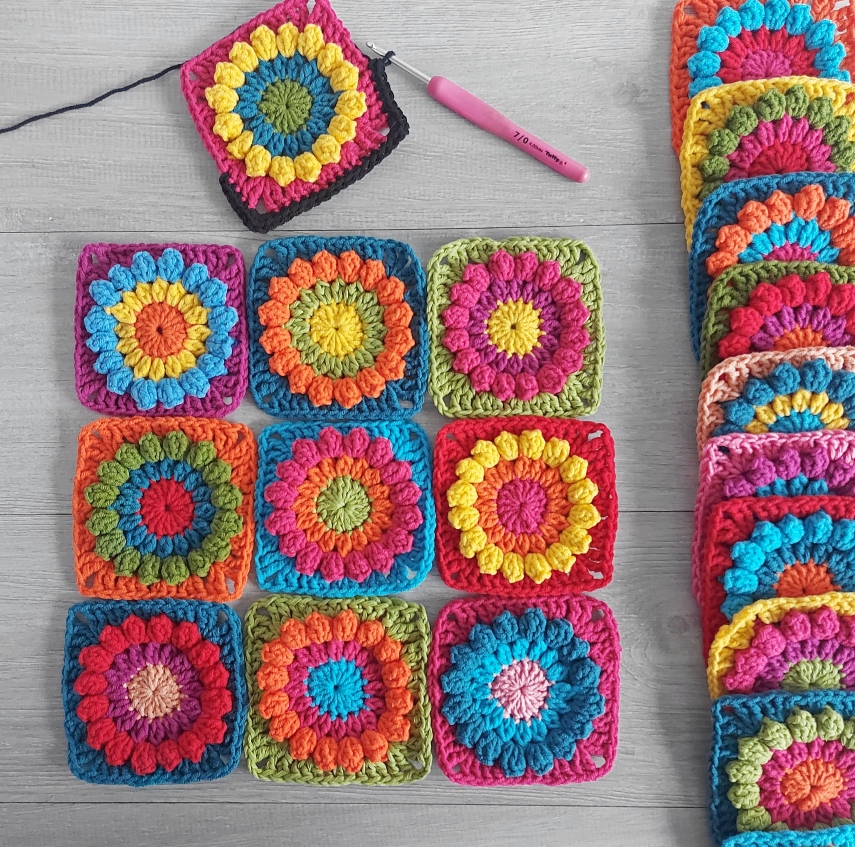
I recommend you block your crochet squares when finished. It will make joining them together so much easier.

Best Yarn for Crochet Bags
When choosing yarn for a crochet bag, it is important to consider a few things. A sturdy yarn that will hold up to wear and tear is essential, as a bag will be used frequently.
Cotton yarn or a cotton/acrylic blend is a good choice because it is durable, easy to work with, and comes in a variety of colors.
For my granny square bag pattern, I used a DK weight yarn called Sirdar Stories, which is a cotton/acrylic blend. This yarn is perfect for bags because it is durable, yet soft and comfortable to use.
It also comes in a wide variety of colors, so you can choose the perfect colors to match your style.
Printable PDF: Ad-free PDF pattern with 6 pages including all details – Purchase on Ravelry and on Etsy
PIN FOR LATER

Crochet Granny Square Bag – Free Pattern
Skill Level
Advanced Beginner
Materials for Crochet Bag
Sirdar Stories dk – 60% Cotton 40% Acrylic, 140m (153yds), 50g
- Main color: 3 balls in Silent Disco (839)
- Contrast colors: 1 ball in each of the following colors
- Summer (813), Fire (811), Date Night (808), Pillow Talk (803), Parade (805), Picnic (815), Camping (814), Surf (818), Glamping (832), Reunion (821)
- 3.5mm & 4mm crochet hooks
- Yarn needle
- Strong sewing thread
- Lining fabric (optional)
- Leather bag handles approx. 23-24in long
You can use any DK weight yarn to achieve a similar effect. Cotton yarn is recommended
Measurements
Front and back panels measure approx. 12.75in x 17in
Sides approx. 4.5in x 42.5in
Gauge
Each square is 4.25in [11cm]
Abbreviations
US crochet terms
- Beg beginning
- Ch chain
- St stitch
- Sc single crochet
- Sl st slip stitch
- Hdc half double crochet
- Dc double crochet
- Tr treble crochet
- Sp space
- MC main color
Special Stitches
Beg Popcorn (beg PC): Ch 3, work 4 dc in space indicated in pattern, remove hook from the last loop and insert into the top of the beg ch 3. Insert hook back into the last loop and pull this loop through. Pull tight.
Popcorn (PC): Work 5 dc in space indicated in pattern, remove hook from the last loop and insert into the top of the first st. Insert hook back into the last loop and pull this loop through. Pull tight
Double Crochet 2 Together Cluster (dc2tog): In indicated space or st, work (yo, insert hook in space/st, yo and pull up loop, yo and pull through 2 loops on hook) twice, yo and pull through all 3 loops on hook.
Pattern Notes
- Ch 3 at beginning of a row counts as 1 dc
- Ch 1 at beginning of a row does not count as a stitch
- Pattern written in US crochet terms
- I do recommend you block your crochet squares when finished. It will make joining them together so much easier
- Make sure to read the notes about the side panels before you start as it includes some helpful tips
- Watch a video tutorial for the sunflower square pattern (rounds 1 – 4) on YouTube
Color Notes
- You can use the colors suggested in the materials list or use yarn from your stash
- If using stash yarn, you will need approximately 300 to 350m of dk weight yarn for the main color and small amounts of each of the other colors
- Using stash yarn will give your bag a unique and personal touch
Sunflower Granny Square (make 24)
Using first color and 4mm hook, make a magic ring.
Round 1: Ch 3 (counts as 1 dc), 15 dc into ring, join with a sl st to 3rd ch of beginning ch 3. Pull ring closed and fasten off yarn – 16 dc
Round 2: Join next color in any st, ch 3, 1 dc in same st (counts as 1 dc2tog), ch 1, [dc2tog, ch 1] in each st around. Join with a sl st to beg dc2tog. Fasten off yarn – 16 dc2tog, 16 ch-1
Round 3: Join next color in any ch-1 space, make a beg PC (see special stitches), ch 2, *PC in next ch-1 sp, ch 2; repeat from * 14 times. Join with a sl st to beg PC. Fasten off yarn – 16 PC, 16 ch-2
Round 4: Join next color in any ch-2 sp, ch 3, 2 dc in same sp, * [2 tr, ch 2, 2 tr] in next ch-2 sp, 3 dc in next ch-2 sp, 3 hdc in next ch-2 sp, ** 3 dc in next ch-2 sp; rep from * 3 times, ending last rep at **, join with a sl st to 3rd ch of beginning ch 3. Fasten off yarn.
Round 5: Join MC in any st, ch 1, make 1 sc in each stitch around, [2 sc, ch 1, 2 sc] in each corner ch-2 sp, join with a sl st to beg sc – 68 sc (17 sc each side)
Sides and Bottom of Bag (Gusset)
Notes
The gusset strip for the side of the bag is made using single crochet stitches in one long strip. You can choose to use a solid color or in multiple colors. I used all the colors from the squares in a random way, changing color every 3 rows.
Don’t complete your strip until you have already joined the long strip to the front and back panels. That way if you need to add more rows or remove some rows, it will be much easier to do!
Gusset Strip
Using 4mm hook ch 19
Row 1: 1 sc in 2nd ch from hook, 1 sc in each st across – 18 sc
Row 2: Ch 1, 1 sc in each st across – 18 sc
Repeat Row 2, changing colors every 3 rows for a total of approx. 180 rows (see notes above)
Bag Panel Assembly
Make 2 panels
Lay out squares in rows of 4 x 3
Horizontal Join – Using your main color and 4mm hook, take the 1st square of row 1 and the 1st square of Row 2, and holding RS together, make a sl st join (loosely) in both loops, in each st of both squares across. Fasten off – 68 sl st
Join the 3rd row in the same way until you have 3 strips with 4 squares in each.
Vertical Join – Turn partially joined panel and work the un-joined squares in the same way as the Horizontal Seams. Fasten off and weave in ends.
You will now have 2 panels with 12 squares in each. Block each panel as this will make them flatter and even out any uneven parts.
Joining the Pieces for the Bag Together
You will now join one side of the gusset around 2 sides and the bottom edge of one of your panels. You will use a sc seam on the right side (outside edge) of each piece.
It is important to take your time and pin in place carefully, making sure not to over stretch or pull too tight.
- With RS of one panel facing out, position the side gusset around 3 sides, making sure all is lined up neatly. Pin all pieces together, or use a stitch marker.
- Using MC and 4mm hook, attach yarn to top corner, insert your hook through the 1st sc of your panel and the 1st row end of your gusset, ch 1, sc down one side, joining both pieces together. Maintain an even tension and consistent stitch placement.
- When you reach the corner where the side gusset meets the bottom gusset, continue the single crochet seam along the bottom edge, smoothly turning the corner to connect the side gusset with the bottom gusset.
- Continue working the single crochet seam along the bottom of the bag and up the 2nd side.
- Fasten off your yarn and weave in any loose ends on the inside of the bag using a yarn needle. Repeat to add the 2nd panel to the opposite side of the gusset.
Top Edging of Bag
Round 1: With MC and a 3.5mm hook, join in any square, ch 1, work 1 sc in each st, around top of bag. Join with a sl st to beg sc. (You will work 17 sc in each square and 18 sc in side gusset)
Rounds 2 – 8: Ch 1, 1 sc in each st around. Join with a sl st to beg sc. Fasten off yarn.
Attaching the Handles
Position the bag handles by placing them on the border of the bag, using the pictures for guidance. Using strong sewing thread and a sharp needle, stitch through the prepunched holes making sure the handles are secure.
Printable PDF: Ad-free PDF pattern with 6 pages including all details – Purchase on Ravelry and on Etsy
Happy Crocheting!

Don’t forget to follow me on Instagram and be sure to tag me in your photos so I can see it too, @anniedesigncrochet or #anniedesigncrochet – I can’t wait to see what colours you use with this pattern!
The photographs and pattern contained on this page are the property of Annie Design Crochet.com.
You are welcome to use this pattern to make items to sell, and I would appreciate that you include a link to the free pattern with credit for the designer, thank you!
No unauthorized reproduction, in whole or in part, or distribution of this pattern or content is permitted.
I love the bag. I am a crocheter and was just wondering if you have ever made a bag using 2 big granny squares and then instead of crocheting a separate piece for the side just crochet along 3 sides of each square until you have the width you want then sew the 2 sides together … im trying to do it now and I’m having trouble around the corners to make them look right … any ideas that might help I’d love .. thanks in advance
Hi! And thank you. If you join both pieces with the seaming on the outside, work 3 sts in the corners. Or whatever looks right. Keeping practicing until it feels right and don’t be afraid to frog it back and try again.
Why not use granny squares for the side too?
You sure could!
Thank you for posting the directions for this bag on your website! I’m looking forward to making it and I’m a little confused about creating the panels. In the directions for the horizontal join, you sl st 2 squares and fasten off with a total of 68 st. Something is missing between joining the first 2 squares and starting the vertical join with the completed rows. I think I have it figured out but I’ve never joined squares this way. Can you clarify?
Hi! You join 17 sts of each square as before (but just 3 squares for vertical join). If the joining looks fairly even, don’t worry too much about it. Blocking the panel will even it out. I am not really certain where you are unsure about joining vertically so feel free to email me – carmen_heffernan@hotmail.com and I will try help you further:)
I am obsessed with all of your work! Thank you for sharing .. and I’m a little jealous that you are in Ireland!! One of my most desirable places in the world. I am in the United States. Much love from here to there~
Aww thank you! Hope you get to visit one day!