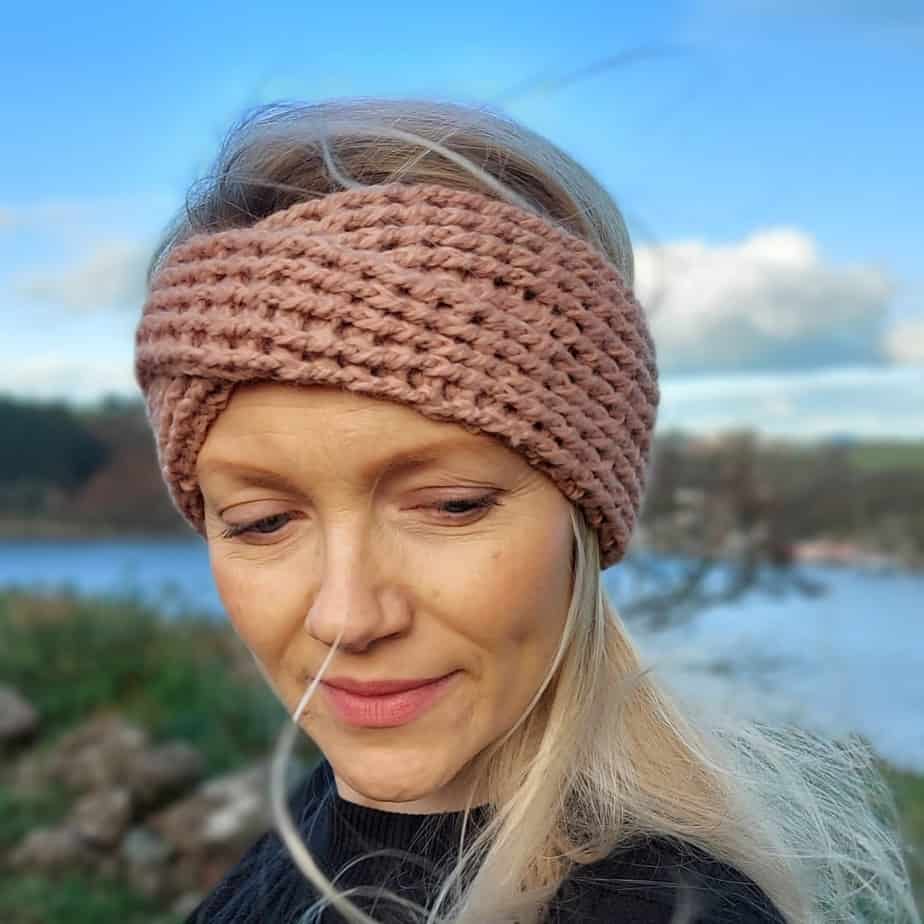
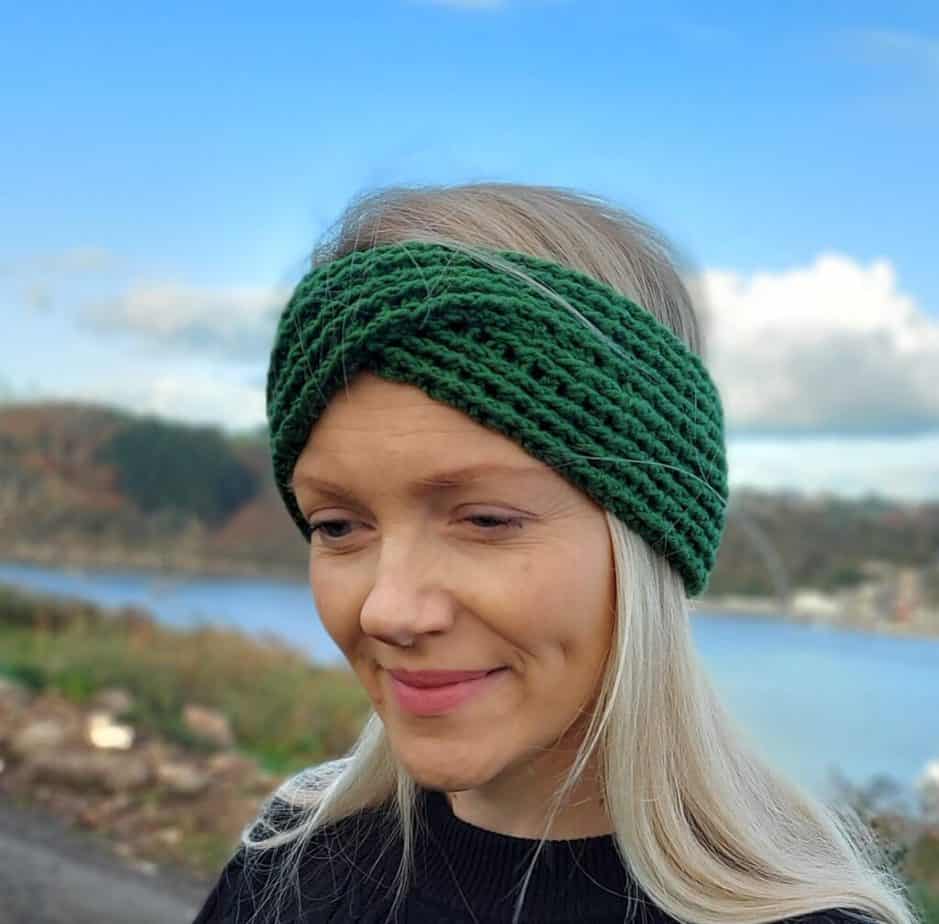
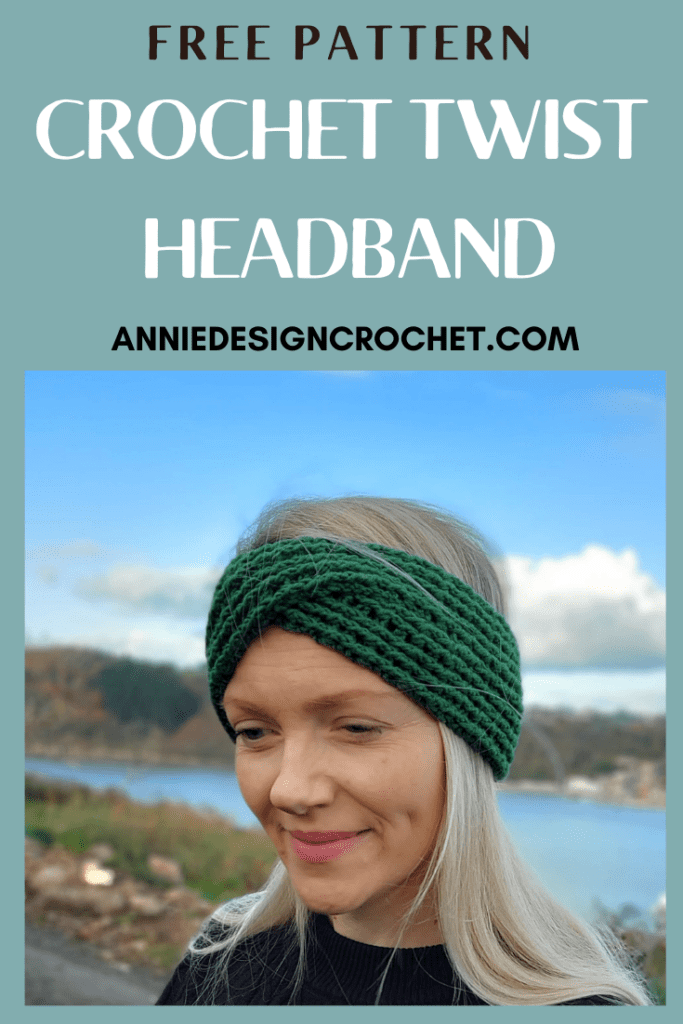
This Crochet Twist Headband Pattern is full of texture and looks store bought! I will show you how to make this cozy headband to keep your ears warm and cozy.
It is quick to make and perfect for last minute gifts. The finished size fits most. They will be a huge hit with friends and family.
The sleek and comfy headband only takes a few hours to make, so it is a great project for an evenings crochet.
Details of the Crochet Twist Headband
Crochet ear warmers help you stay warm and on-trend during the colder weather. This headband is designed to be both light-weight and super stretchy, making it perfect for all-day wear.
The unique texture of the headband is made by using crochet post stitches, which give it a beautiful textured look. The simple twist detail adds a stylish edge to the design, making it a great gift for any fashion-conscious family members!
How to get the Pattern for Crochet Twist Headband
- Free Written Pattern: Scroll down this blog post for the Instructions for this headband
- Printable PDF: Adfree printable PDF pattern with 6 pages including all details. Thank you for your support! – Purchase on Ravelry and on Etsy
Check out more free crochet patterns for accessories on my blog
Yarn for Crochet Headbands
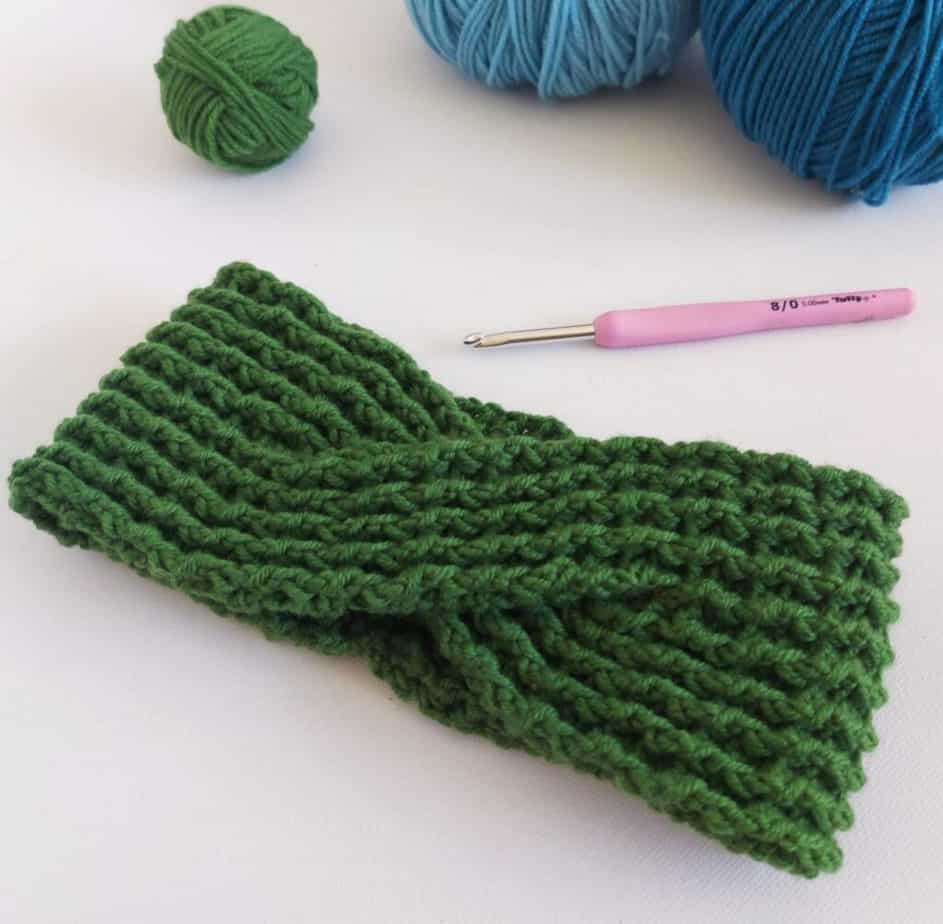
This ear warmer pattern is written for a DK weight yarn, or a Light Worsted yarn and a 5 mm crochet hook. Both weights worked beautifully for me when making the samples.
You will need approx. 150m of yarn.
One of my testers used a bulky yarn and a larger hook size and the pattern worked out great!
Materials
- King Cole Luxury Merino DK, 100% Superwash Merino, 50g/140m (1 ball) or/
- Rico Design Creative Soft Wool Aran, 75% Acrylic, 25% Wool, 100g/300m (approx. 130m)
- 5mm Crochet Hook
- Yarn Needle
Tension
22 sts and 11 rows over 4in [10cm] x 4in [10cm] over pattern using yarn recommended and 5mm hook
Measurements
The head circumference measurements given are a guideline only.
The headband is very stretchy and will fit most sizes easily. Pattern includes 2 sizes with size small in brackets ()
Small/medium – 18in to 20in [46 – 51cm] wide and 4in [10cm] depth
Medium/large – 21in to 23in [53 – 58cm] wide and 4in [10cm] depth
Abbreviations
Wrong Side – WS
Right Side – RS
Chain – ch
Double crochet – dc
Stitch – st
Repeat – rep
Special Stitches
Front Post Double Crochet (FPdc): Yarn over, insert hook from the front around the post of the next dc in the row below from right to left and pull up a loop, (3 loops on hook), yarn over and pull 2 loops (2 loops left on hook), yarn over and pull through 2 loops.
Back Post Double Crochet (BPdc): Yarn over, insert hook from the back around the post of the next dc in the row below right to left and pull up a loop, (3 loops on hook), yarn over and pull 2 loops (2 loops left on hook), yarn over and pull through 2 loops.
Notes
- Pattern is written in US crochet terms.
- The pattern is written for a DK weight yarn or a light Worsted weight yarn. if you use a different weight yarn, you may need to adjust the amount of rows made in section 1 and 3.
- You will work the pattern in 3 sections. Section 1 is worked in pattern, section 2 is divided into 2 sections which are then crossed over and joined again, section 3 is then worked in pattern. You will join centre back seam to finish.
- Pattern is written is one size for Medium/Large size with adjustments for Small in brackets () after row 3.
- Count your stitches as you go to help keep track!

Instructions for Crochet Twisted Headband Pattern
Section 1
Chain 23
Row 1 (WS): 1 dc into 4th ch from hook, 1 dc in each ch to end, turn – 21 sts
Row 2 (RS): Ch 2 (counts as 1st dc here and throughout), miss st at the base of ch 2, (1 FPdc around post of next st, 1 BPdc around post of next st) to end, working last BPdc around beg ch , turn – 21 sts
Row 3 (WS): Ch 2, miss st at the base of ch 2, (1 BPdc around post of next st, 1 FPdc around post of next st) to end, working last FPdc around beg ch 2, turn – 21 sts
For size small you will work rows 4-17
For size large you will work rows 4-19
Rows 4 – (17) 19: Rep rows 2 & 3
Row 20: Rep row 2, turn. You are ending on a RS row – see picture 1
Section 1 is now complete and you will now work section 2
Section 2 – part 1
Row 21 (WS): Ch 2, miss st at the base of ch 2, (1 BPdc around post of next st, 1 FPdc around post of next st) 5 times, turn – 11 sts You will be working on these 11 sts for part 1
Row 22 (RS): Ch 2, miss st at the base of ch 2, (1 FPdc around post of next st, 1 BPdc around post of next st) to end, working last BPdc around beg ch 2, turn – 11 sts
Row 23 (WS): Ch 2, miss st at the base of ch 2, (1 BPdc around post of next st, 1 FPdc around post of next st) to end, working last FPdc around beg ch 2, turn – 11 sts
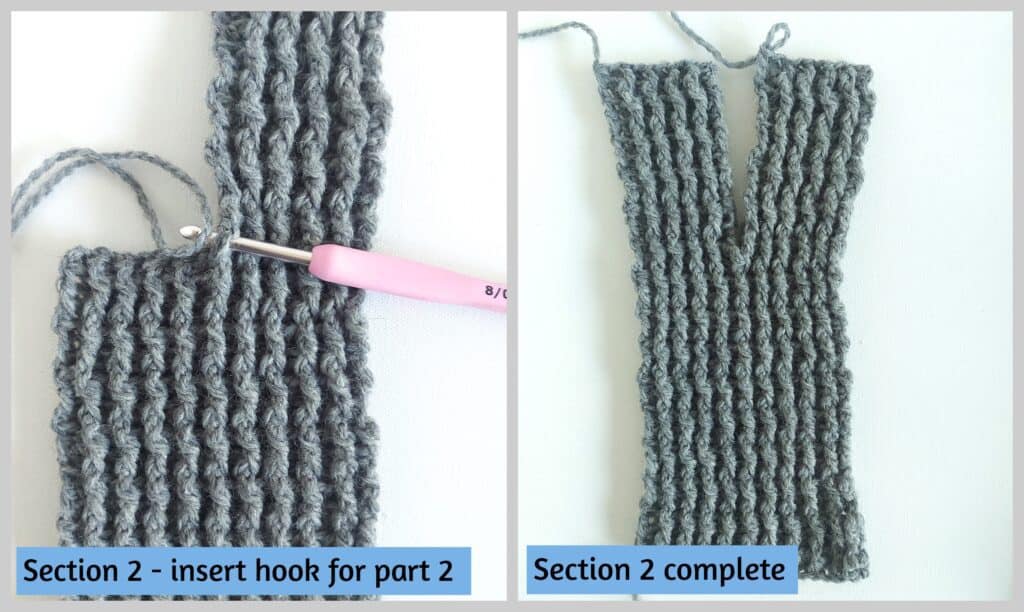
Rows 24 – 35: Rep rows 22 & 23 ending on a WS row Extend loop and cut yarn. You will be working with this loop later – see picture 2
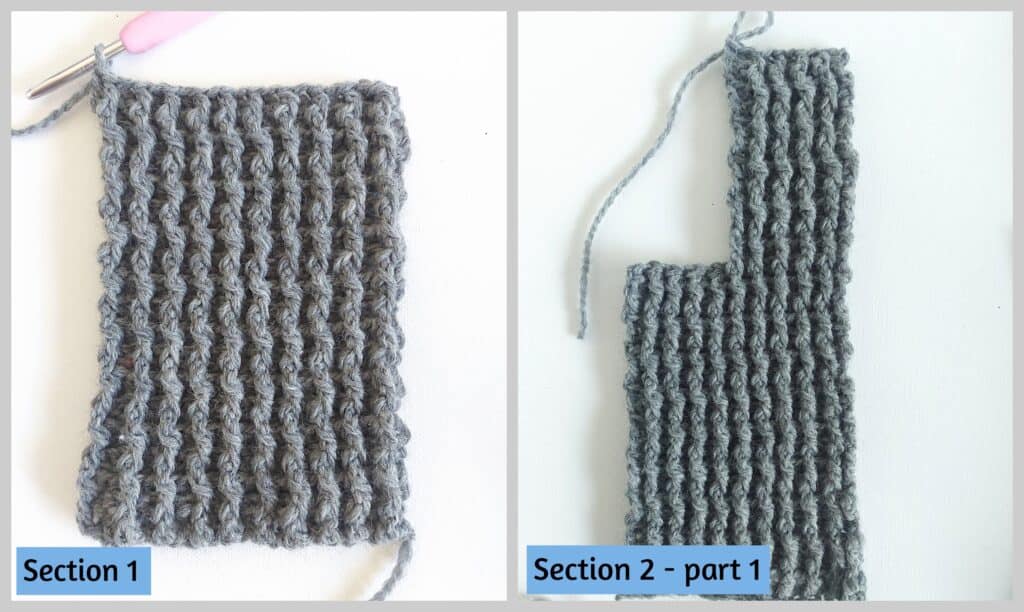
pic 1 pic 2
Section 2 – part 2
With WS still facing you, rejoin yarn to last st worked at base of part 1 – see picture 3 (By joining yarn to st at base of part 1, you are creating an extra stitch for part 2 to give you 11 sts)
Row 21 (WS): Ch 2, miss st at the base of ch 2, (1 BPdc around post of next st, 1 FPdc around post of next st) 5 times, working last FPdc around beg ch 2, turn – 11 sts You will be working on these 11 sts for part 2
Row 22 (RS): Ch 2, miss st at the base of ch 2, (1 FPdc around post of next st, 1 BPdc around post of next st) to end, working last BPdc around beg ch 2, turn – 11 sts
Row 23 (WS): Ch 2, miss st at the base of ch 2, (1 BPdc around post of next st, 1 FPdc around post of next st) to end, working last FPdc around beg ch 2, turn – 11 sts
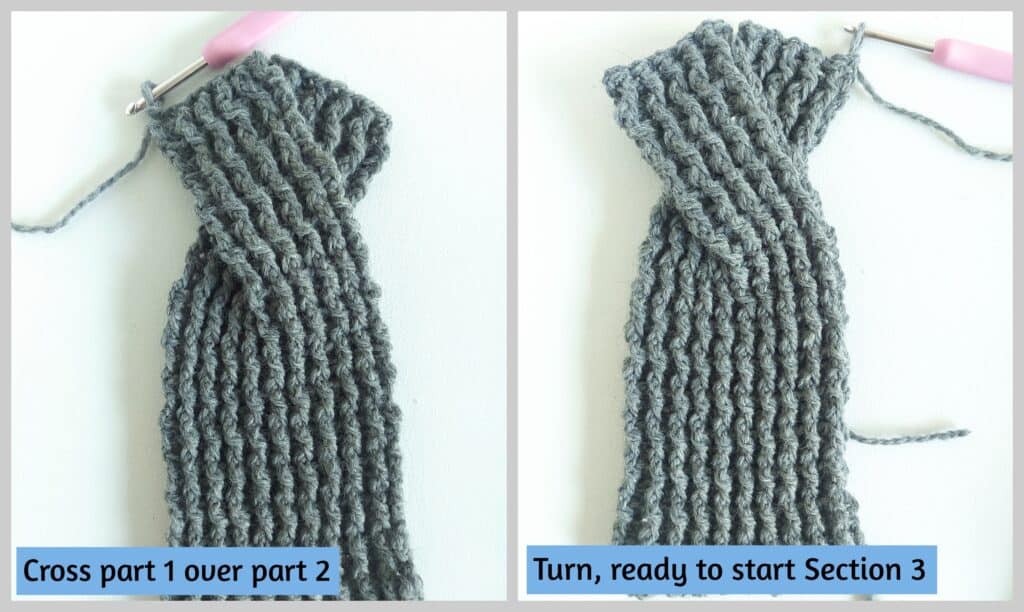
Rows 24 – 35: Rep rows 22 & 23 ending on a WS row. Fasten off yarn – see picture 4
pic 3 pic 4
Section 3
Cross part 1 over part 2 and return hook to loop and re-join yarn. Turn so that you now have RS facing ready for next row to begin – see pictures 5 & 6
Row 36 (RS): Ch 2, (1 FPdc around post of next st, 1 BPdc around post of next st) 4 times, 1 FPdc around post of next st, 1 BPdc around post of last st of part 1 and around post of 1st st of part 2 together (which creates a decrease), (1 FPdc around post of next st, 1 BPdc around post of next st) to end, working last BPdc around beg ch 2, turn – 21 sts Continue to work pattern across joined sections
Row 37 (WS): Ch 2, miss st at the base of ch 2, (1 BPdc around post of next st, 1 FPdc around post of next st) to end, working last FPdc around beg ch 2, turn – 21 sts
Row 38 (RS): Ch 2, miss st at the base of ch 2, (1 FPdc around post of next st, 1 BPdc around post of next st) to end, working last BPdc around beg ch 2, turn – 21 sts
Row 39 – (52) 54: Rep rows 37 & 38. Fasten off yarn
pic 5 pic 6
Finishing
Join centre back seam by whip stitching together. Weave in all threads.
You can purchase the ad-free PDF version of this pattern on Ravelry and Etsy
The PDF is designed for printing. Thank you for your support!
Find more Free patterns here
If you make this pattern, don’t forget to follow me on Instagram and be sure to tag me in your photos so I can see it too, @anniedesigncrochet or #anniedesigncrochet – I can’t wait to see what colours you use with this pattern!
The photographs and pattern contained on this page are the property of Annie Design Crochet.com.
You are welcome to use this pattern to make items to sell, and I would appreciate that you include a link to the free pattern with credit for the designer, thank you!
No unauthorized reproduction, in whole or in part, or distribution of this pattern or content is permitted.
Hi, Carmen. This ear warmer is beautiful. I have a question for you: You list 2 yarns in materials, but it looks like you’re only using one strand and I don’t see directions to change yarns. Are you just offering alternatives?
Hi Marcie! Apologies for any confusion! I was listing the 2 yarns that I used to make my samples – a light aran weight and a dk weight. The pattern is suitable for both! (one strand only)
I found this pattern to be a little confusing. You give instructions at first for 2 sizes however the pattern is not consistent and really written for just one size. Not sure if the Ravelry pattern is any better, but I don’t want to take the chance. It’s unfortunate because it really is a pretty headband.
Thank you for feedback! The adjustment for sizing is a small adjustment (For size small you will work rows 4-17. For size large you will work rows 4-19) It is a super stretchy headband and working less rows will make it slightly small in width. I have added the extra info in the post:)
Thank you, “Annie”. I love the ear warmer and look forward to making a few as gifts. I do not know where to purchase either spec yarns so I will use a substitute. I am experienced crocheter with hooks as old as I am, since you gave a gauge I can work with that.
I am new to your channel and happy to be here. I rarely use Instagram but I might more now that you are there.
Fookie [to my friends]
Thank you! It is an easy pattern to substitute with yarn, as it is vert stretchy. Thank you for your lovely comment:)
Hi Carmen, Do you have the sizes (cm) for the 3 sections? I’m using different yarn and I find it confusing how long should I go with each sction. Thanks lot, it looks like a great pattern!
I don’t have precise sizes and I don’t have the samples anymore as I gave them away. If it helps, I would make one headband and then that would give you a prototype to work from? It is a very forgiving pattern as it is so stretchy!
On this pattern, I’m somewhat confused. Is it 21 dc plus the two chain turning chain for a total of 22 stiches? Or is the turning chain 1 of the double crochets for a total of 21 stitches?
I guess the confusion is coming from your gauge which says 22 stiches to 4 inches.
Thank you.
Hi. The skipped chains in the beginning count as 1 dc. I measured gauge by counting the amount of stitches in 2″ and then x 2. Sorry for any confusion!
Ok. That’s what I thought! Thank so much. It’s turning out great.
Denise
Thank you so much! I make ear warmers for kids at our local elementary schools. I made the smaller size first, but then in the next ones, I made each side 4 rows shorter for the littler kids. The teachers let the kids who have lost theirs, or just don’t have any, pick out their own. These will be nice and warm — no frozen little ears!
Just a note for anyone else who makes hats, mittens, scarves, etc. for the kids — the kids requested ear warmers instead of hats.
Warm wishes and thank you again!
Steph
Thank you! I am thrilled that you enjoyed making the pattern. A friend made these for her grandchildren and so many of their friends requested one too. You are so right – they love ear warmers!
I think this might be the most frustrating thing I’ve ever crocheted—nothing to do with the pattern, but Ive learned i really deTest FPDC & BPDC. I’ve never lost count so often before🫠
love the finished piece!
I understand! It did take me a while to get my head around the stitch counts….but I am happy you love the result!