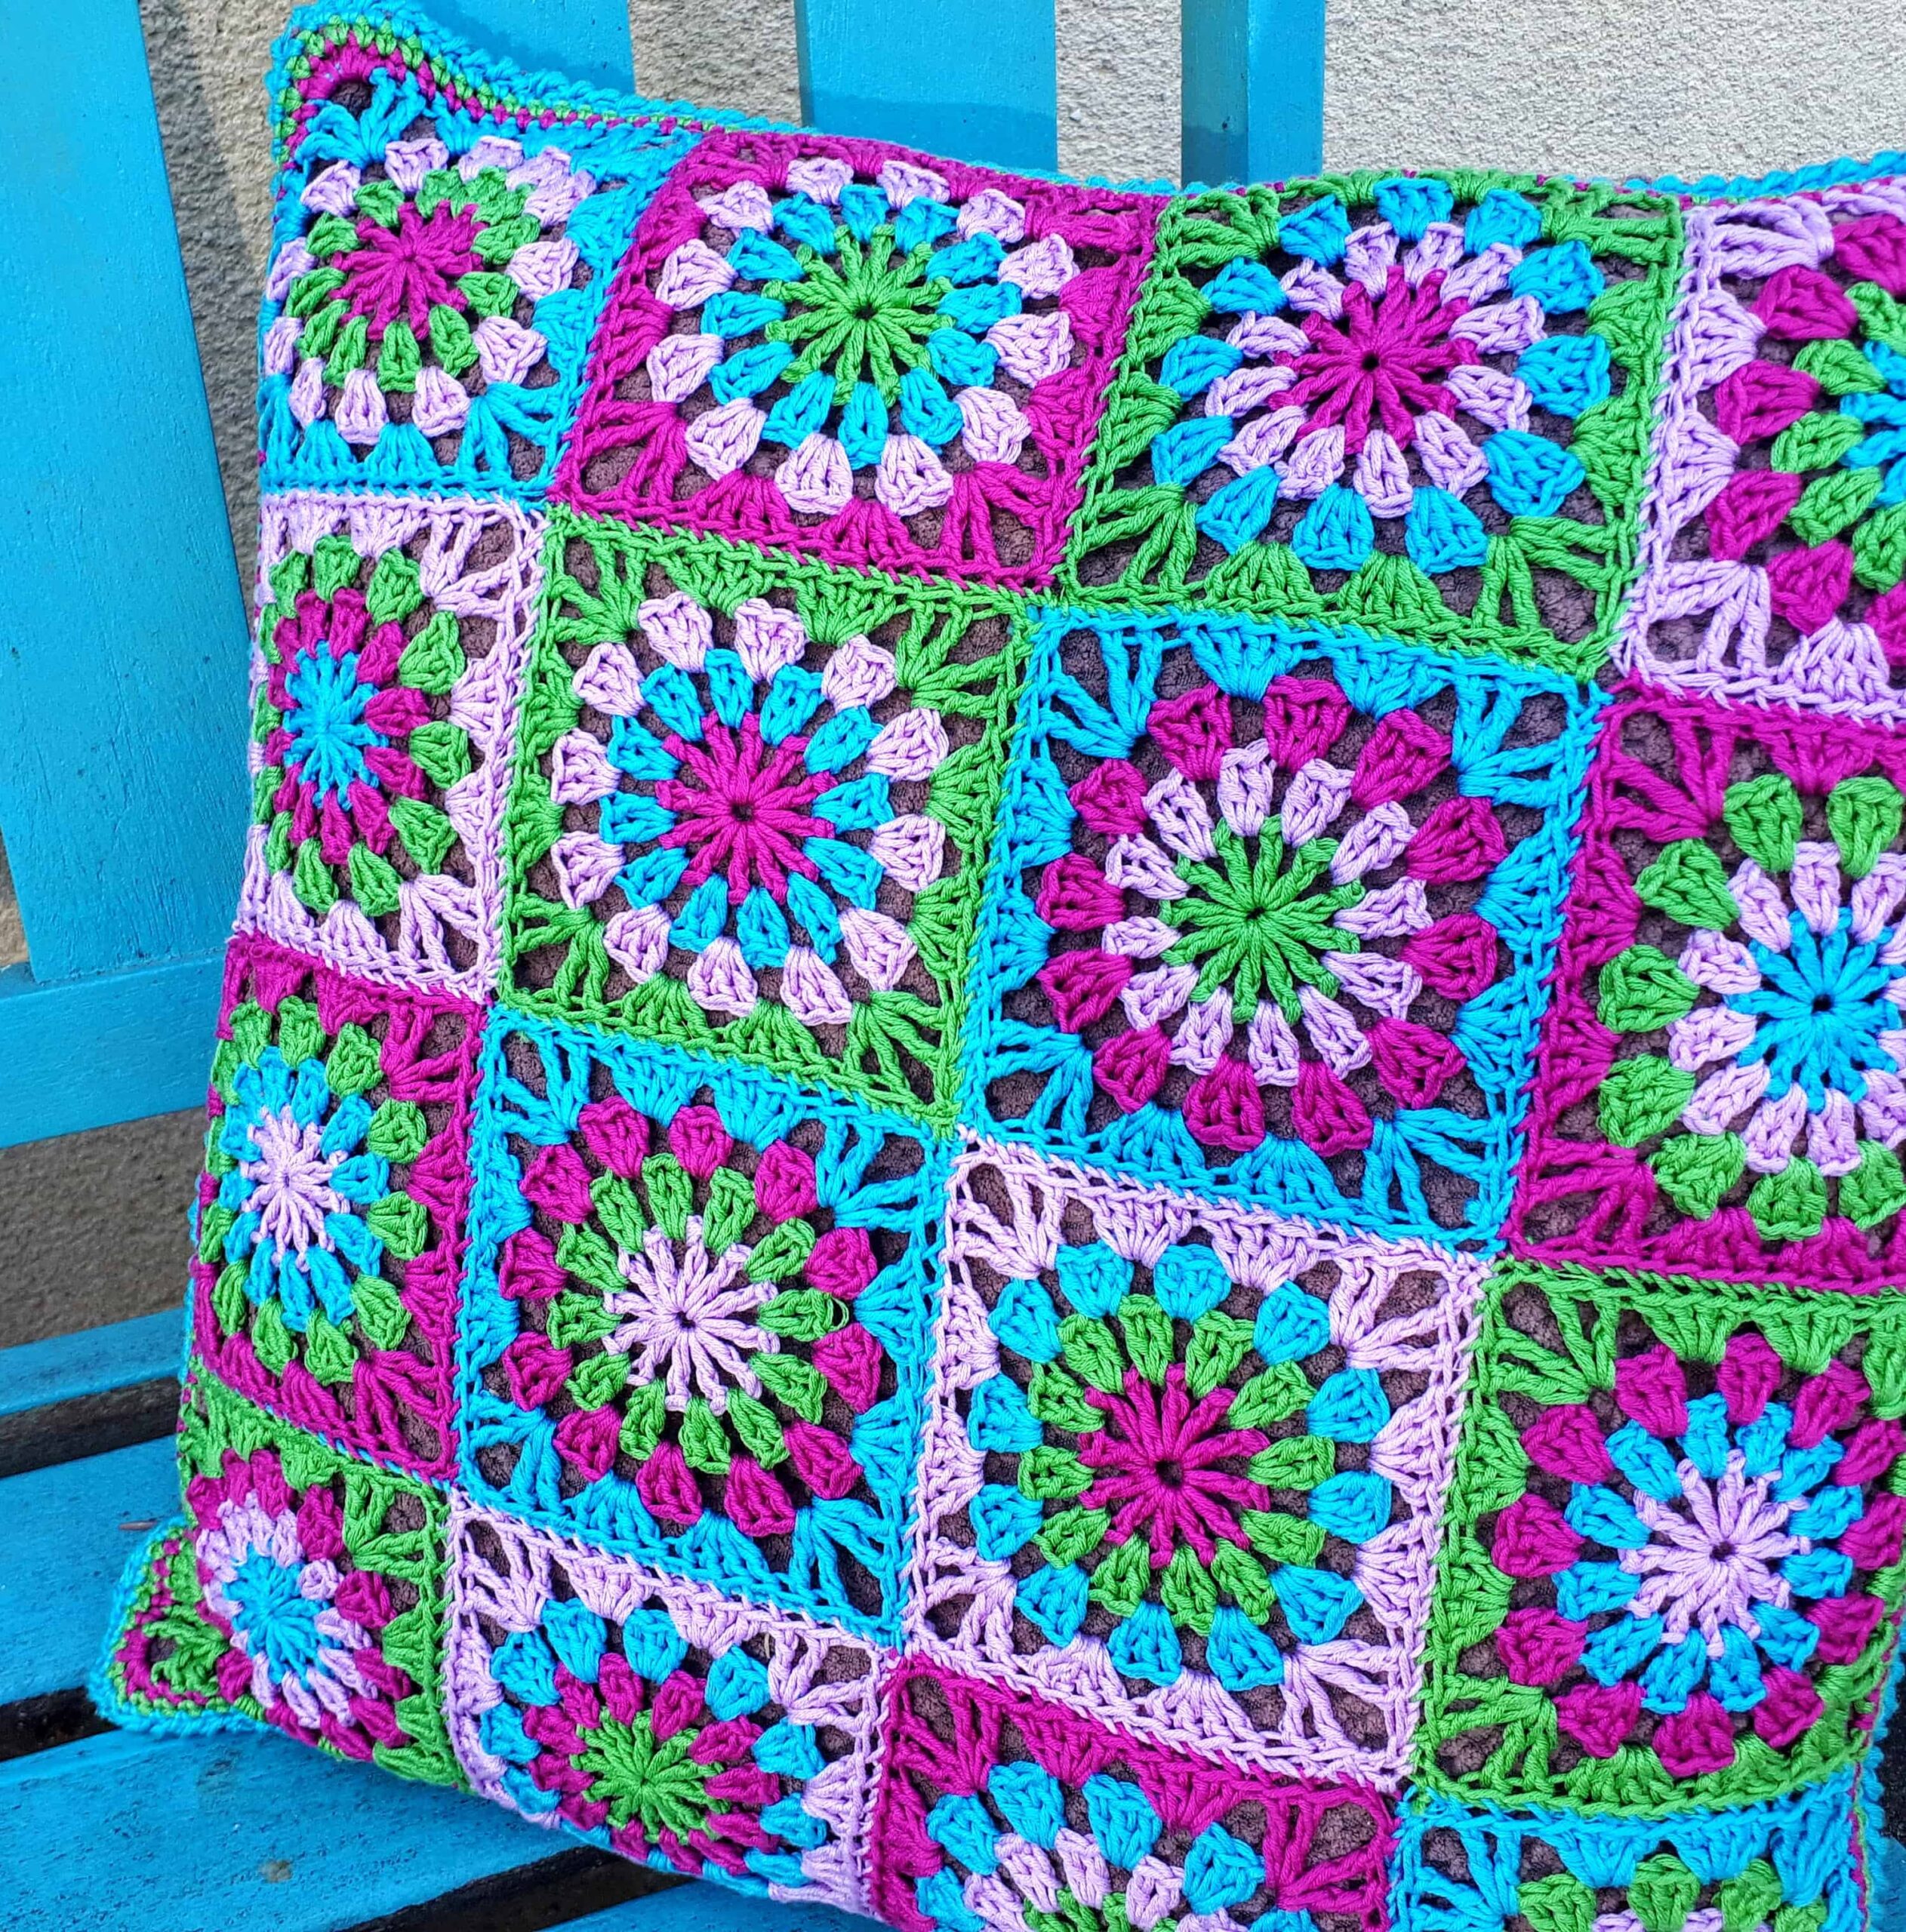
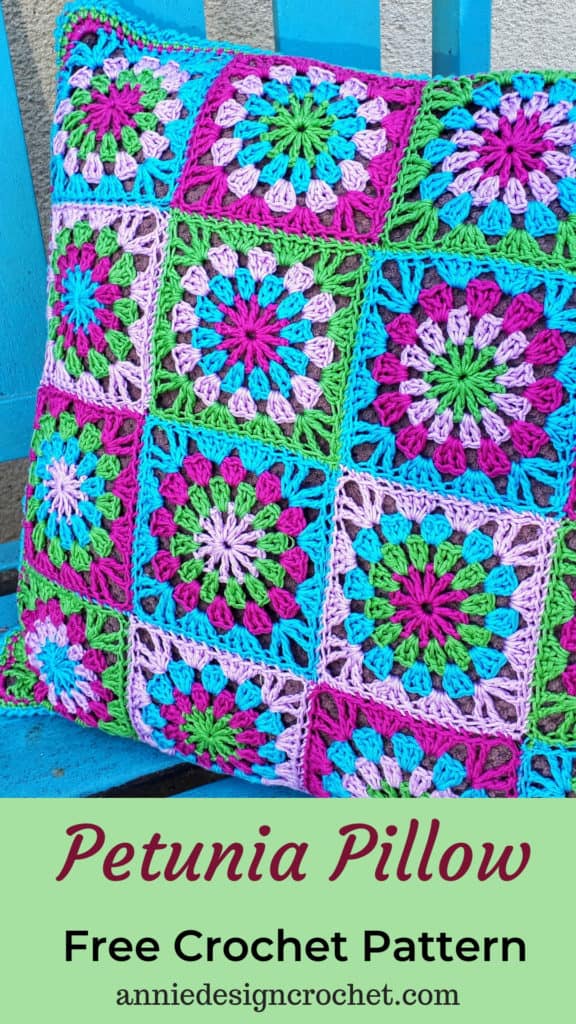
Sometimes you just need to crochet a traditional granny square pillow. I have an easy tutorial today for a crochet cushion cover. I made 16 granny squares in fun colour combinations, and then attached the crochet piece to the front of a store bought pillow…..easy! No messing around with a fabric insert and zips!
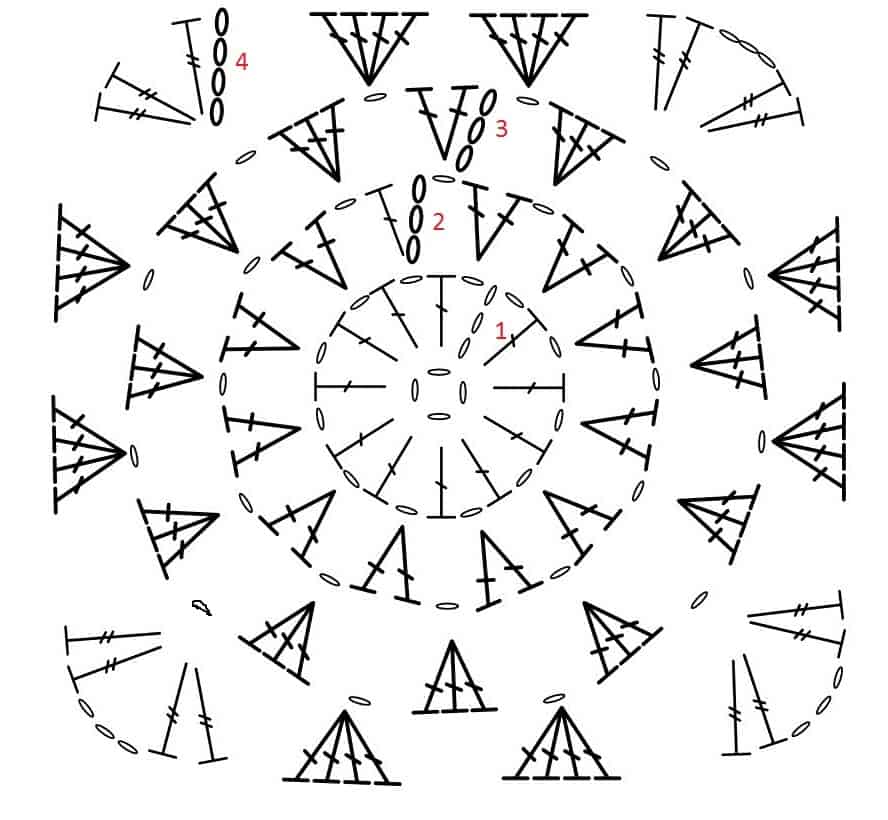
The crochet granny square is a very easy pattern of a crochet circle in three rounds, and a final 4th round to square the circle. You have probably already made loads of these, but if you are a beginner I have included a basic crochet chart to help.
Pin Pattern for later

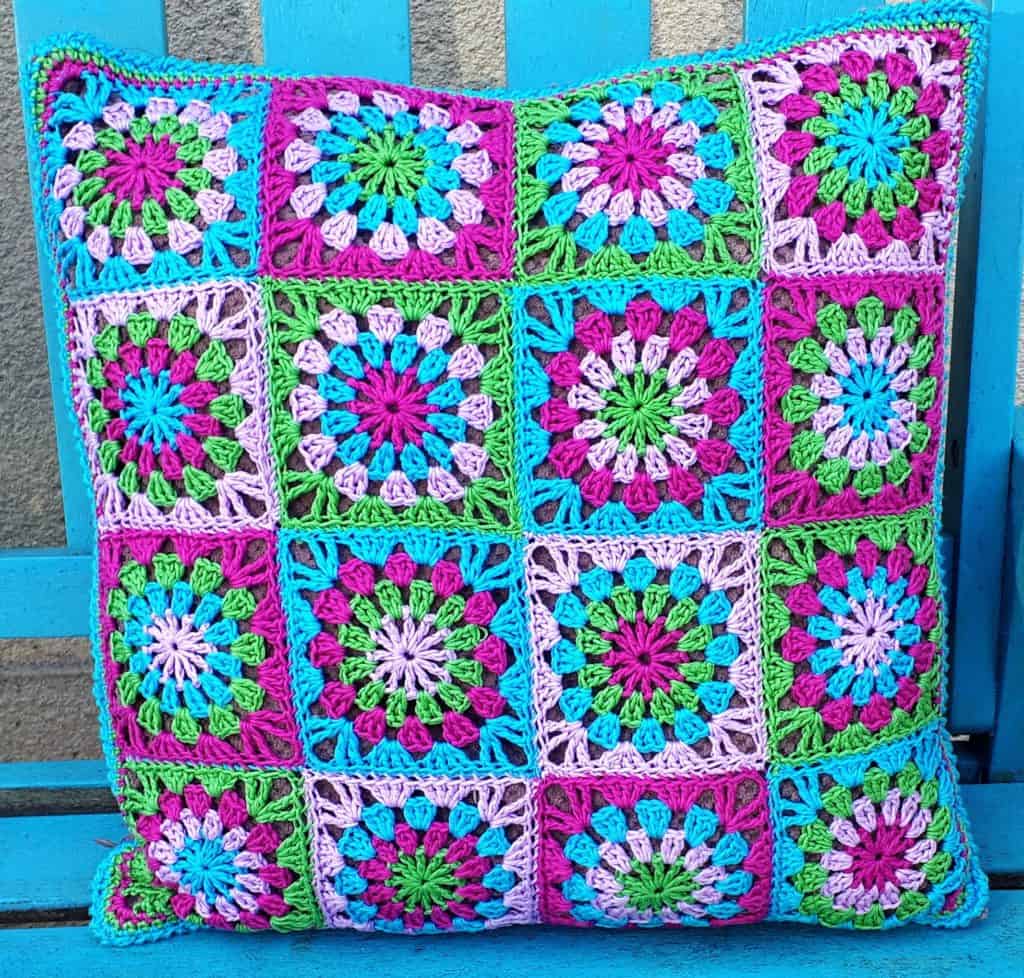
This free crochet pillow pattern is perfect for using up any cotton yarn you have lying about, or just choose 4 favourite colours to make one similiar to mine. I choose Rico Essentials Cotton in blue, green and some bright purple and lilac.
If you would like to make a more traditional granny square cushion, you may like this crochet pillow with mini granny squares
Check out loads more crochet pillows in this collection – 18 Colorful Crochet pillow Patterns
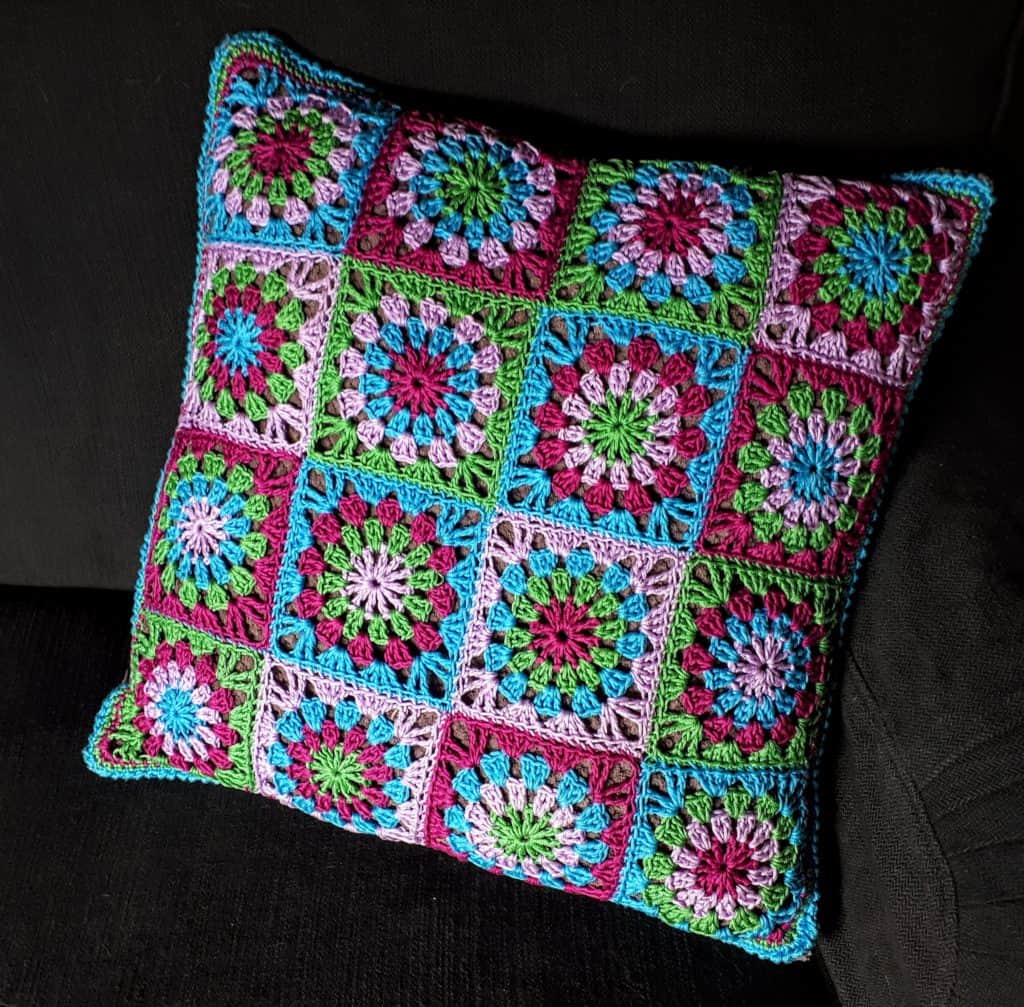
I love the way the pillow ‘pops’ against the dark sofa!
Materials for a Granny Square Pillow
- Rico Essentials Cotton DK (or any similar DK weight yarn) in four colours
- You can use any DK yarn you wish to achieve a similar effect. Cotton yarn is preferable
- 4mm Crochet Hook
- 16″ x 16″ [40 x 40cm] ready-made pillow
- Yarn needle and strong sewing thread
Granny Pillow Size
Finished size 16″ x 16″ [40 x 40cm]
Each square is approx. 3.75″ [9.5cm]
Abbreviations (US crochet terms)
- yo – yarn over
- ch – chain
- dc – double crochet
- tr – treble crochet
- sc – single crochet
- st(s) – stitch(s)
Special Stitches
Crab Stitch (or Reverse Single Crochet) – makes a lovely decorative edging. You can find a fab tutorial from HeartHookHome.com HERE
Crochet Granny Pillow Instructions
Square (make 16)
Using Yarn A, ch 4, sl st to join into a ring.
Round 1: Ch 4 (counts as first dc, ch 1), (1 dc, ch 1) 11 times into ring, join with a sl st to 3rd ch of beg ch4. Fasten off yarn (12dc, 12 ch-1 sp)
Round 2: Using yarn B, join in any ch-1 space from round 1, ch 3 (counts as 1 dc), 1 dc, ch 1 into same space, *2 dc, ch 1 into next ch-1 space; repeat from * around, join with a sl st to top of beg ch 3. Fasten off yarn. (24 dc, 12 ch-1 sp)
Round 3: Using yarn C, join in any ch-1 space from round 2, ch 3 (counts as 1 dc), 2 dc, ch 1 into same space, *3 dc, ch 1 into next ch-1 space; repeat from * around, join with a sl st to top of beg ch 3. Fasten off yarn. (36 dc, 12 ch-1 sp)
Round 4: Using yarn D, join in any ch-1 space from round 3, ch 4 (counts as 1 tr), [1tr, ch3, 2tr] (corner made) into same space, * [4 dc in next ch-1 space] twice **, (2 tr, ch 3, 2 tr) in next ch-1 space; repeat from * 2 more times, and from * to ** once. Join with a sl st to top of beg ch 4. Fasten off yarn.
Crochet a total of 16 squares.
Crochet Chart for Square
Finishing your Crochet Pillow
Sew the squares together to make four rows with four squares in each row
Place right side of each square together and sew using back loops only, for a neat finish.
Block your crochet piece to size. I pinned out the square to measure approx 15.5 x 15.5″ [39 x 39cm] sprayed lightly with water, and left to dry. You could also use a steam iron, moving it an inch or two over your square. If using acrylic yarn, be careful the hot iron does not touch it!
Border
Round 1: With right side facing, and using colour of your choice, join into any corner space. Ch 1 * (2 sc, ch 2, 2 sc) (corner made), sc in each st across side, making 14sc on top of each square and 1sc in space between squares, to next corner; repeat from * until four corners and four sides have been made. Join with a sl st to beg ch 1 to join. Fasten off yarn.
Round 2 : Join in next yarn in any st, ch 1, sc in each st around pillow, making (2 sc, ch 2, 2 sc) in each corner ch-2 space. Join with a sl st in first sc. Fasten off yarn.
Round 3: Join in next yarn in any st, ch 1, sc in each st around pillow, making 3 sc in each corner ch-2 space. Join with a sl st in first sc. Fasten off yarn.
Round 4 : Ch 1, skip a st to the right, and make a crab st (see special stitches) into each sc around, ending with a sl st into first crab st made. Fasten off. Weave in all threads. (or you could just make another sc row around the edge)
Finishing
Remove the pillow insert. Lay your square on one side of your pillow and pin it in place around all sides. Using a strong cotton sewing thread, whip stitch around. Put your insert back in your pillow, fluff it up and enjoy!
You can see pictures of how I attached the front of a previous pillow HERE
Find more Free patterns here
If you make this pattern, don’t forget to follow me on Instagram and be sure to tag me in your photos so I can see it too, @anniedesigncrochet or #anniedesigncrochet – I can’t wait to see what colours you use with this pattern!
The photographs and pattern contained on this page are the property of Annie Design Crochet.com.
This pattern is for personal use only.
No unauthorized reproduction, in whole or in part, or distribution of this pattern or content is permitted.

What a beautiful pillow cover and pattern! Thank you so much for sharing it!
Thank you for your patterns. I’m making a continuous granny square (2 of them to cover a 12” pillow form. How many inches should I make the granny squares so I can fit pillow form nicely into it. Thank you for any help.
Hi! I like to make my pillow panels slightly smaller than the pillow form to allow for a stretch. Try making it 11.5″ and pin it and see if that is enough. It can be a bit of trying it on!
I already seamed it together before seeing your reply. I made it the same size as pillow form & it turned out well but next time I’m going to do as you say as a little snugger would be good. Thank you & for all your patterns 😀