
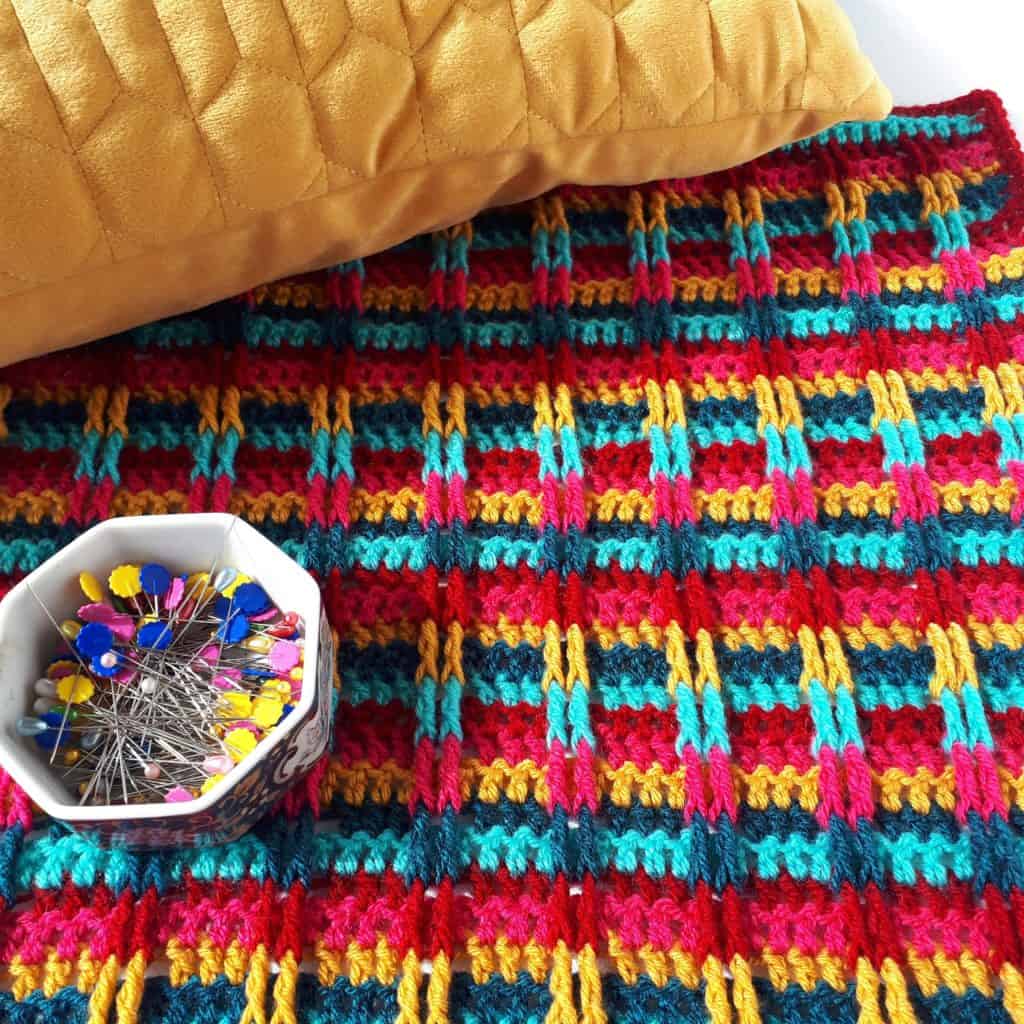
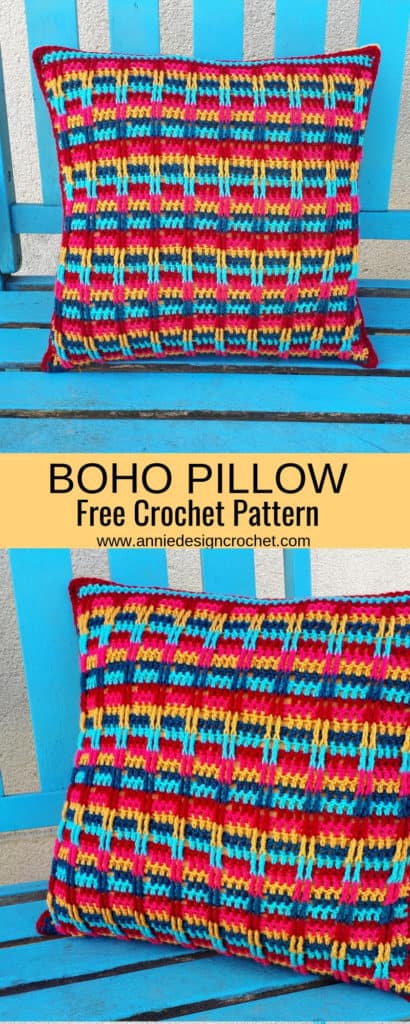
I am sharing today a free crochet pattern for a pillow (or cushion as we call them in Ireland!) that I crocheted this week, and absolutely love! It has an easy effective stitch and will use up any colourful scraps of DK yarn you have in your stash.
The pattern is written for a pillow front that fits a 17″ ready made cushion, but it is only a recipe and you could use any weight yarn, and any size cushion you wish. Its easy, I promise! And as you only have to crochet one side, it is quick to make. Have fun playing with colours.
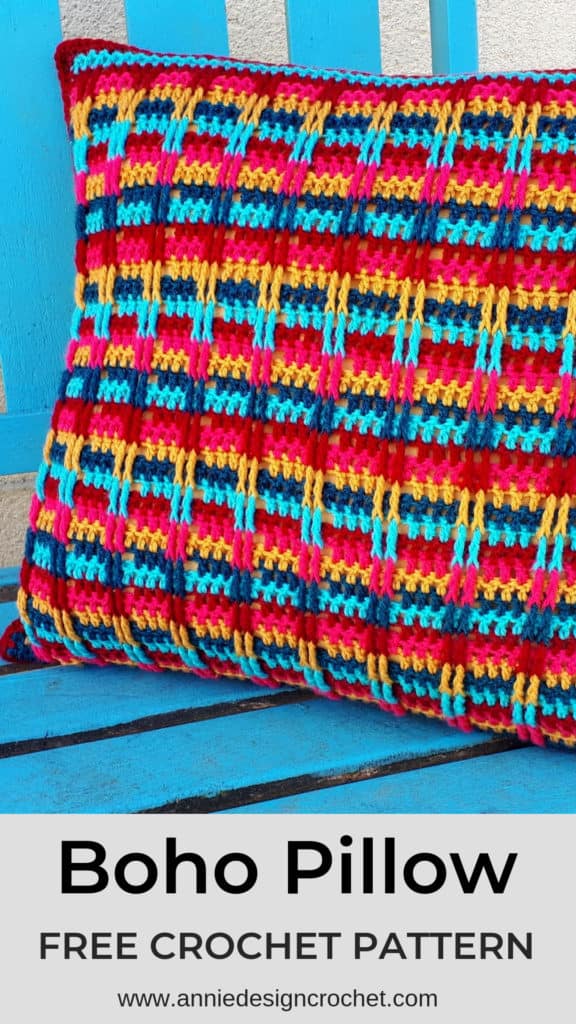
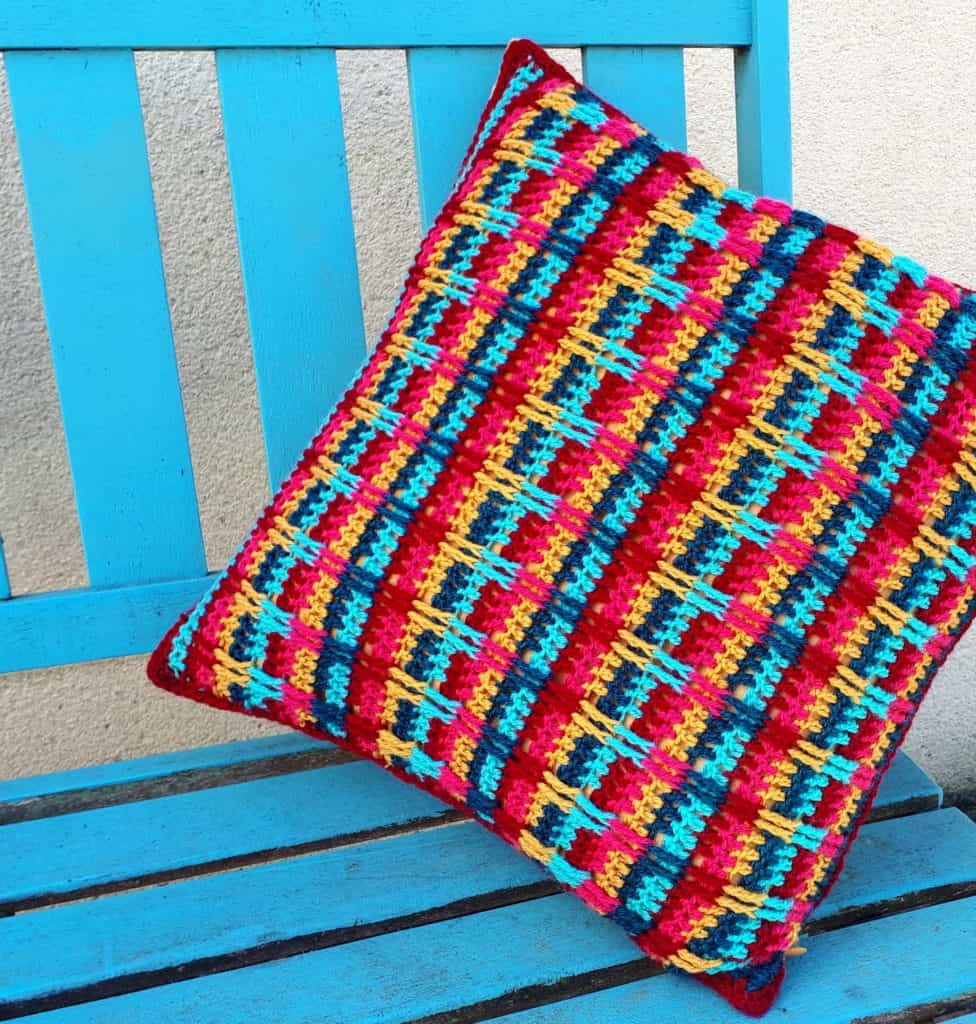
I bought a lovely mustard pillow from a local store, and crocheted a colourful square. I then attached the crochet piece to the front of the pillow…..easy! No messing around with a fabric insert and zips!
You may also enjoy 18 Colorful Crochet pillow patterns and this gorgeous mini-granny crochet cushion.
Read on for the free crochet pattern for this super cute boho pillow.
Materials
- Cygnet DK : 100% Acrylic / 297 meters / 100 grams (pillow uses 5 colours)
- You can use any DK yarn you wish to achieve a similar effect. Cotton yarn would work very well.
- 4mm Crochet Hook
- 17″ x 17″ [43 x 43cm] ready-made pillow
- Yarn needle and strong sewing thread
Size of Pillow
Finished size 17″ x 17″ [43 x 43cm]
Abbreviations
- yo – yarn over
- ch – chain
- dc – double crochet
- fptr – front post treble crochet
- sc – single crochet
- st(s) – stitch(s)
Special Stitch
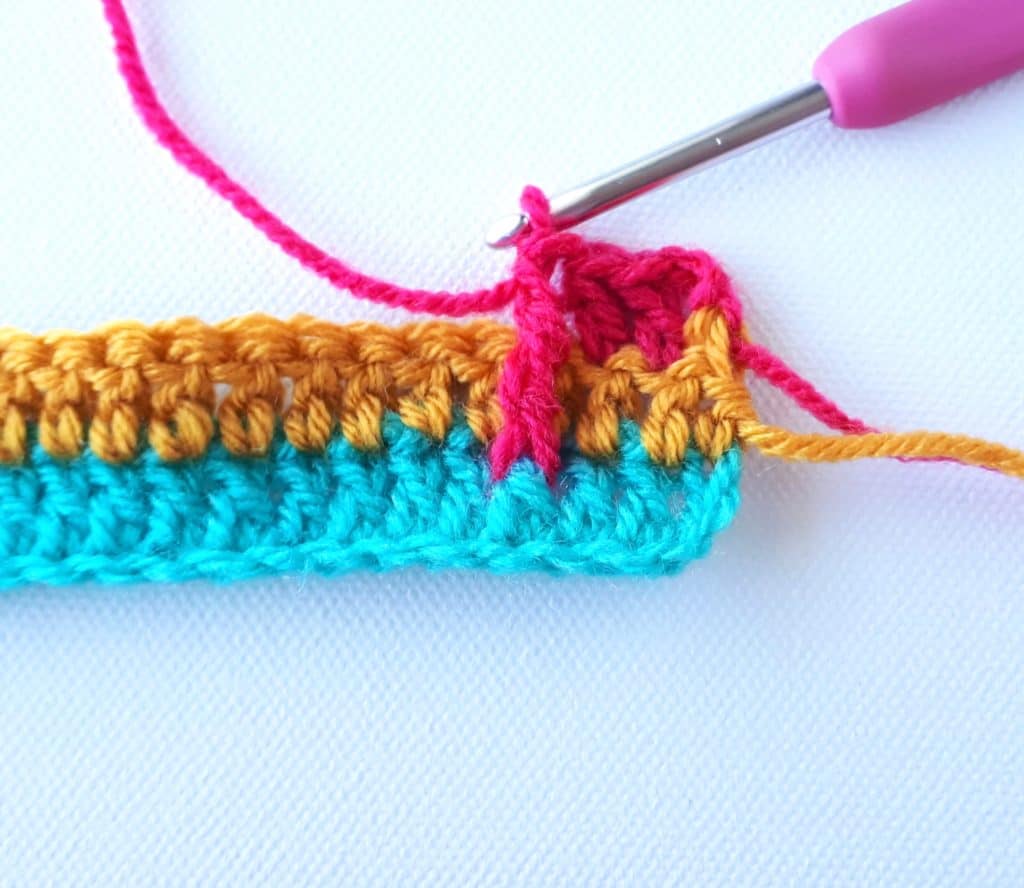
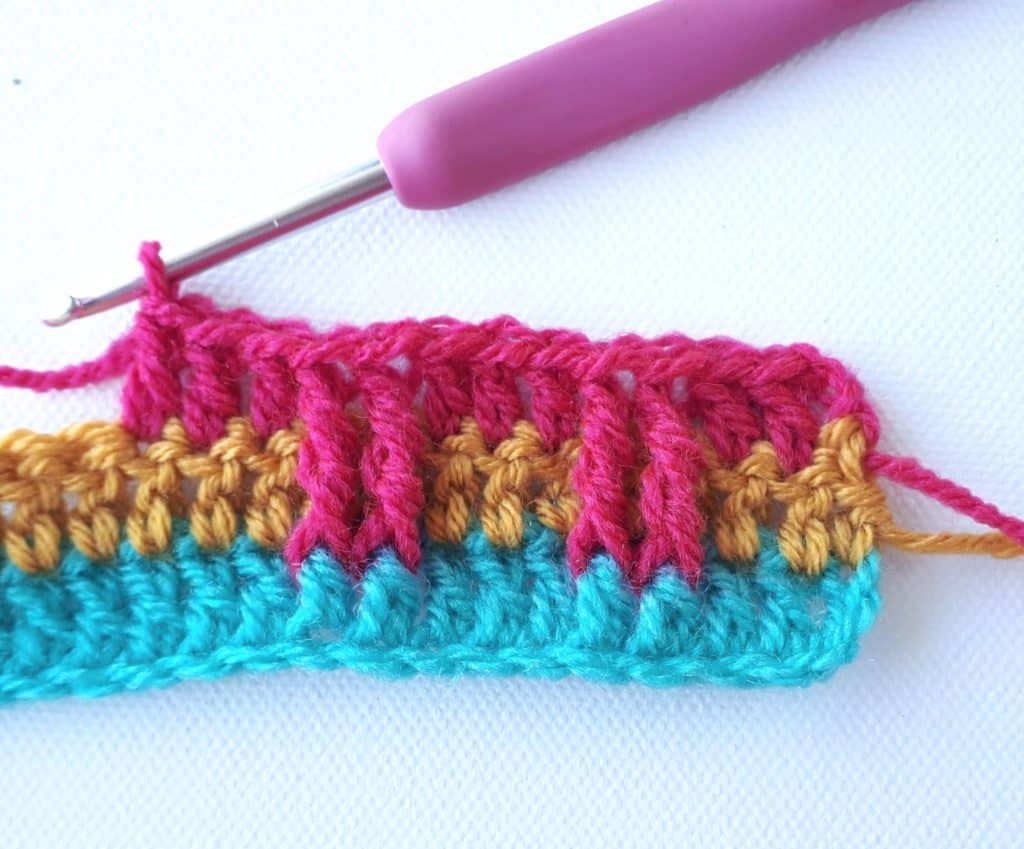
Front post treble crochet (fptr) – Make your stitch as loosely as you can – Yo 2 times, insert your hook from front to back to front, around the post of the stitch 2 rows below, yo, pull up a loop, (yo, pull thru 2 loops on your hook) 3 times.
Notes
- The pattern is written in US crochet terms
- The pattern repeat is a multiple of 5 sts (+ 3) + 3 for the foundation row. You can use this multiple to make your pillow front any size you like. Try and make it slightly smaller than your pillow, so it will stretch nicely into shape.
- Use an odd number of colours for the stripes if you want to achieve the same effect
- You will change colour every row
- You will make your front post treble crochet stitches every 2nd row
- Beginning ch 3 counts as 1 dc
- Pillow uses 5 colours which are repeated in sequence every 5 rows
Instructions for Boho Crochet Pillow
You will change colour every row
Using 1st colour, ch 56
Row 1: 1 dc in 4th ch from hook, dc in each st across, turn. Fasten off yarn – 53dc
Row 2: Ch 3 (counts as 1 dc here and throughout), dc in each st across, turn. Fasten off yarn
Row 3: Ch 3, 1 dc in next 2 sts, * 1 fptr in each of the next 2 sts, two rows below, 1 dc in the next 3 sts; rep from * across, turn. Fasten off yarn
Row 4: Ch 3, dc in each st across, turn. Fasten off yarn
Repeat rows 3 & 4 18 more times, changing colour every row
Total 39 rows
Finishing
You will now work 2 rows of sc around 4 sides of pillow square for a border, in any colour
Border
Row 1: Join yarn in first st in top right of piece, ch 1, 1 sc in each st across (53 sc), 3 sc in corner, work 53 sc down side of square (work as evenly as you can. I made 1 sc around each row end, and 2sc in every third row), 3 sc in next corner, 53 sc across bottom of square, 3 sc in next corner, work 53 sc up last side of square (as before), 3 sc in final corner.
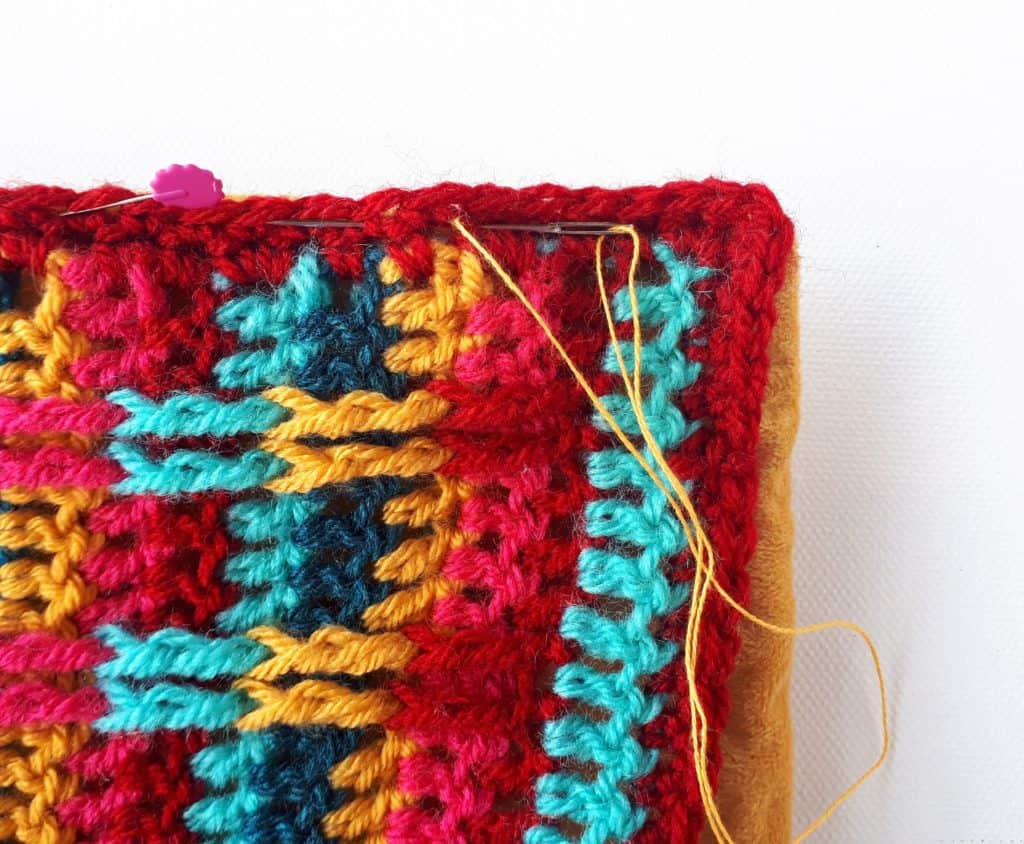
Row 2: Ch 1, 1 sc in each st around square, working 3 sc in each corner, Fasten off and weave in all threads.
Block your crochet piece to size. I pinned out the square to measure 17 x 17″ [43 x 43cm] sprayed lightly with water, and left to dry. You could also use a steam iron, moving it an inch or two over your square. If using acrylic yarn, be careful the hot iron does not touch it!
Here is my crochet square nicely blocked, ready to attach to my pillow
Remove the pillow insert. Lay your square on one side of your pillow and pin it in place around all sides.
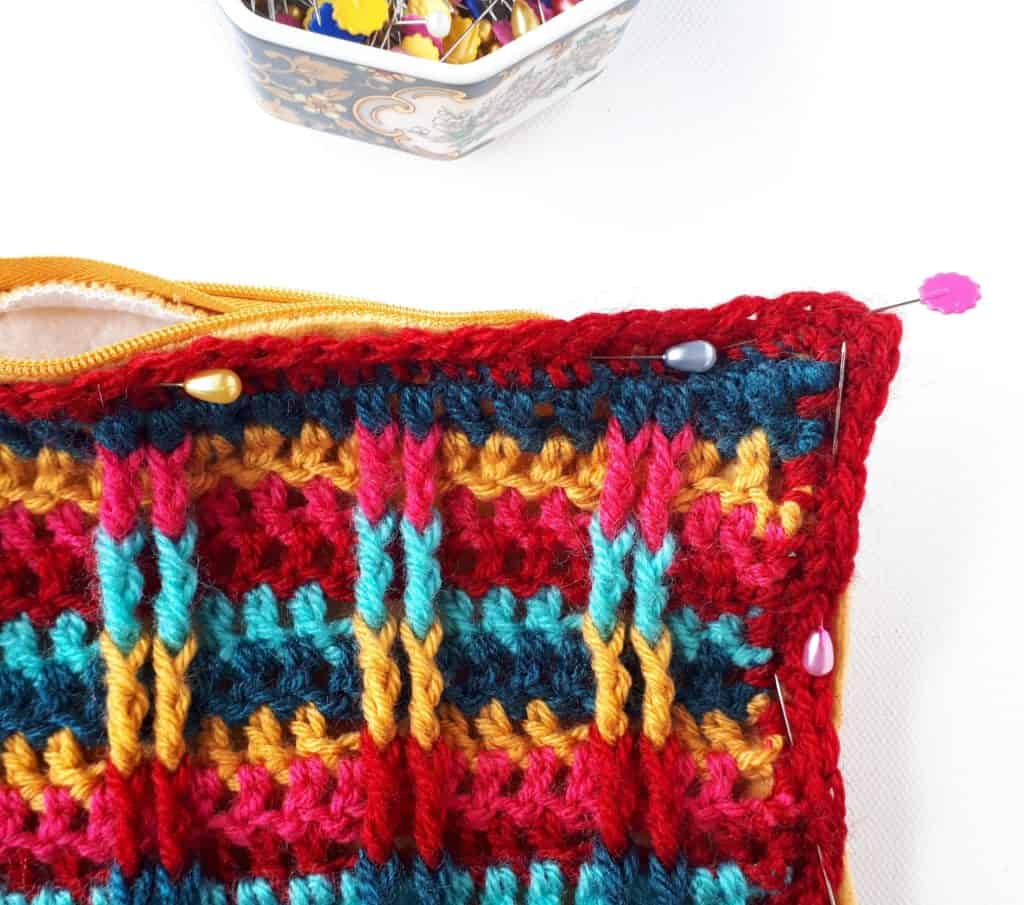
Using a strong cotton sewing thread, whip stitch around.
Put your insert back in your pillow. fluff it up and enjoy! I hope I inspired you to make one (or a few) Boho pillows of your own!
Add to your Ravelry Queue
Find more Free patterns here
If you make this pattern, don’t forget to follow me on Instagram and be sure to tag me in your photos so I can see it too, @anniedesigncrochet or #anniedesigncrochet – I can’t wait to see what colours you use with this pattern!
The photographs and pattern contained on this page are the property of Annie Design Crochet.com.
This pattern is for personal use only.
No unauthorized reproduction, in whole or in part, or distribution of this pattern or content is permitted.

Absolutely gorgeous, guess what I’m adding to my wip pile this week. I also love that you have blown my mind this week with the crocheting one side and attaching to a cushion… Genius
It’s so amazing and beautiful. These ideas Are Very Impressive thanks for helpful ideas I am very very happy to see this because you give me creative ideas.