Add a touch of whimsey to your projects with this free crochet pattern for an adorable crochet owl applique.
This easy owl applique pattern allows you to play with different colors, making each crochet owl truly unique. Whether you’re making it for yourself or as the perfect gift for an owl lover, these little cuties are so much fun to make.
Read below to create your own little flock of delightful crochet owls!
Materials Needed for a Crochet Owl
For my crochet owl applique, I used a cotton DK yarn – Paintbox Cotton DK, for the body. It gave the owl a lovely texture and weight. I used a 3 mm crochet hook.
The eyes were made from a lighter fingering/4 ply cotton – Scheepjes Cotton 8, which resulted in a neater, more defined appearance. However, you’re not bound to these specific yarn weights. It is a great way to use up small amounts of stash yarn as you will only need a little bit of yarn. Just make sure to match your yarn weight with the appropriate hook.
In my experience, using a slightly smaller hook than typically recommended, like a 3mm crochet hook, creates a firmer gauge that really makes the details pop.
Lastly, don’t forget a tapestry needle for sewing the pieces together and embroidering the intricate details that make our crochet owls come to life! You could also use a safety eye if you prefer.
Customize Your Crochet Owl
One of the best things about this crochet owl applique is its versatility. You can play with different colors to give your finished owl its own unique character.
You can also add personal touches like embellishments, or change up the colors. Your imagination is your only limit!
See the image of the cute little owls below for some ideas to to add a different look to your owl. The sleepy owl is the cutest thing! You can find a photo tutorial for the sleepy eyes below.
- This adorable owl will make a charming addition to a variety of items.
- You can spruce up a plain bag
- Add a sweet touch to crochet blankets for a baby shower gift.
- Add a cute crochet owl to a hat for a little girl or boy.
- The crochet owls can transform any home decor project, like a pillow into a personalized piece that’s sure to be treasured

Sleepy Owl Crochet Pattern
The pattern is in US crochet terms.
Abbreviations (US terms)
- Ch Chain
- SC Single crochet
- DC Double crochet
- Rep Repeat
- Sl st Slip stitch
Materials
- I used a cotton DK yarn (Paintbox Cotton DK) for the body of the owl, and a fingering/4 ply cotton (Scheepjes Cotton 8) for the eyes. You can of course, use any weight you like but I find the lighter weight yarn makes a neater eye.
- Whatever yarn weight you use, just make sure to use the matching hook. A smaller hook than recommended works best to give a firm gauge
- 3mm crochet hook
- Yarn needle to sew pieces together and embroider the details
It makes a much neater finish if you use an invisible join to finish your circles. I have included a tutorial at the bottom of the page.
Body of Crochet Owl
Round 1: Magic ring, ch 2 (counts as 1 dc), 11 dc into ring. Pull centre to close tightly. Join to top of 1st dc (just after ch 2. It stops the gap on next row!) – 12 dc
Round 2: Ch 2, 1 dc in same st, 2 dc in each st around. Join to top of 1st dc – 24 dc
Round 3: Ch 1 (counts as 1 sc), 2 sc in next st, (1 sc in next st, 2 sc in next st) repeat around. Join to beg ch 1, fasten off yarn – 36 sc
Place 2 markers (I use scraps of yarn) to help later when attaching wings. Add marker to any stitch, skip 15 sts and add 2nd marker to next st.
Eyes (make 2)
You can use a contrast colour for round 2 if you like
Round 1: Magic ring, ch 2 (counts as 1 dc), 11 dc into ring. Join with sl st to 1st dc (as before, the dc after ch2) – 12 dc
Round 2: Ch 1 (counts as 1 sc), 2sc in next st, (1 sc in next st, 2 sc in next st) repeat around. Join to beg ch 1, fasten off yarn leaving a long tail for attching later.
Wings
- Join yarn in marker on left side of owl body.
- Ch 1, 1 sc in same st, 2 hdc in next st, 2 dc in next st, [1 dc, ch 2, sl st] in next st, fasten off.
- Working on other side of owl body, join yarn in st 4 sts before marker.
- Ch 2, 1 dc in same st, 2 dc in next st, 2 hdc in next st, [1 sc, ch 1, sl st] in next st (marked stitch), fasten off.
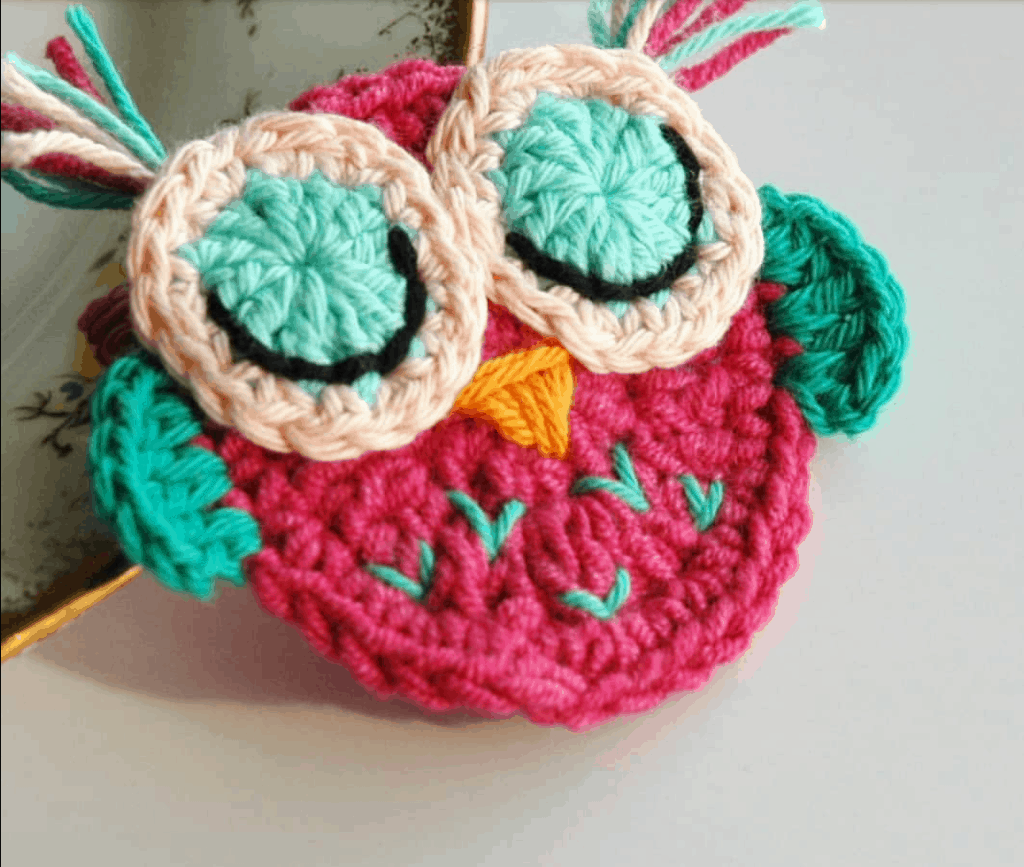
Sleepy Eyes
Using black yarn, make back sewing stitches just inside round 2 on eye, to form the shape of the ‘sleepy eye’. See picture for details.
Place both eyes on body and sew into place with white yarn.

Beak
Using yellow yarn, make a few up and down stitches between the eyes, and 2 or 3 stitches across the top of the beak to form the shape. See picture for details. Weave in all threads.
Adding details to the Crochet Owl
Sometimes I add a few more little stitches in a contrast colour to the body to look like feathers…just a detail that can also be included if you want.
See the following picture for some more ideas for making crochet owls. I made little wings (ch 7, sl st into 2nd ch from hook, sc, hdc, dc, dc, tr into remaining chains, fasten off) and sewed them onto the body.
The owl on the right has little black circles sewn on to the eyes. Have fun experimenting!

Invisible Joining (Invisible Needle Join)
Complete the final stitch of your round. Cut yarn leaving a long tail. Drop your hook and pull the tail all the way through the stitch and thread the yarn tail through a yarn needle.
- Insert the needle from the front to the back under the top two loops of the first complete stitch made to your left (after the beg ch 3). See Picture 1
- Pull yarn through. See Picture 2
- Insert your needle in the back loop only of the last stitch made to your right. See arrow on Picture 3
- Pull through loop gently and weave in ends. See Picture 4
Check out all my crochet applique free patterns
Follow me on Instagram for more crochet inspiration
I hope you enjoy this Free pattern!
If you make this pattern, be sure to tag me in your photos so I can see it too, @anniedesigncrochet or #anniedesigncrochet – I can’t wait to see what colours you use!