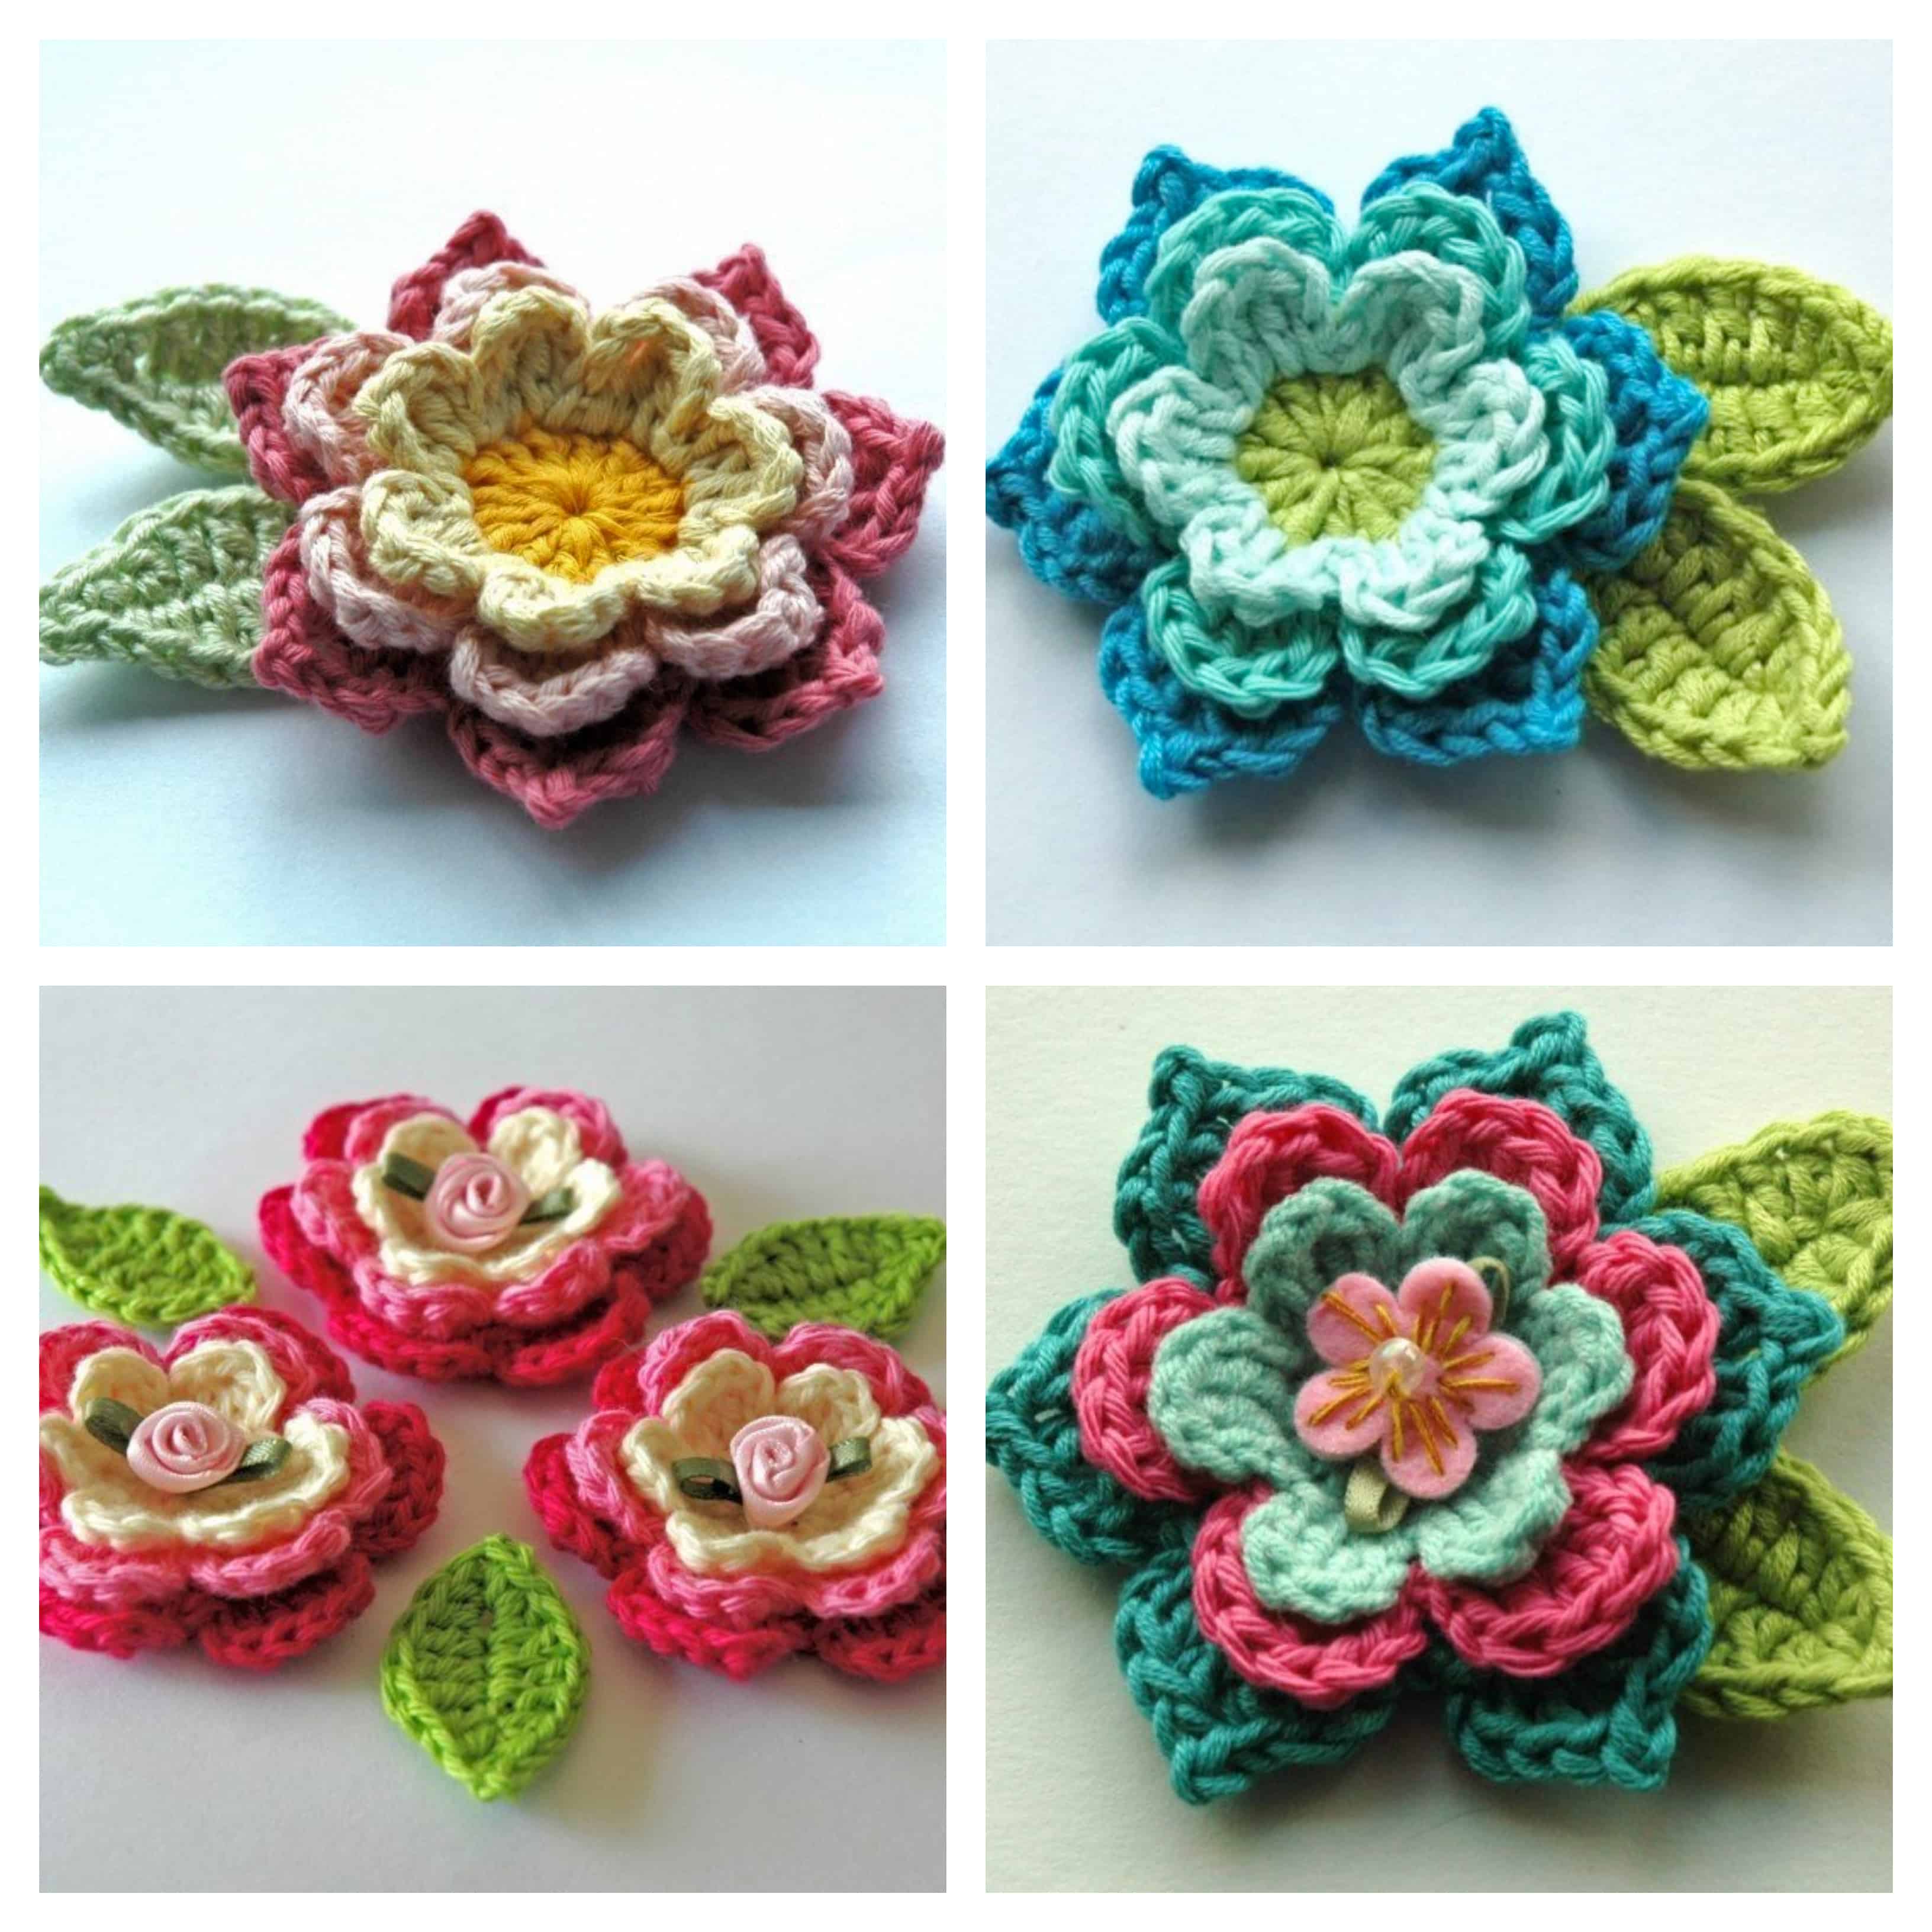
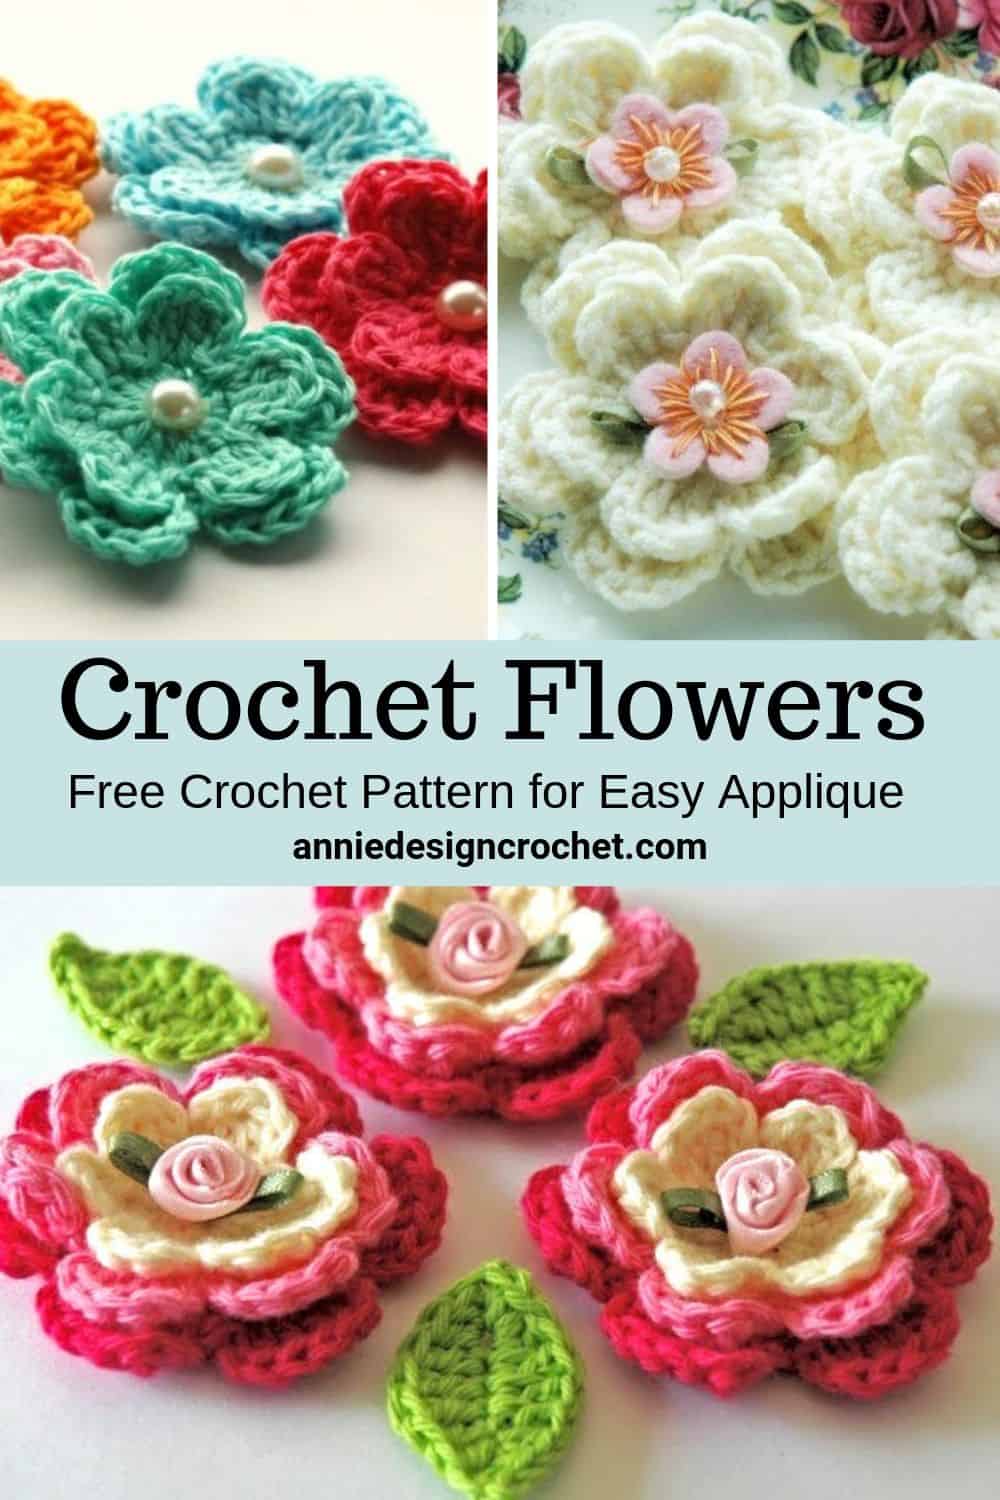
I have been making these little crochet flowers and leaves for years, in every colour combo possible! I am so happy to share them with you now.
The pattern is easy – and a beginner, with a little practice, will soon be churning out loads of flowers. I hope to inspire you to use your most colourful yarns to create your own crochet gardens.
A single flower makes a gorgeous pin/brooch, or string them together for a garland. Embellish a baby blanket….a cushion…..the list is endless!
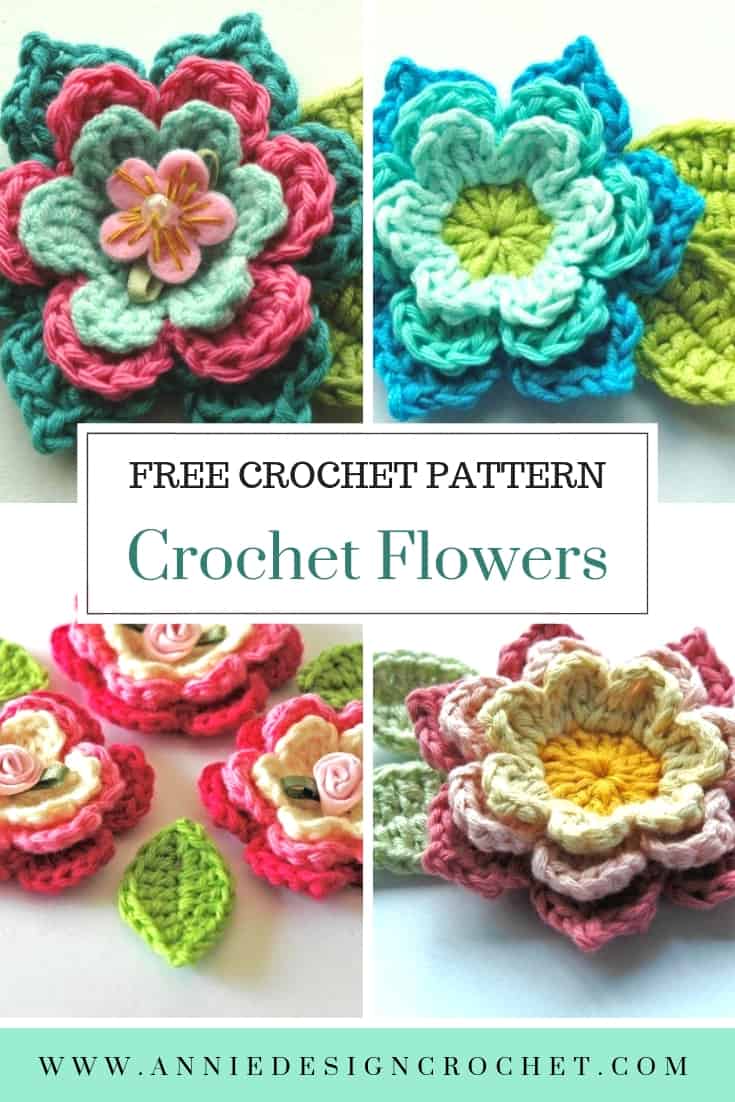
PIN FOR LATER
Best Yarn for Crochet Flowers and Leaves
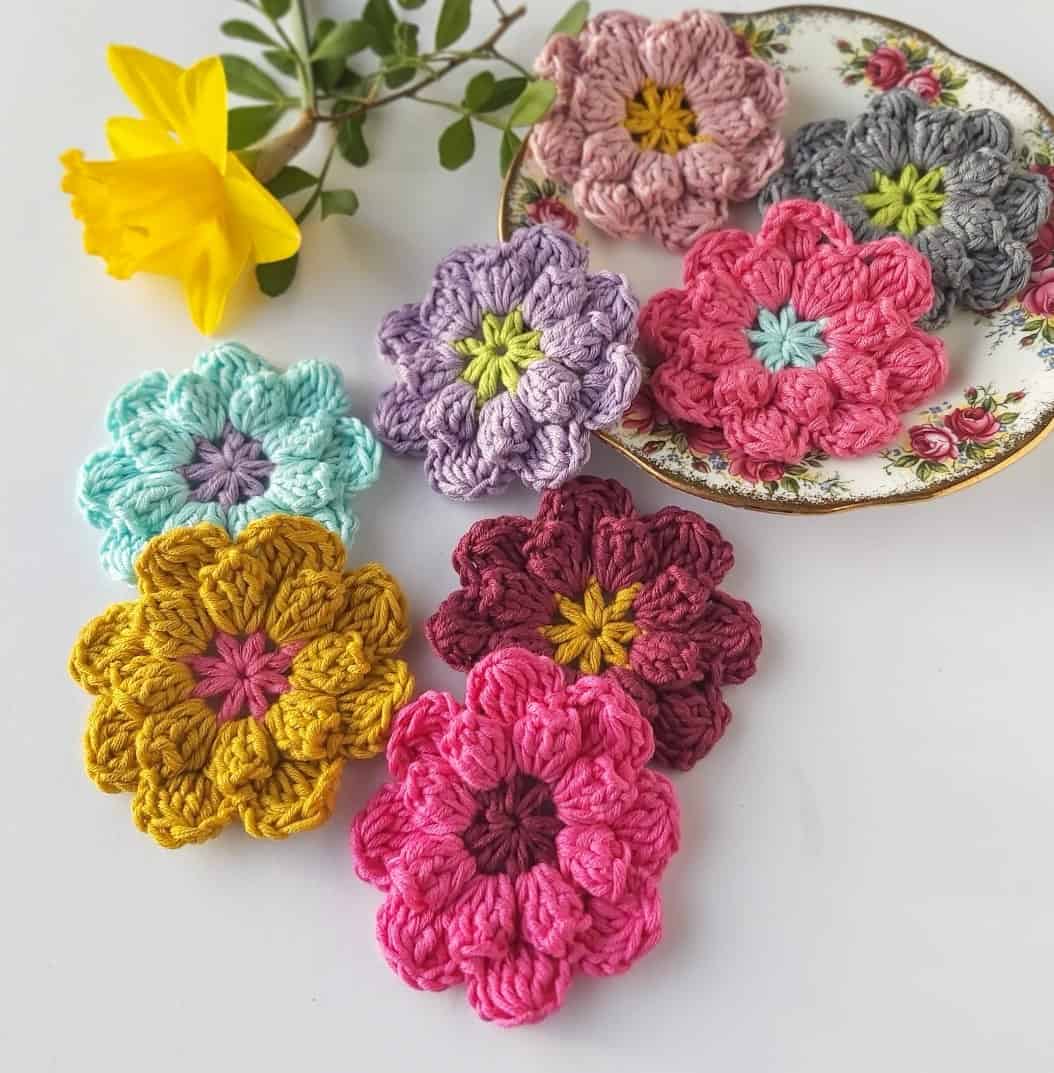
I used scraps of DK weight yarn and 4 ply/fingering weight yarn for my flowers, but you can use any yarn weight you wish – just use a matching hook.
My favourite yarn for making flowers is the wonderful Scheepjes Catona, which you can purchase in tiny 25g balls. It is a fabulous all-purpose 100% mercerised cotton 4 ply yarn. Cotton yarn has excellent stitch definition, and is perfect for smaller projects like these crochet flowers.
Crochet Flowers Pattern Collection
If you love to crochet colorful flowers, you will love this eBook – ‘Quick and Easy Crochet Flowers’. Each pattern is accompanied with a step by step photo tutorial making it easy for even a beginner to follow.
It contains 4 of my most popular flower patterns in one beautiful PDF bundle.
Purchase the Crochet Flowers Collection PDF
Crochet Flower Pattern Details
Crochet Hook Size
- DK weight – 3.5mm hook
- 4 ply/fingering weight – 2.5mm or 3.00mm hook
Measurements
- A flower made in DK weight yarn is approx. 3″
- A flower made in 4 ply/fingering weight yarn is approx. 2.5″
Abbreviations
US Crochet terms
- sc – single crochet
- dc – double crochet
- ch – chain
- sl st – slip stitch
- st – stitch
- rep – repeat
UK Crochet terms
- dc – double crochet
- tr – treble crochet
- ch – chain
- sl st – slip stitch
- st – stitch
- rep – repeat
Check out another Crochet Pattern for Easy Crochet Flowers
Lets start crocheting! You will find a pattern for crochet leaves further down the page.
Instructions for Crochet Flower Pattern
Round 1: With first colour, ch4 (counts as centre ch and 1dc), and work 11dc into 4th ch from hook, join with sl st to top of beginning ch 3. Fasten off yarn – 12dc
Alternative round 1: With first colour, make a magic ring, ch3 (counts as 1dc), and work 11dc into ring. Tighten magic ring, join with sl st to top of beginning ch 3. Fasten off yarn – 12dc
Round 2: Join 2nd colour into top of any dc st from last round. *[ch 2, 1dc] into same st, [1dc, ch 2, sl st] into next st; repeat from * to ; total of 6 times. Fasten off yarn – 6 petals
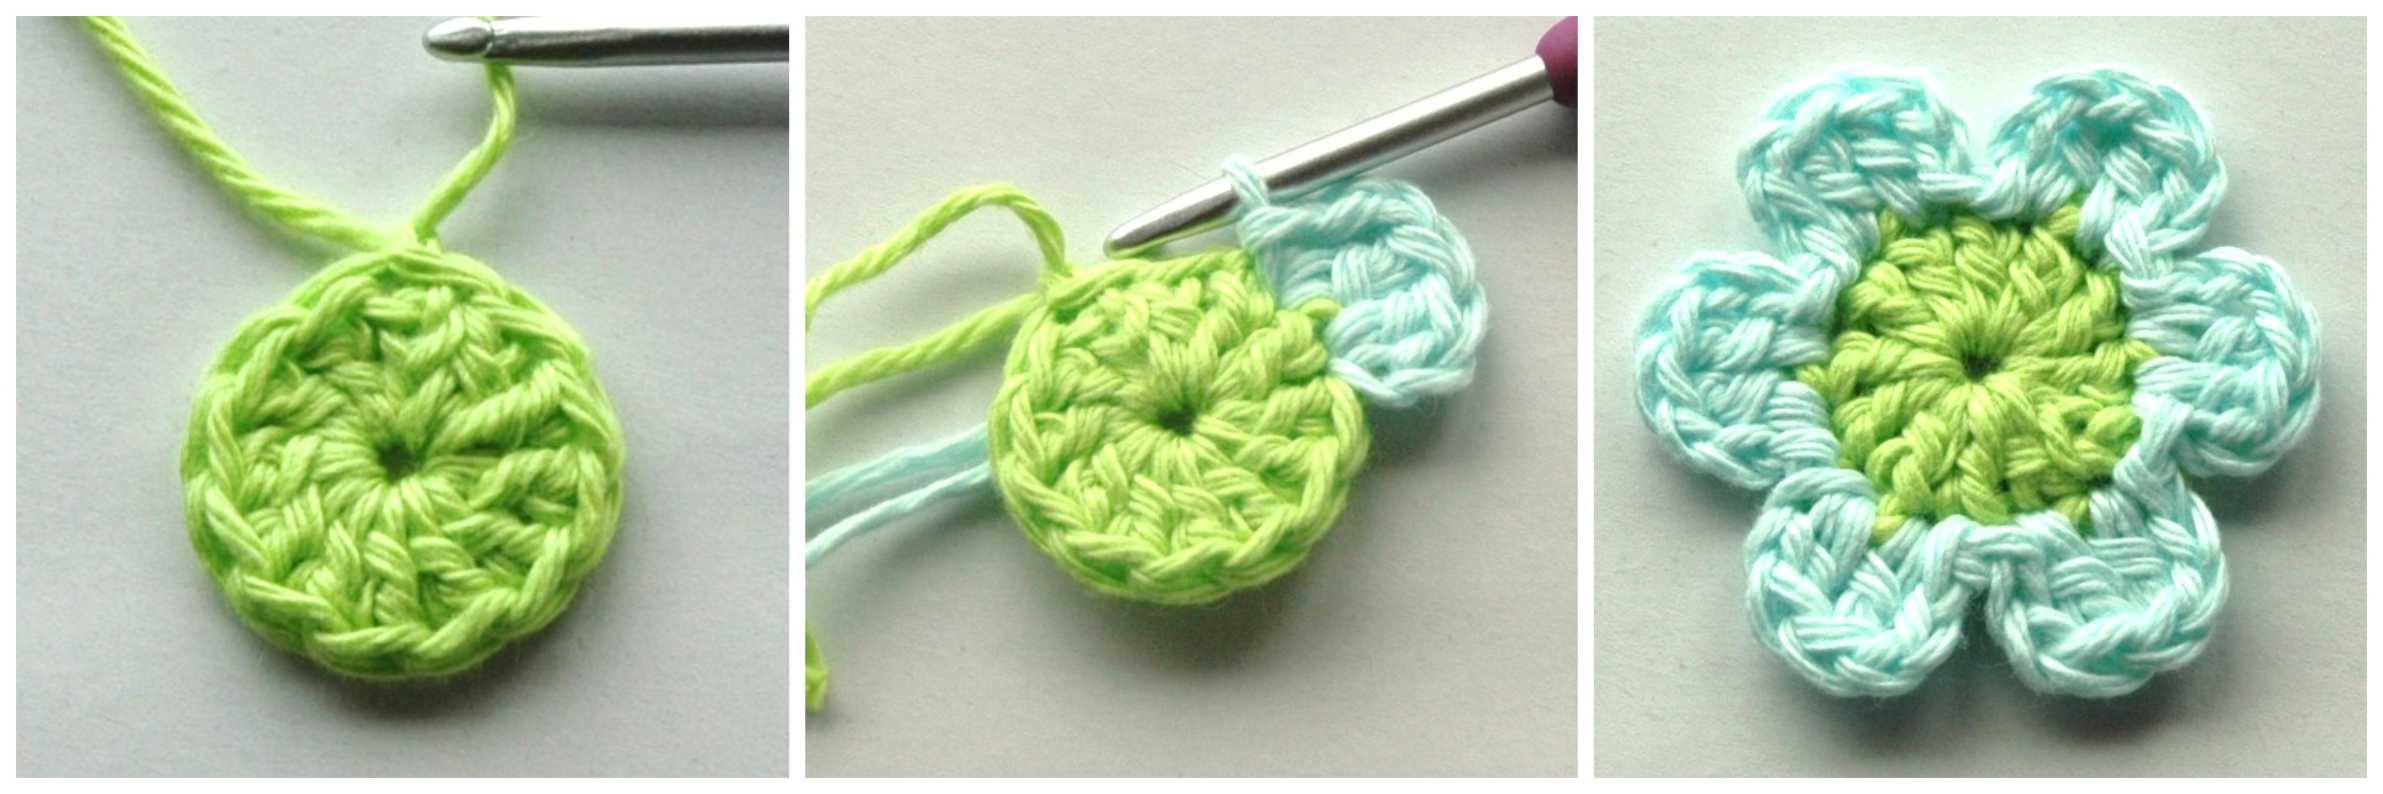
With right side of flower facing you, you will now work behind row 2. Hold the petals forward so you can see your work.
Round 3: With 3rd colour and working behind row 2, work 1 sl st into a st (hook 2 loops to create a stable base to work from) between petals, (ch 4, 1 sl st in stitch between next petal) 5 times. Ch 4, sl st to 1st sl st to close. Do not fasten off yarn – 6 x ch-4 loop spaces
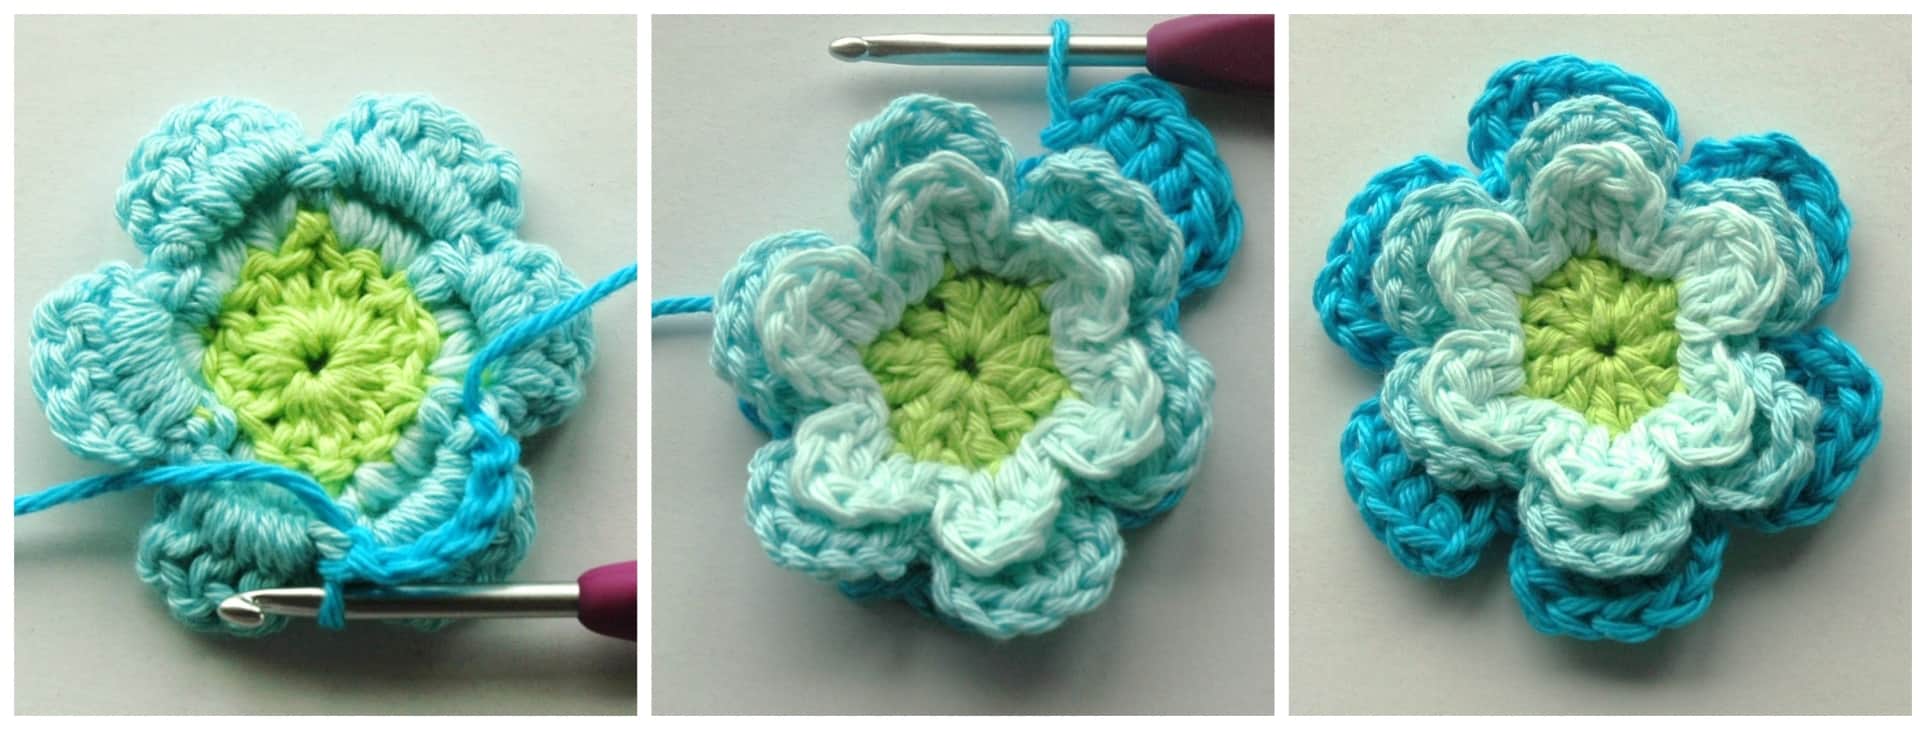
Round 4: Sl st into 1st ch-4 space, * [ch2, 3dc, ch2, slst] in same space, sl st into next ch-4 space; Repeat from * to ; total of 6 times. Fasten off yarn – 6 petals

Round 5: With 4th colour and working behind round 4, work 1 sl st into a st between petals, (ch 5, 1 sl st in stitch between petals) 5 times, ch 5, sl st to 1st sl st to close. Do not fasten off yarn – 6 x ch-5 loop spaces
Round 6: Sl st into 1st ch-5 space, * [ch2, 4dc, ch2, slst] in same space, sl st into next ch-5 space; Repeat from * to ; total of 6 times. Fasten off yarn – 6 petals
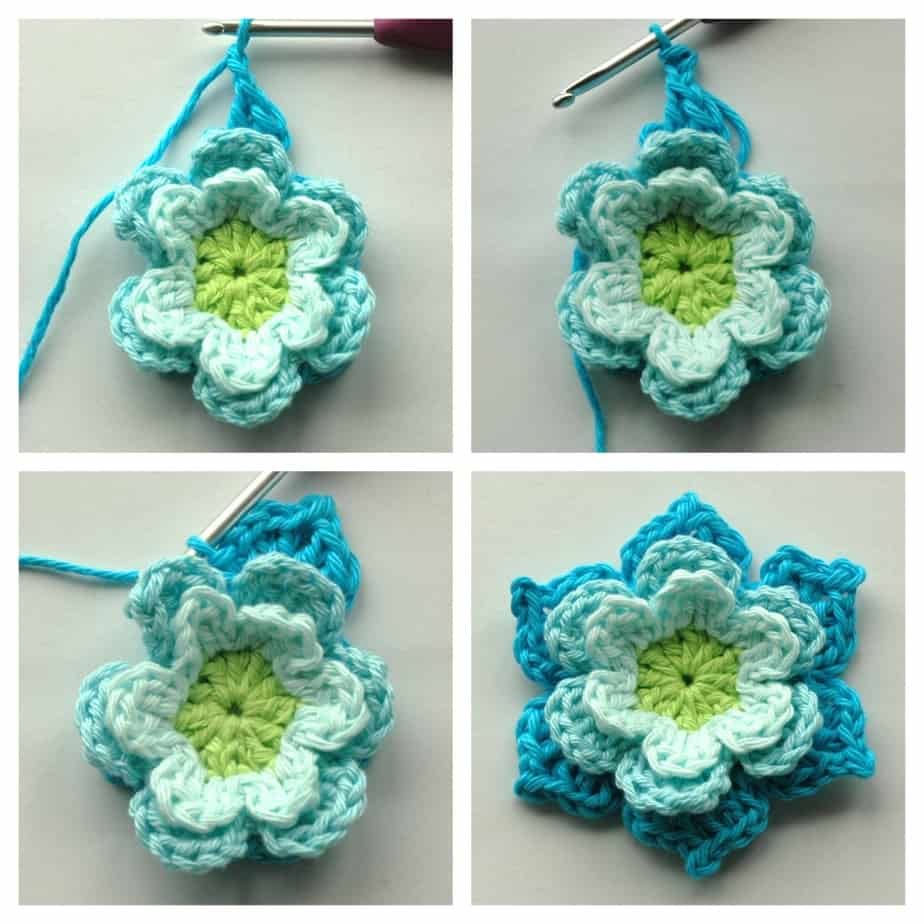
Weave in all threads and admire your beautiful flower! Scroll down for alternative round 6 instructions to make a pointed (picot) petal, that will change the look of the finished flower.
Round 6 (picot version): Sl st into 1st ch-5 space, * [ch2, 2dc, ch2, sl st back into 2nd ch from hook, 2dc, ch2, slst] in same space, sl st into next ch-5 space; Repeat from * to ; total of 6 times. Fasten off yarn – 6 petals
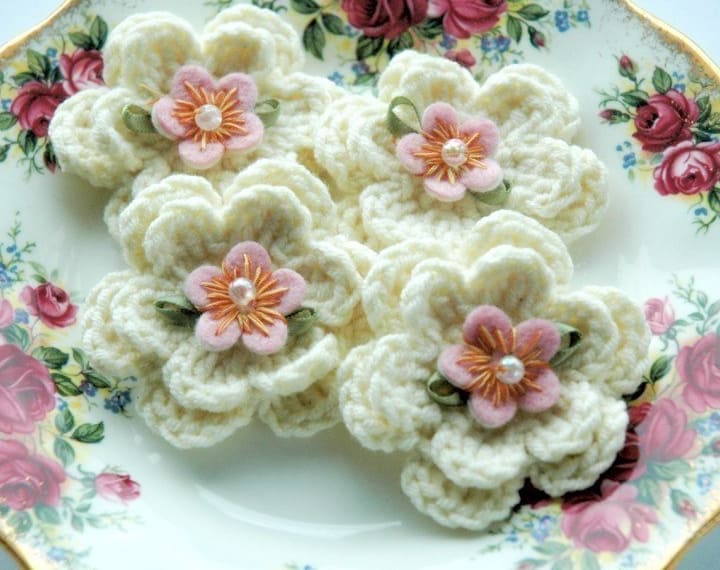
Another variation you could make, is to crochet rounds 1 & 2 in the same colour and add an embellishment.
These sweet little rose embellishments are freely available in craft shops and add a lovely touch to your flowers. You can sew them to the centre of your crochet flower, or use a hot glue gun like I did.
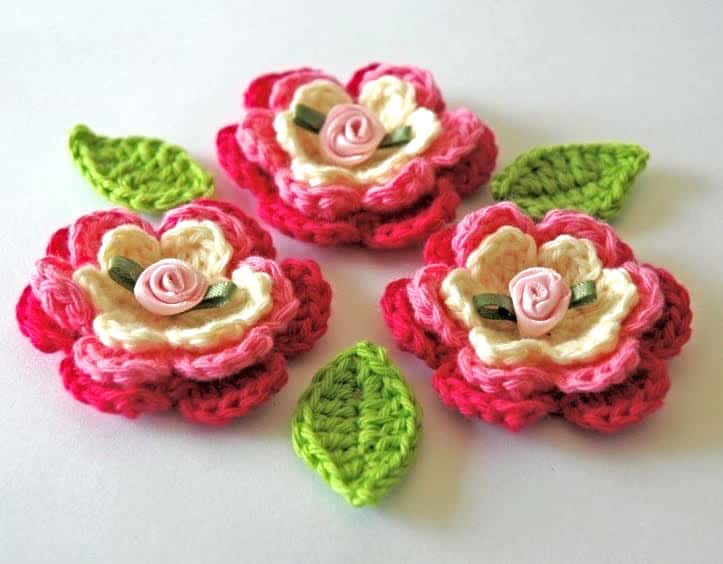
These crochet flowers were made in cream yarn and embellished with little felt flowers………I left out out the final layer of petals to make them 2-layer.
Want to make some leaves to add to your flowers? Read on for a simple leaf pattern and a few pictures to help you, if needed.
Pattern for Crochet Leaves
Ch 7, sc in 2nd ch from hook, hdc in next ch, dc in each of next 3 chs, [2 hdc, ch 2, sc back in to 2nd ch from hook, 2 hdc] in last ch.
Rotate to work along the other side of ch 7.
Dc in each of next 3 chs, hdc in next ch, sc in last ch. Sl st to first sc to join.
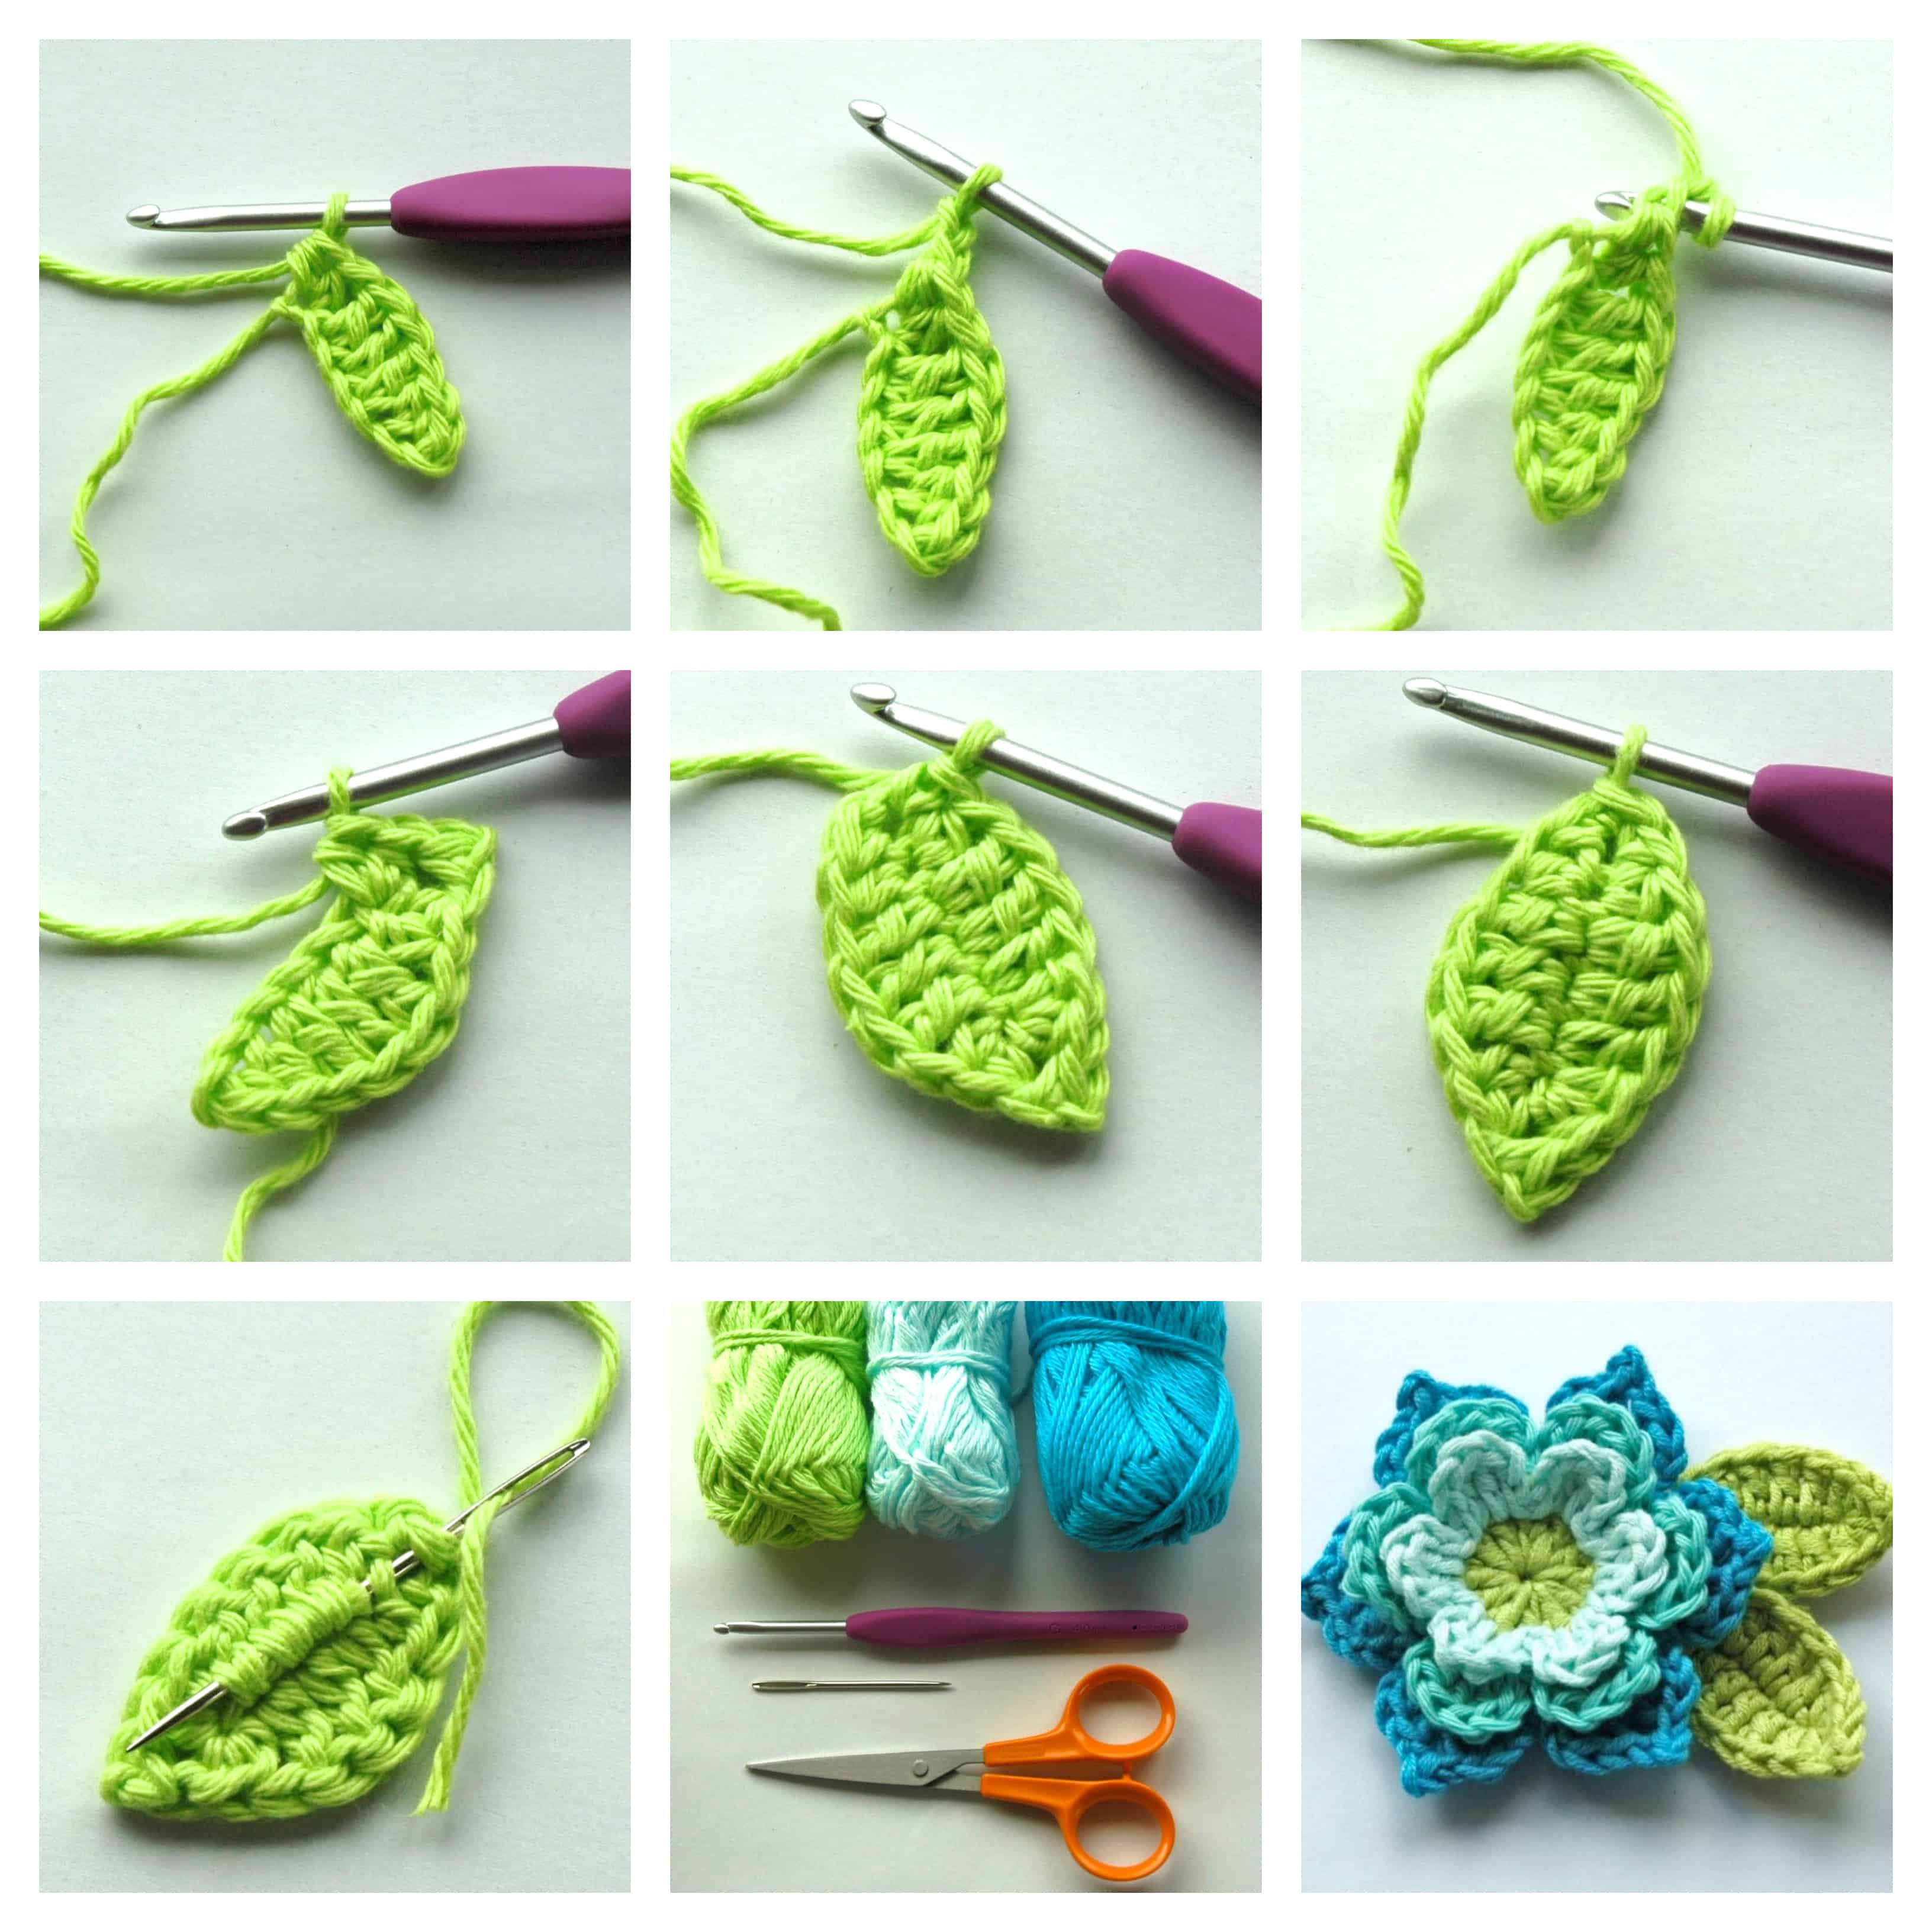
Fasten off and weave in threads.
If you make this pattern, don’t forget to follow me on Instagram and be sure to tag me in your photos so I can see it too, @anniedesigncrochet or #anniedesigncrochet – I can’t wait to see what colours you use with this pattern!
The photographs and pattern contained on this page are the property of Annie Design Crochet.com.
You are welcome to use this pattern to make items to sell, and I would appreciate that you include a link to the free pattern with credit for the designer, thank you!
No unauthorized reproduction, in whole or in part, or distribution of this pattern or content is permitted.
I really enjoyed crocheting these flowers! I pinned this pattern to my Crochet board! Do you also have a pattern for the leaves, & how to attach them?
Hi, and thank you! There is a pattern for leaves in my Free pattern for Bloom Pillow. I simply sewed the leaves with a few stitches, to the back of the flower:)
Just made one-I love it! So cool, thanks for the pattern ????
Thank you! I am glad you enjoyed it:)
These flowers r so gorgeous!!
Thanks!
Dear Carmen. First, WOW. I just turned 70, teaching myself to crochet, it’s quite easy with gorgeous people like yourself on the net taking time to show us, the masses, not only your fabulous creativity, designs, colour combinations, which I just love yours, but you take the time to show us how to do it. For this I am truly grateful and excited. Love and respect to you from my happy self. Sherie Rodrigues from Australia. 🙏🌟
Thank you for sharing your beautiful layered flower pattern! I am visiting from Anabelia craft design.
Thank you! I love Anabelia’s crochet!
They are absolutely beautiful.
I’d really like to crochet/sew them on a crochet triangle shawl I just made. But I don’t know how.
Any suggestions?
Thanks!! ❤️
Hi! And thank you. I have attached crochet flowers to blankets and shawls by sewing them on with a thin cotton yarn, or sewing thread. Pin in place and make a few light stitches and it will be fine!
I can’t for the life of me figure out the leaves.
Leaves
Ch 7, sc in 2nd ch from hook, hdc in next ch, dc in each of next 3 chs, [2 hdc, ch 2, sc back in to 2nd ch from hook] <—— this is where things go off for me. The first 2 hdc creates a gap, then the ch 2 sticks out from the curved shape of the leaf. If I follow the pattern as is, I end up with the last ch being separate from the rest of the leaf. I’m not sure that describes it properly.
I’ve only been crocheting for 2 months, and following patterns isn’t always easy, for some reason. I’m old enough to know it’s probably me and not other's mistakes.
Literally after 2 days of attempting these leaves, writing a comment, I ‘figured it out’. Basically I just kept going and realized how it comes together after starting on the other side of the ch 7. Looking at the other pictures and instructions helped.
That is great! I just answered your previous comment and I am delighted you figured it out.
I get you! When you ch 2, and sc back into 2nd ch from hook, try and grab 2 loops with your hook and then make 2 more hdc back into the same space. [2 hdc, ch 2, sc back in to 2nd ch from hook, 2 hdc] is all made in the same space so it fits tightly together. Look at the pictures in the post closely. Try it a few times and you will see!
Thank you very much for the pattern. They are beautiful and stunning. I can’t stop making them.
They can be addictive! Enjoy and thank you:)
Wow..thank you so much for this beautiful pattern. I made it today and it came wonderful. I love them..thank you..
Thank you for your lovely comment:)
On the [ch 2, dc 1] what does the 1 mean?
Hi! It means [ch 2, make 1 dc]. I appreciate you pointing this out as it does sound confusing! I wrote the pattern a few years ago and hopefully I am more consistent now. And thanks!
Thank you so much for the brilliant pattern! they are beautiful! I was wondering if I am allowed to sell some that I have made? I would give credit to the author and have a link to your website.😃
Thank you ✨
That would be great, thank you! I always appreciate that
I love these flowers but can’t figure out round 3. The picture looks like DC, but the direction only list CH. Can you please clarify. Thank you!!!!!
You create chains behind round 2. And then work round 4 into them to make the 2nd layer of petals. Try it and hopefully it will be clear:)
do you have a tutorial for this blooming flower?
Hi! I don’t have a video tutorial but the written pattern is in the post:)